This tutorial is also available in French
➔

Battery change on Defender Td5

Vehicle ➔ Defender 110 Td5 2002
Difficulty ➔ Easy

Time ➔ 30 minutes
Summary
Advertisement
Advertisement

Recommendations

The engine must be stopped when disconnecting the battery. The vehicle's electrical system may be damaged if the engine is running without a battery.
As a safety measure, always start by disconnecting the negative terminal of the battery and then the positive terminal. Indeed, the negative terminal is connected to the ground of the Defender. If you start by unscrewing the positive terminal and your spanner touches a body element, you will create a short circuit.
If your Defender still has its original car radio, make sure you have its activation code before disconnecting the battery. You will need to enter the code to reactivate the car radio when you have reconnected the battery.
The workshop manual specifies that if the Defender is equipped with an alarm and immobilizer system, a specific procedure must be followed when disconnecting the battery (see Op 07). This prevents the alarm from being triggered. In our case, on the 2002 Defender Td5 equipped with an alarm, I do not follow this procedure and the alarm is not activated.
Choosing your new battery

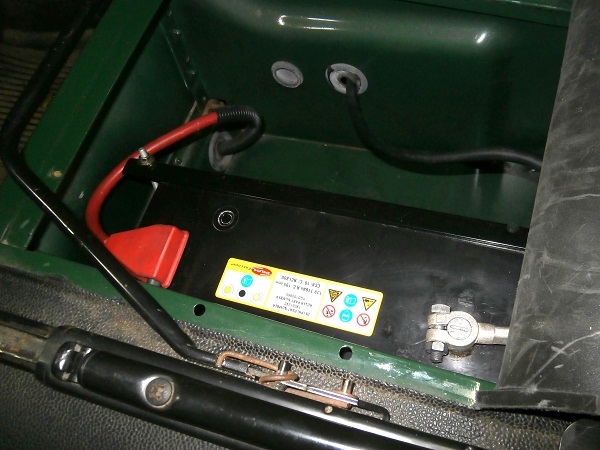
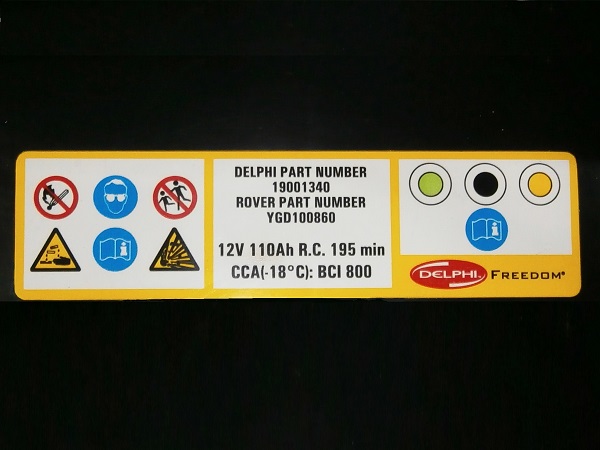
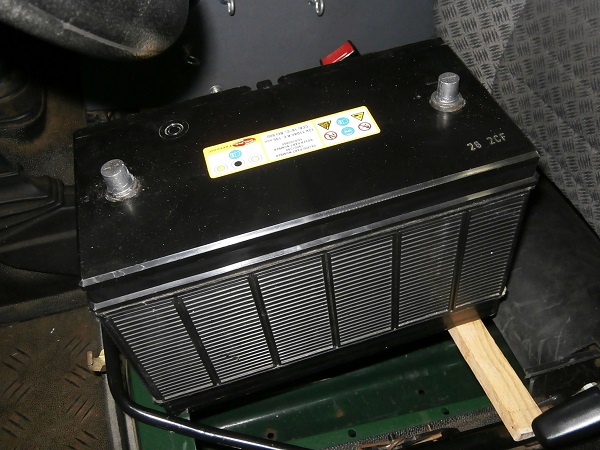
The original battery fitted to the Defender Td5 is reference YGD100860 (see Op 05 3rd photo). This is a Delphi Freedom battery reference 19001340 (12V, 110Ah, CCA 800A). It is a very good quality battery but it is only available from Land Rover dealers.
The dimensions of the original battery are : L330 x W170 x H215 mm.
If you are considering a larger battery, make sure it will fit in its compartment under the LH seat before buying it.
If you are considering a larger battery, make sure it will fit in its compartment under the LH seat before buying it.
On the original battery, the terminals are positioned in the axis of the battery. If you can't find a battery of this type, it is best to buy a battery with the negative (-) terminal on the left and the positive (+) terminal on the right. Nevertheless, if you only have a battery with the terminals reversed, the cables will be a little tight but you will still be able to connect them.
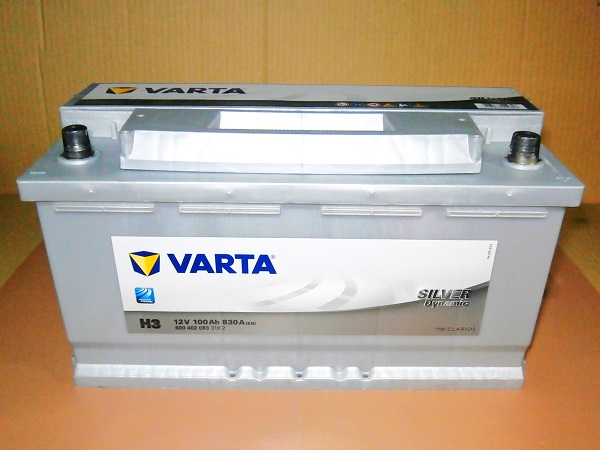
On my Defender Td5, I fitted a Varta H3 Silver Dynamic battery (12V, 100Ah, CCA 830A) :
• It is a very good quality battery, available from many car battery retailers or online for a reasonable price.
• The storage capacity is slightly less than the original battery (100Ah instead of 110Ah). That should still be enough because the Defender is strictly original without any additional electrical equipment.
• The cold cranking amperage is slightly higher than the original battery (CCA 830A instead of CCA 800A). The Defender will therefore have no problems starting this winter.
• Its dimensions are L353 x W175 x H190 mm. It is a little wider than the original battery but it still fits in the compartment.
Required Tools
Sponsored links by


Spare Parts
Our Partner

Advertisement
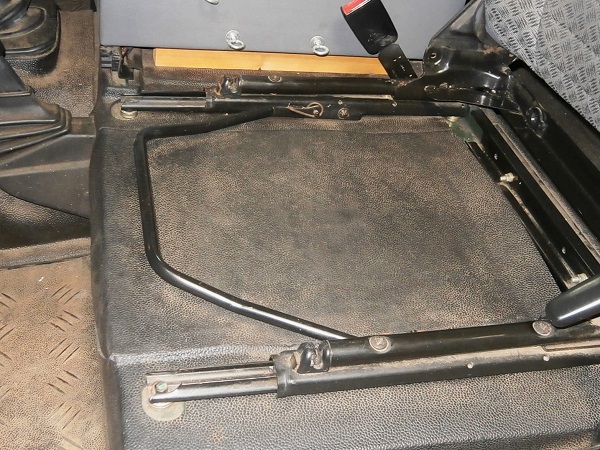
Access the battery
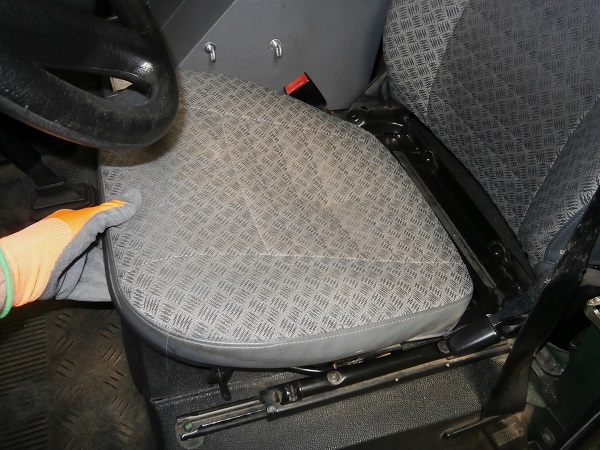
Op 01
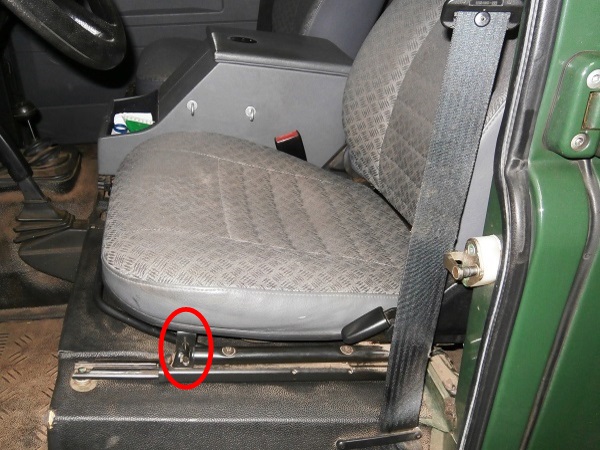
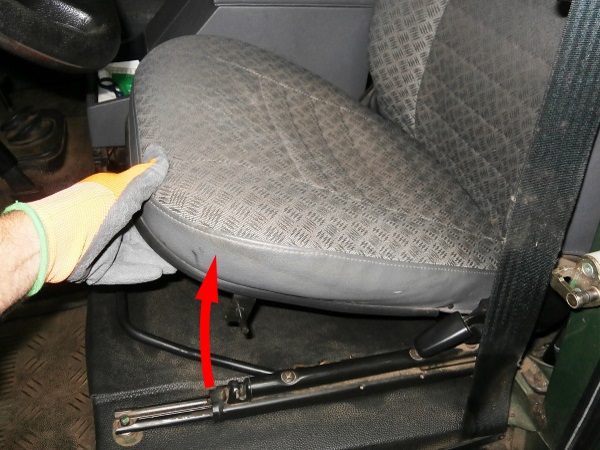
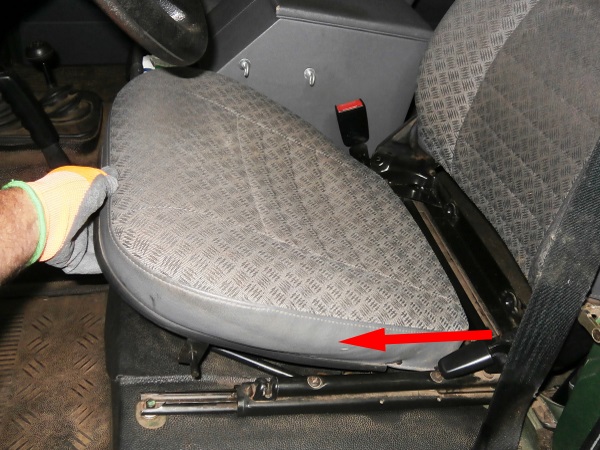
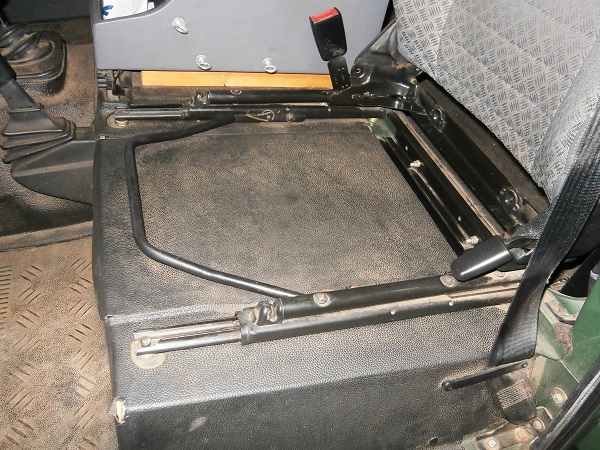
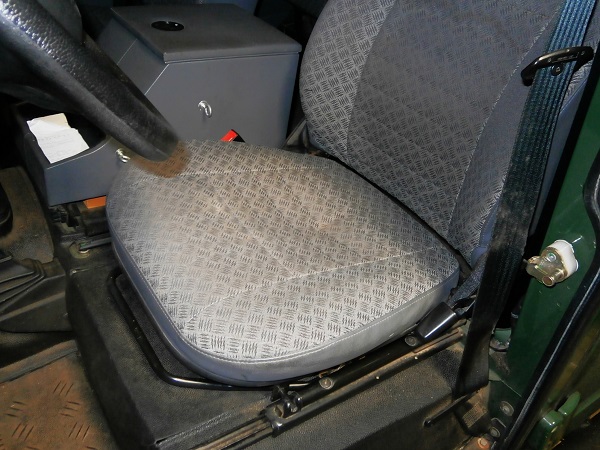
Remove the LH seat cushion :
•
Lift the front of the cushion to unclip the 2 locking lugs. Pull by hand.
•
Slide the cushion forward.
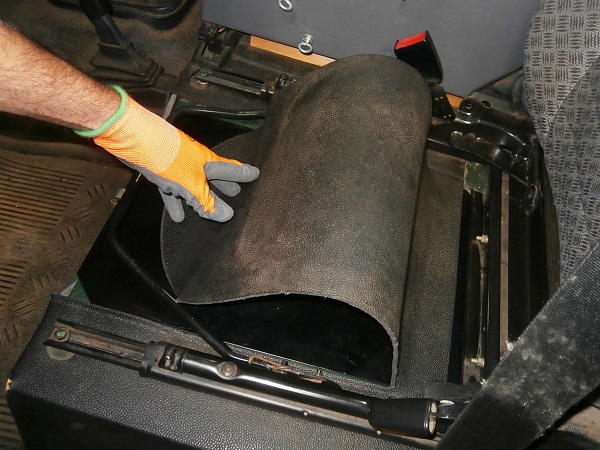
Op 02
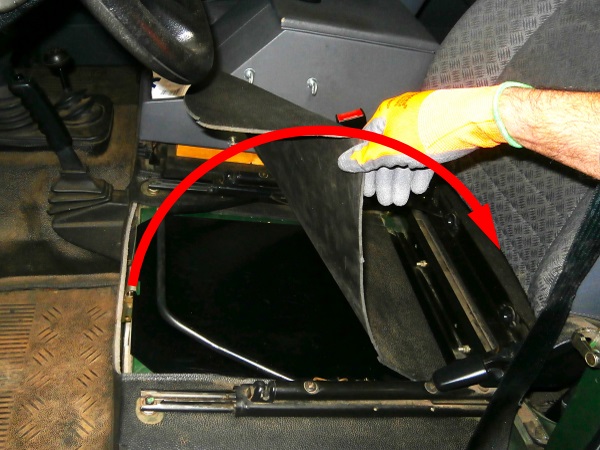
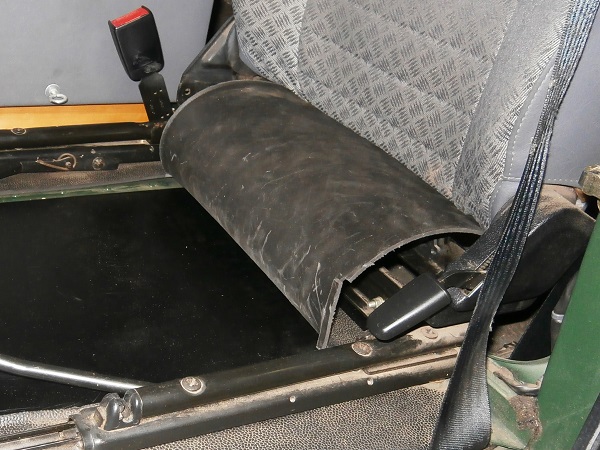
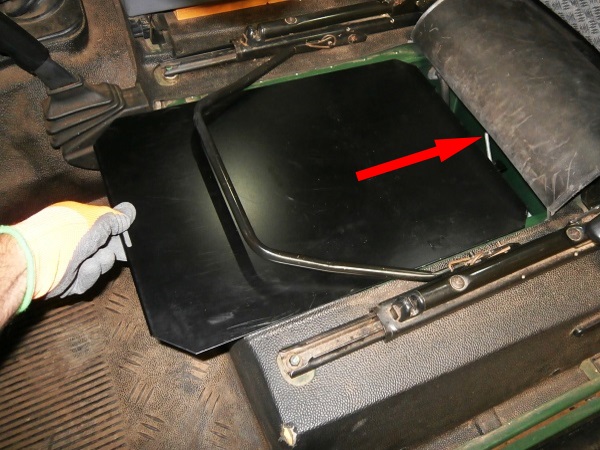
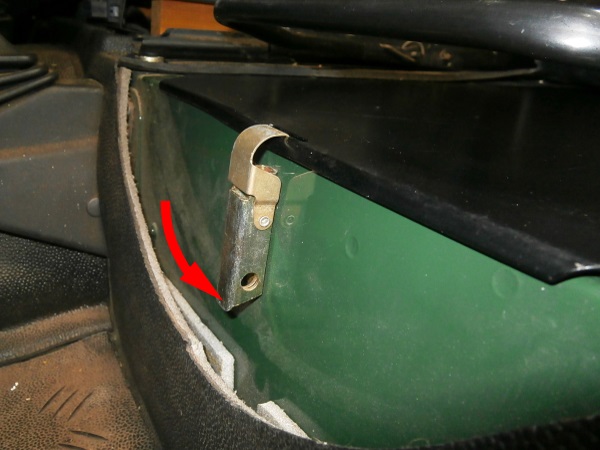
Spread the trim.
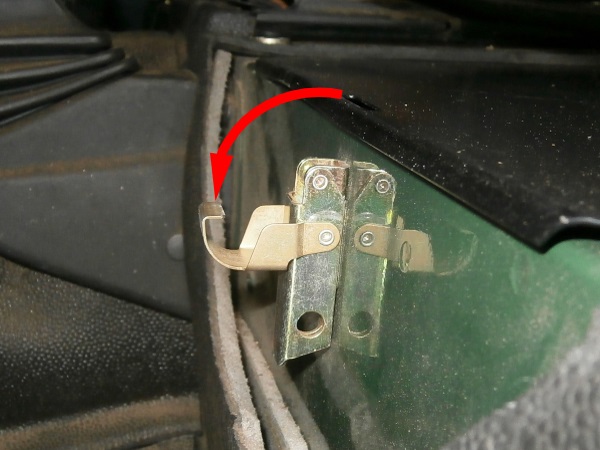
Op 03
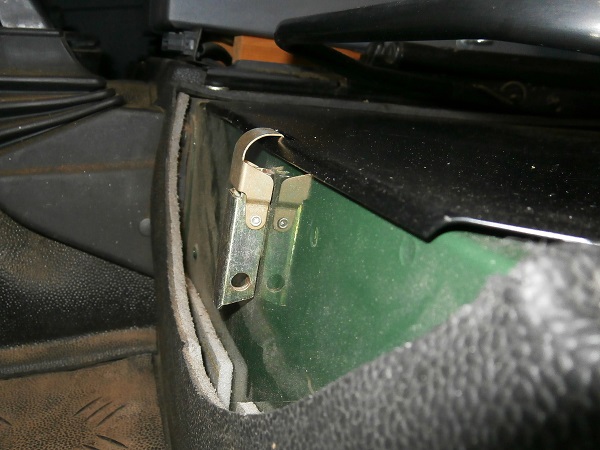
Unlock the retaining clip for the battery compartment cover. Pull by hand.

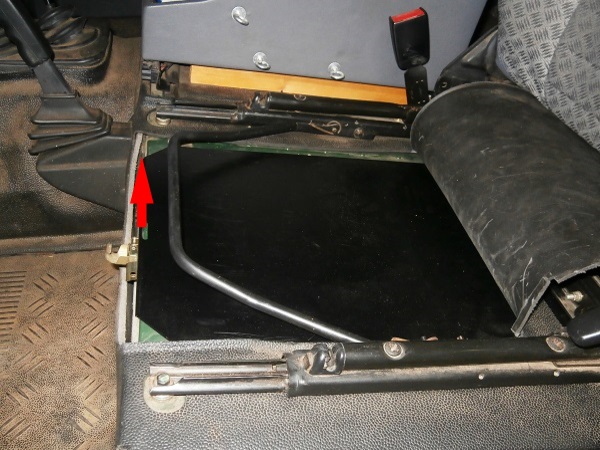
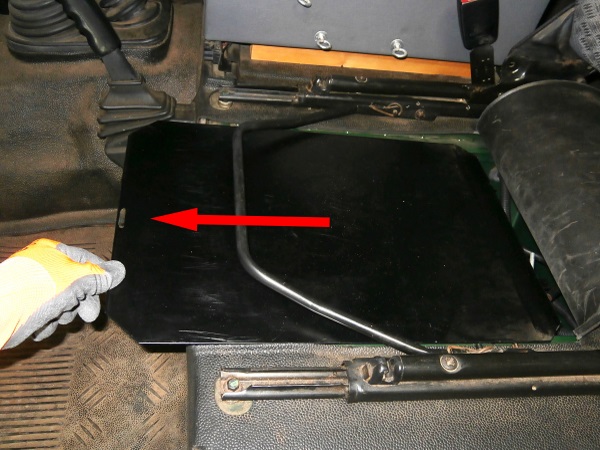
Op 04
Remove the cover. Lift slightly and pull forward by hand.
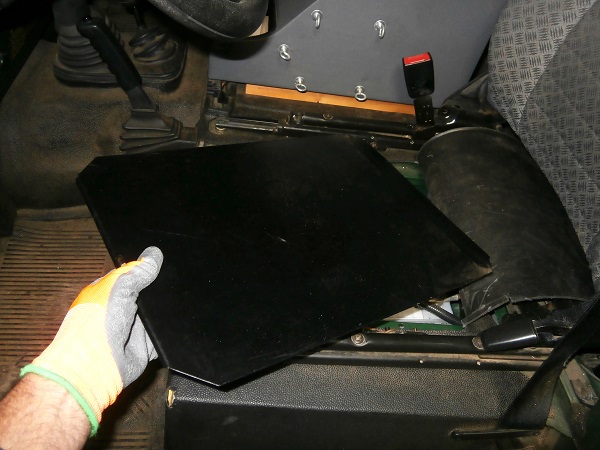
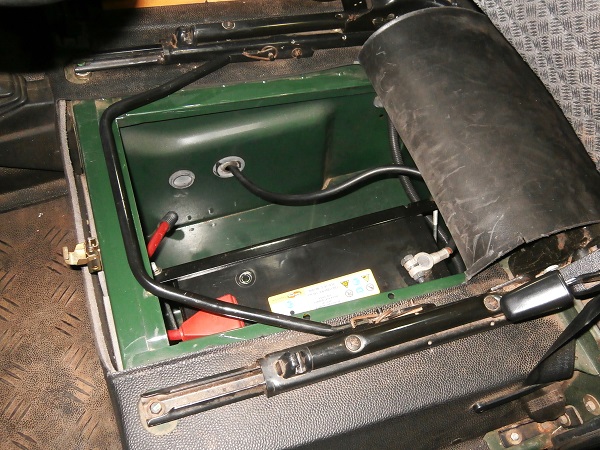
Op 05
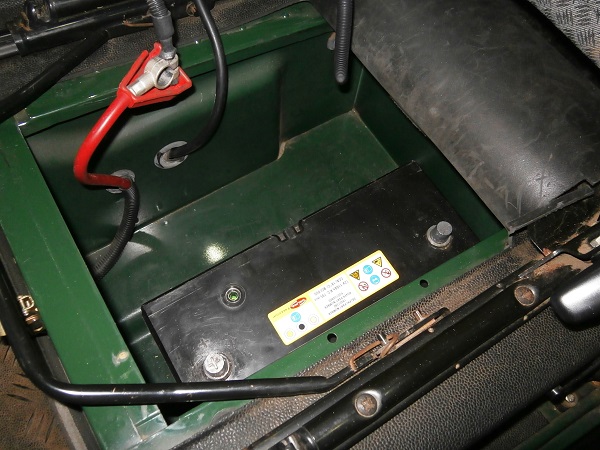
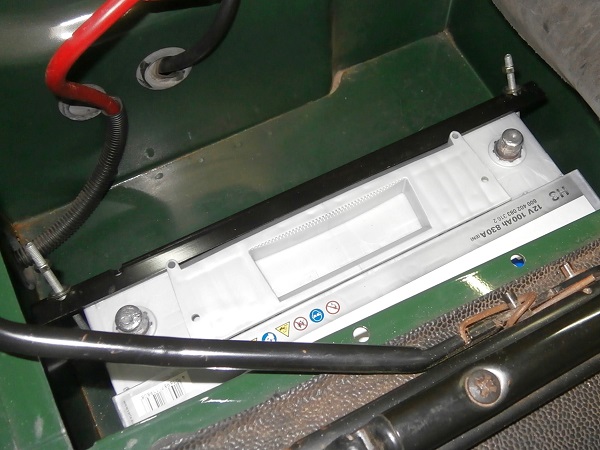
Locate where the battery is.
Check the battery condition
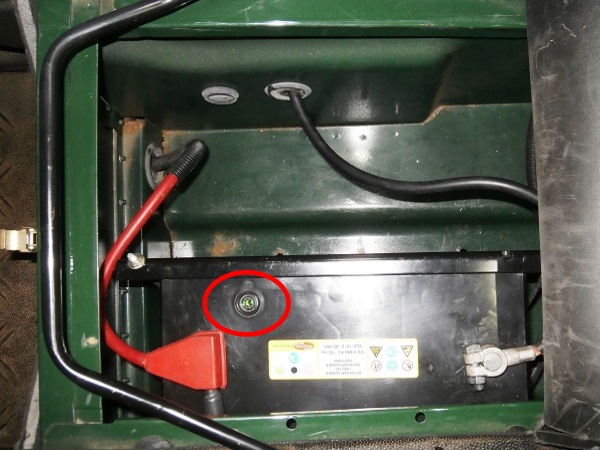
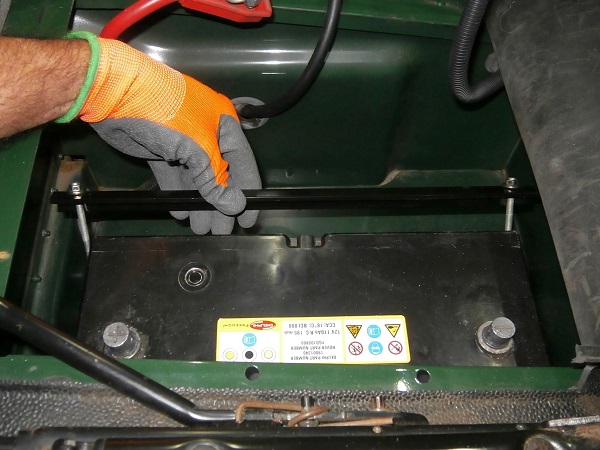
Op 06
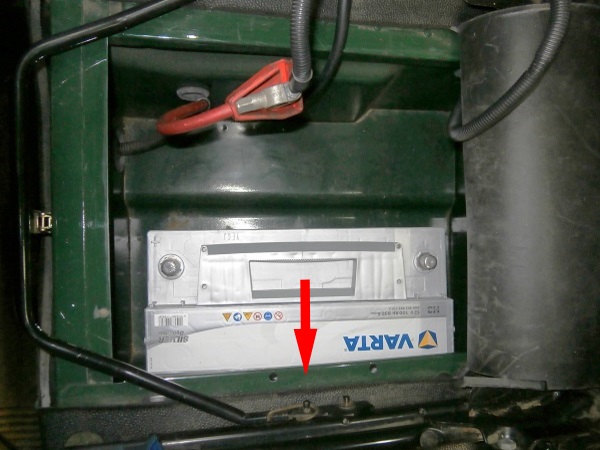
Check the condition of the original battery.
There is a small window to see the condition of the battery (1st photo) :
• Green color: the battery is charged.
• Dark color: the battery must be charged.
• Yellow color: the battery must be replaced.
• Green color: the battery is charged.
• Dark color: the battery must be charged.
• Yellow color: the battery must be replaced.

Advertisement
Remove the battery
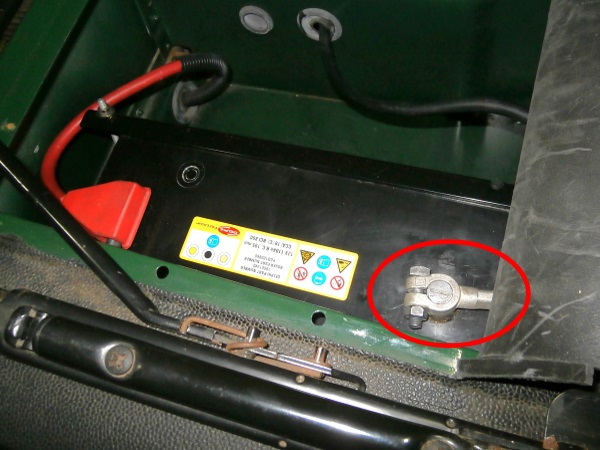
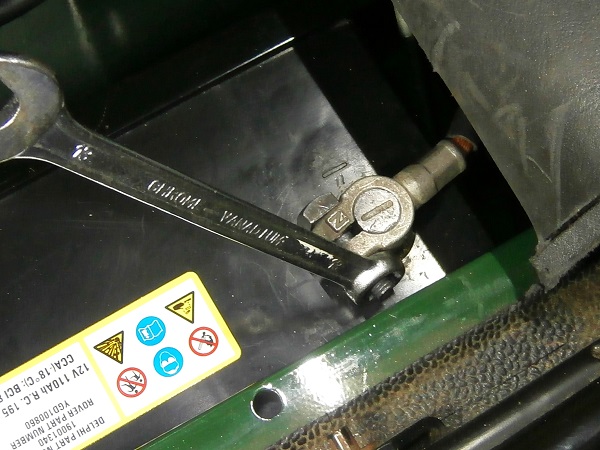
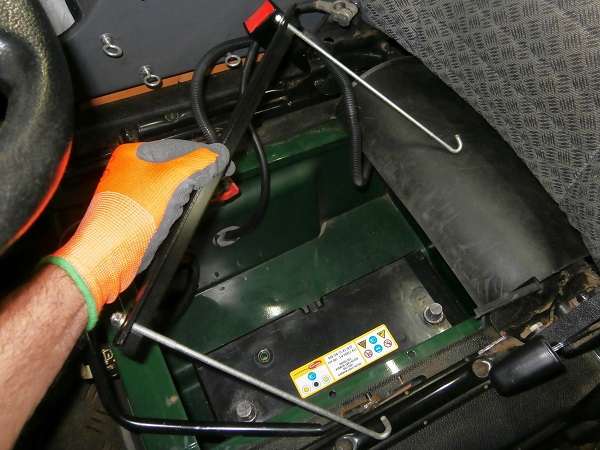
Op 07
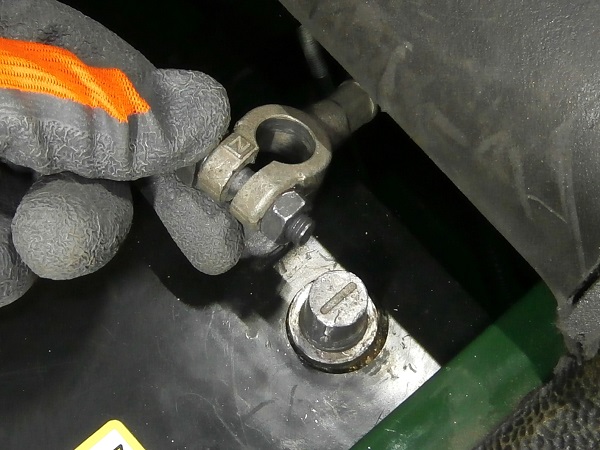
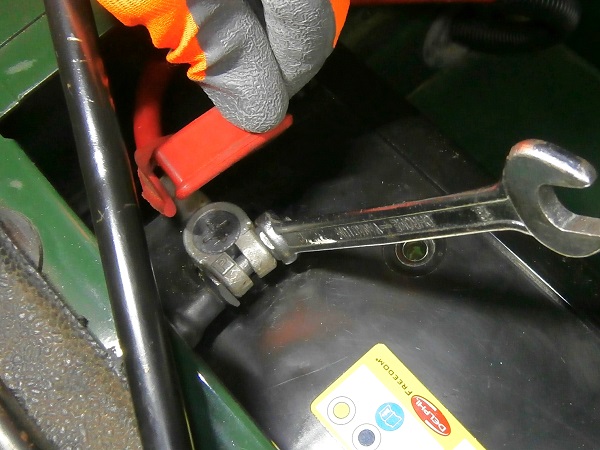
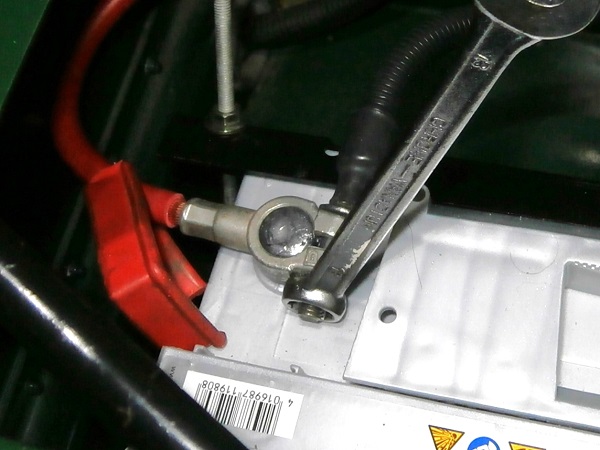
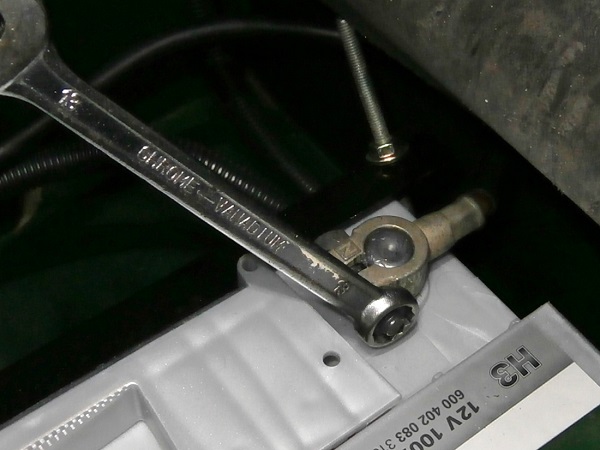
Loosen the locking nut on the negative battery cable. Use the 13 mm spanner.
Do not disconnect the battery cable yet.
Op 08
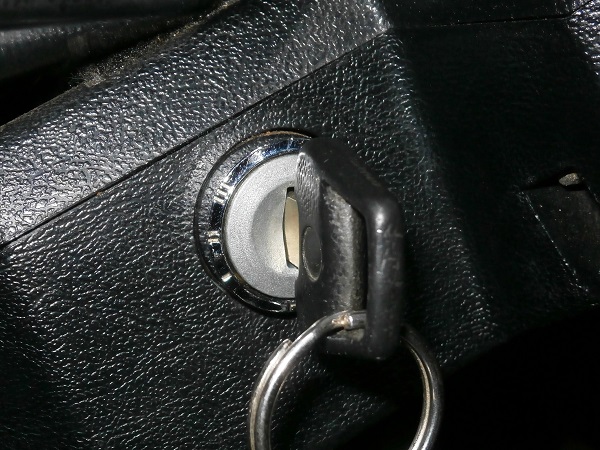
Execute the procedure to prevent the alarm from being activated :
•
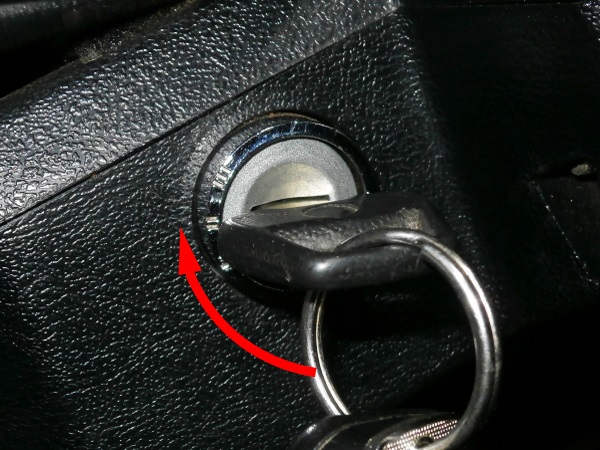
Place the ignition key in position 2.
•
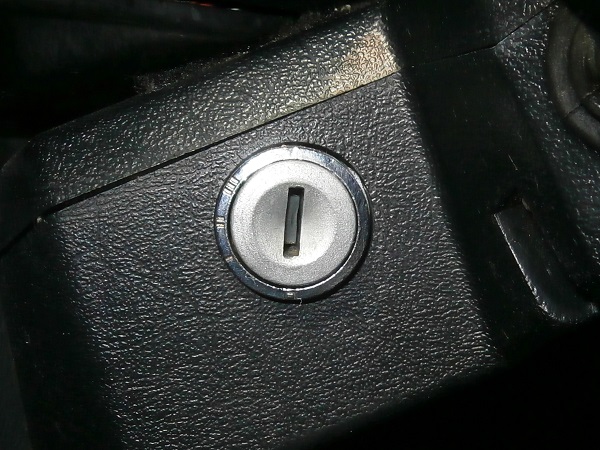
Turn off the ignition and remove the key.
As soon as you turn off the ignition, you will have 15 seconds to disconnect the negative battery cable of the battery.
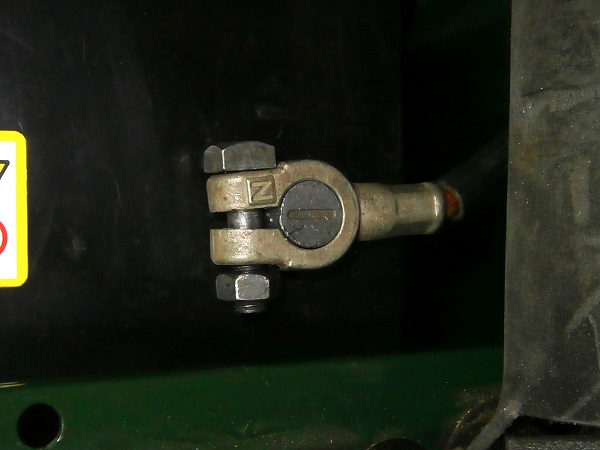
Op 09
Disconnect the negative battery cable from the battery. Lift by hand.
Op 10
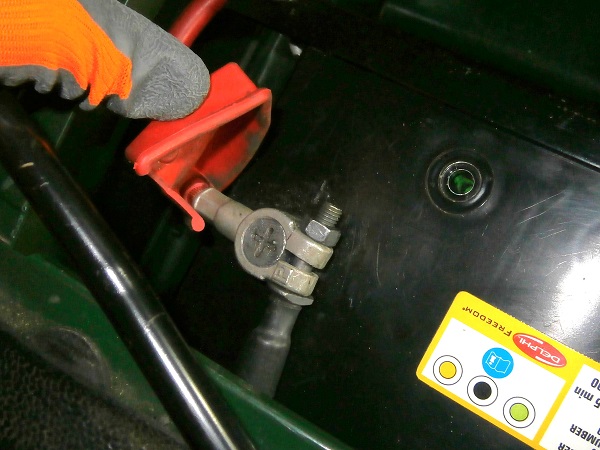
Disconnect the positive battery cable from the battery :
•
Lift the red plastic cover of the terminal.
•
Loosen the locking nut. Use the 13 mm spanner.
•
Disconnect the battery cable. Lift by hand.

Op 11
Spread the cables to make it easier to remove the battery.
Op 12
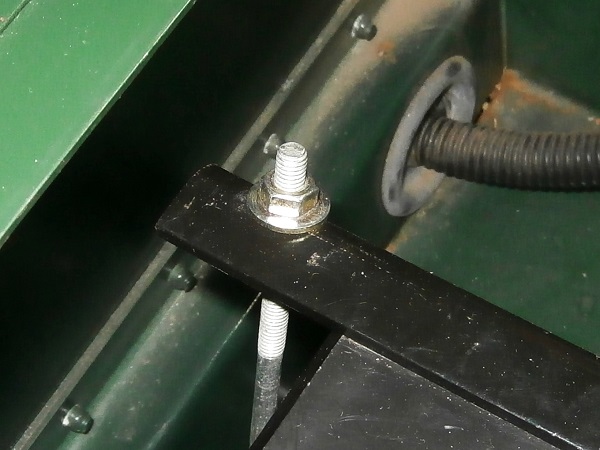
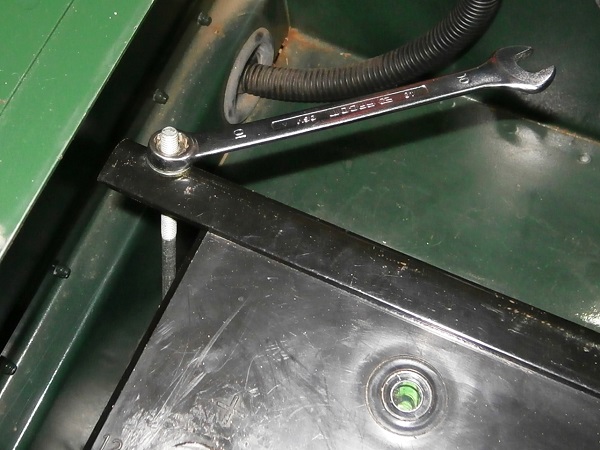
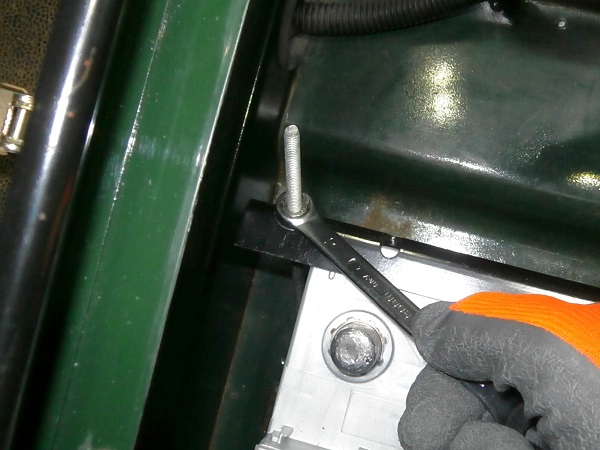
Loosen the 2 nuts on the battery clamp. Use the 10 mm spanner.
No need to remove the nuts. The battery clamp is removed with its two J blots.
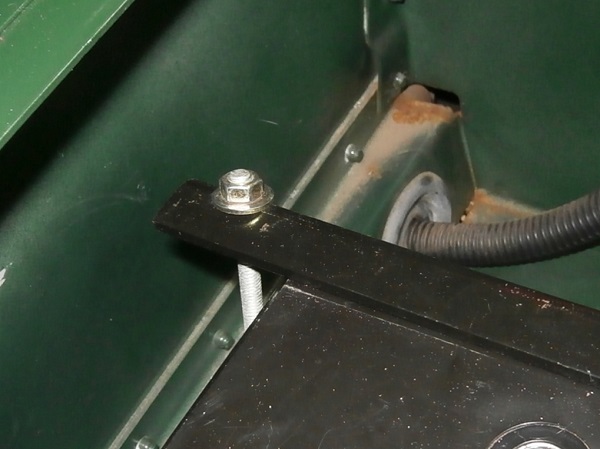
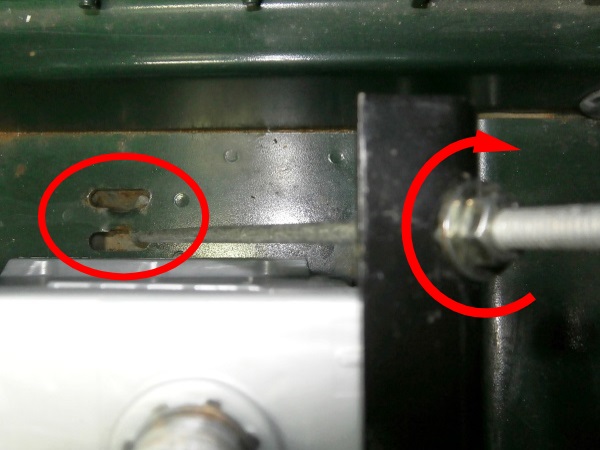
Op 13
Remove the clamp + J bolts assembly.
The J bolts are bent at the bottom to attach to the floor. Just wiggle them to release them.
Op 14
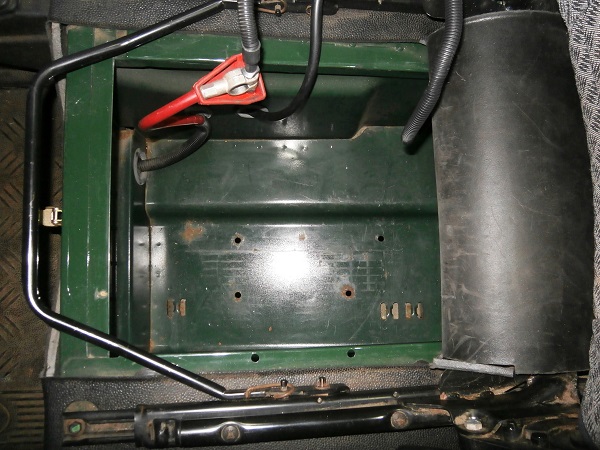
Remove the battery. Lift by hand.
Be careful with your fingers as the battery is very heavy (22 kg) and the opening of the compartment is just sufficient for the passage of the battery.
Install the battery
Op 15
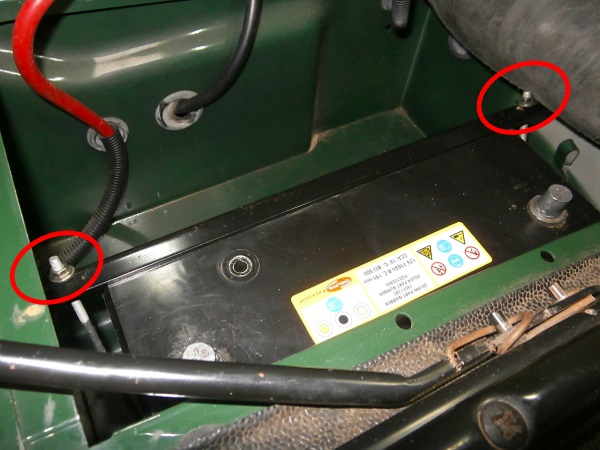
Before replacing the battery, look at how the J bolts should be attached to the floor.
It is better to do a test without the battery because when it is in place, you can't see much of the fixing points of the J bolts.
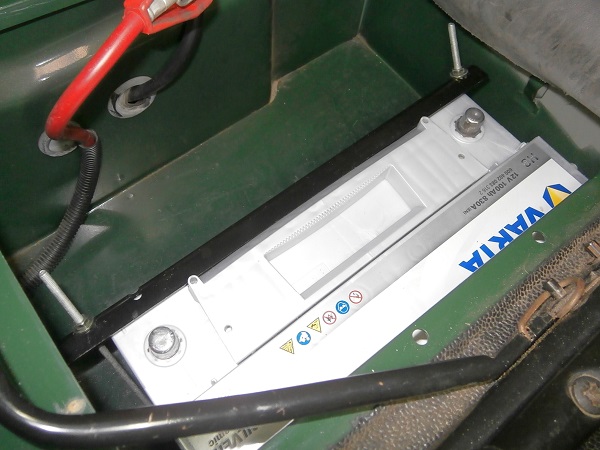
Op 16
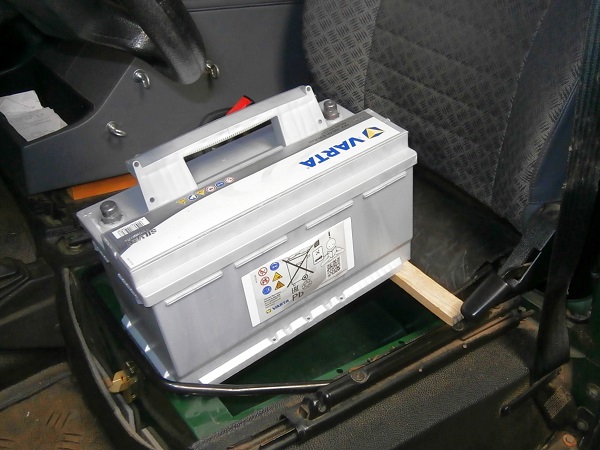
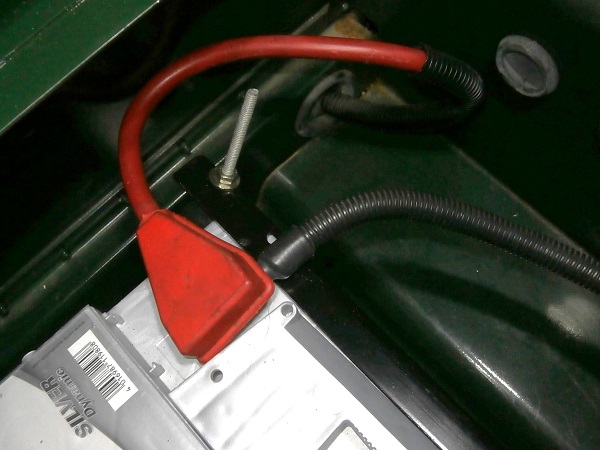
Position the new battery (Varta H3) :
•
Engage the battery in its compartment.
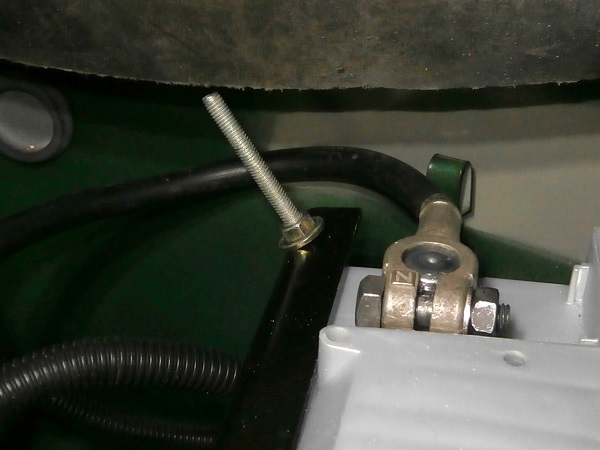
•
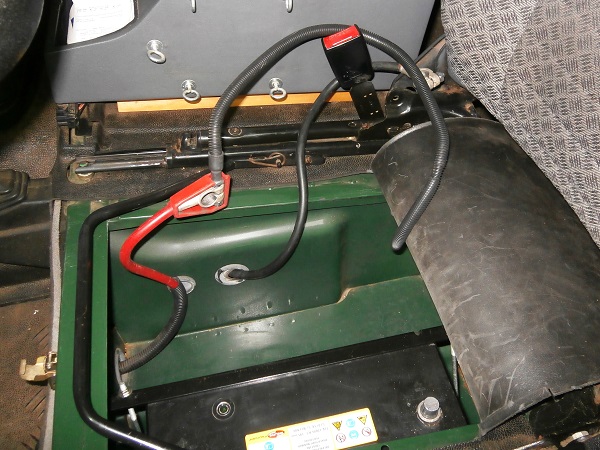
Press the battery against the outer wall of the compartment (2nd photo).
Op 17
Secure the battery :
•
Position the retaining clamp + J bolts assembly on the battery.
•
Attach the curved side of the two J bolts to the floor and start tightening the nuts.

Op 18
Tighten the 2 nuts on the battery clamp. Use the 10 mm spanner.
Op 19
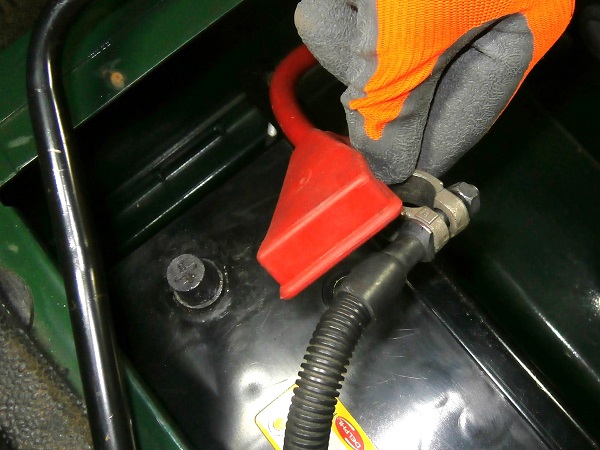
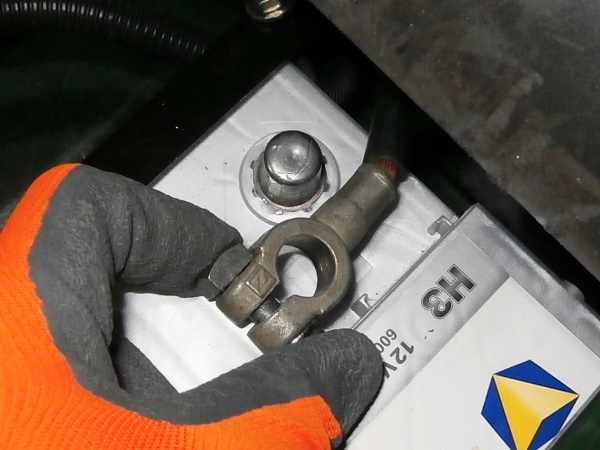
Connect the positive battery cable on the battery :
•
Engage the positive battery cable on the ''+'' terminal. Push by hand.
•
Tighten the locking nut. Use the 13 mm spanner.
•
Fit the red plastic cover on the terminal.
The positive battery cable is the red cable.
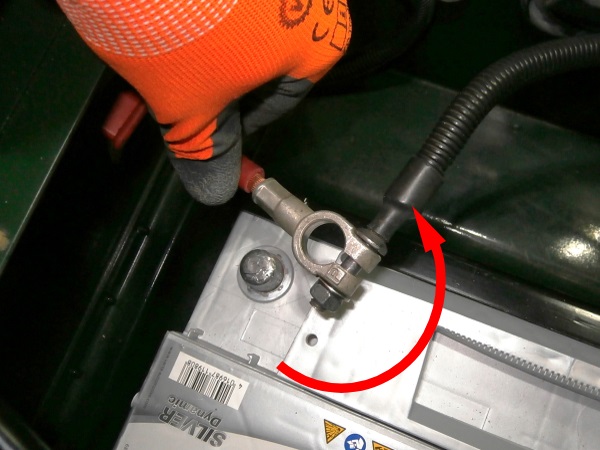
Unlike the original battery where the terminals are on top, the terminals of this new battery are recessed. This forced me to reverse the black electrical cable that arrives on the positive battery cable (1st photo).
Op 20
Connect the negative battery cable on the battery :
•
Engage the negative battery cable on the ''-'' terminal. Push by hand.
•
Tighten the locking nut. Use the 13 mm spanner.
The negative battery cable is the black cable.
Advertisement
Fit the LH seat cushion
Op 21
Fit the cover on the battery compartment :
•
Slide the cover as far back as possible. Push by hand.
•
Lower the front part of the cover.
•
Lock the retaining clip.

Op 22
Fit the trim.
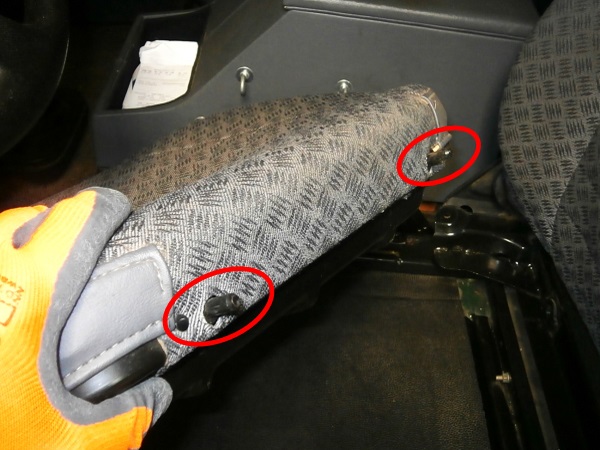
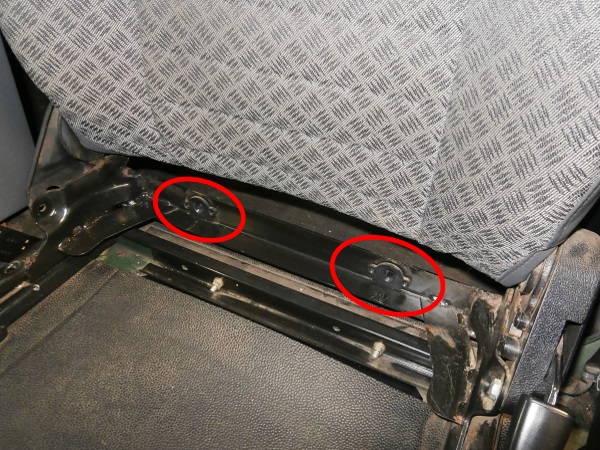
Op 23
Fit the seat cushion :
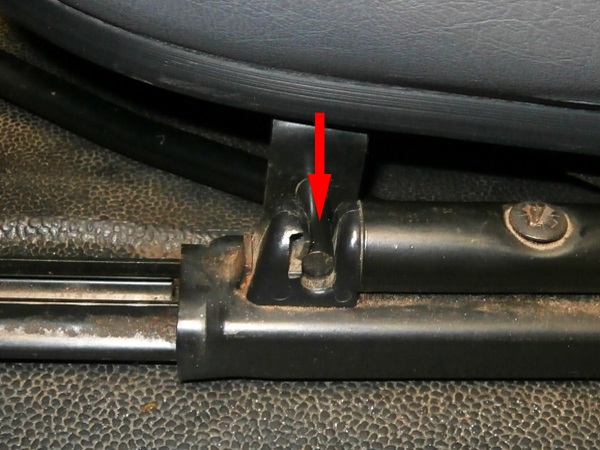
•
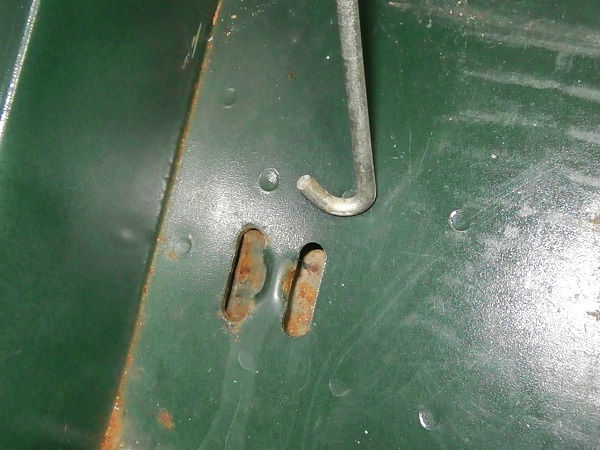
Slide the 2 rear lugs of the cushion (1st photo) into the punchings of the seat frame (2nd photo).
•
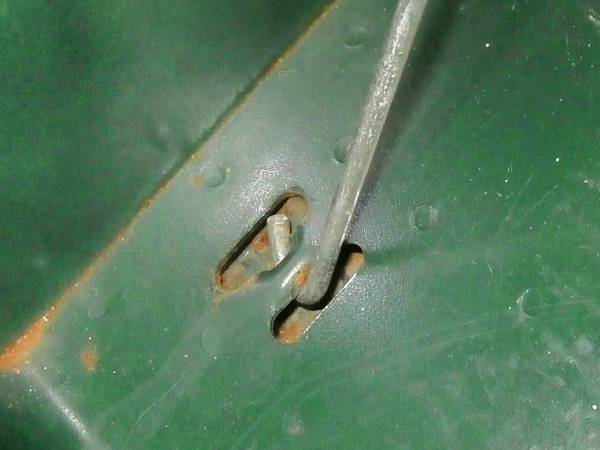
Engage the 2 side lugs of the cushion into the locking clips (4th photo).
The End