This tutorial is also available in French
➔

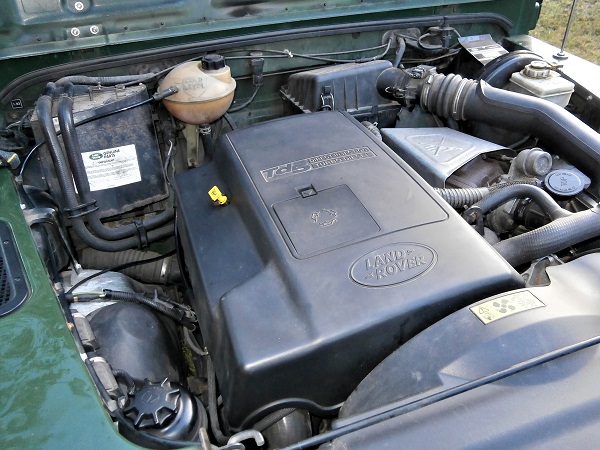
Engine oil change on Defender Td5
Vehicle ➔ Defender 110 Td5 2002
Difficulty ➔ Medium

Time ➔ 2 hours
Summary
Advertisement
Advertisement

Recommendations

Here are the oils we recommend for the Defender Td5 :
• 5W30 A1/B1 or A5/B5 oil for ambient temperatures from -30 to +35°C.
• 5W40 A3/B4 oil for ambient temperatures from -30 to +50°C.
• 5W50 A3/B4 oil for intensive use in a hot country.
• 5W30 A1/B1 or A5/B5 oil for ambient temperatures from -30 to +35°C.
• 5W40 A3/B4 oil for ambient temperatures from -30 to +50°C.
• 5W50 A3/B4 oil for intensive use in a hot country.

If you want to know more, we have dedicated a page to choosing oil
(➔ see the page ''Which oil for your Td5 engine ?'').
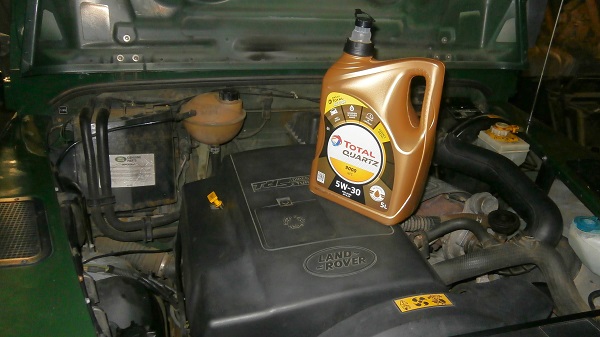
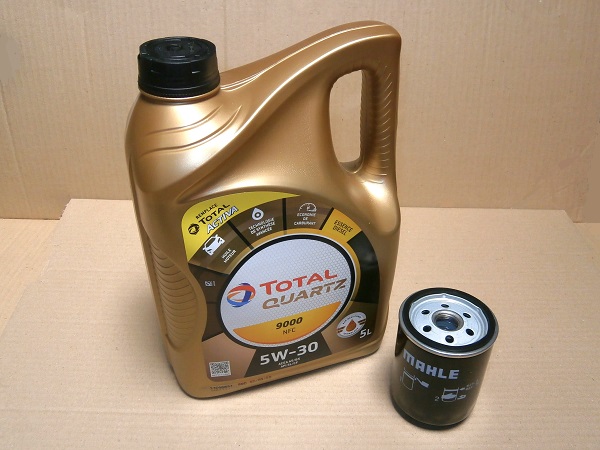
We use Total Quartz 9000 NFC 5W30 ACEA A5/B5 oil on our Defender Td5. It is affordable and perfect for the temperate climate.
Land Rover recommends changing the engine oil every 20,000 km or every year, whichever comes first.
We change the engine oil on our Defender Td5 every 10,000 km.
We change the engine oil on our Defender Td5 every 10,000 km.
Oil volume required for oil change ➔ 7.2 liters.
Supplement when changing the oil filter ➔ 1.0 liter.
Supplement when changing the oil filter ➔ 1.0 liter.
The Td5 engine has 2 oil filters :
• The main oil filter of the cartridge filter type. As on all cars.
• The rotor oil filter of the centrifugal filter type. The oil under pressure drives the rotor at high speed. Small impurities are projected by centrifugal force and are immobilized on the internal wall of the rotor. This filter stops small particles of 3 to 15 microns that the main filter cannot stop.
Before draining, drive a few kilometers to warm up the oil. The oil will then be more fluid and will drain better.
Used oils, brake fluids, seals and filters are hazardous waste for the environment. They must in no circumstances be thrown neither in the natural environment, nor in the sanitation network, nor in household waste. They must be deposited in a recycling center.
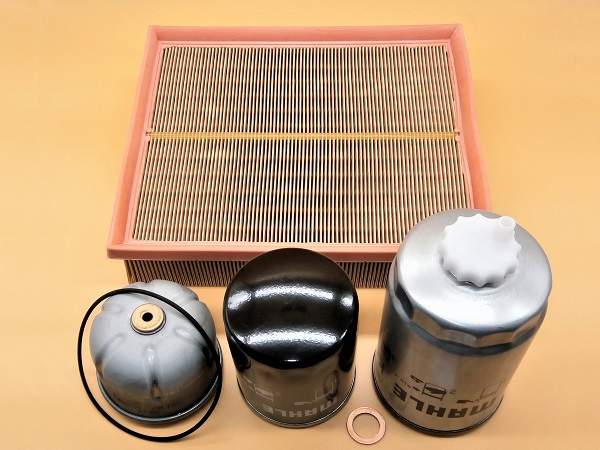
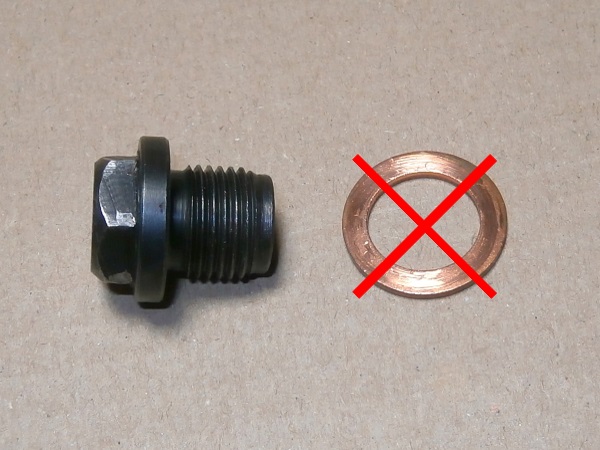
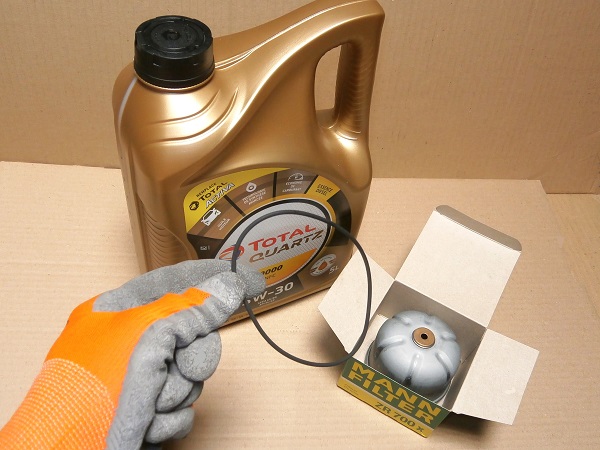
The only spare parts needed for the Defender Td5 engine oil change are the sealing washer, the oil filter and the rotor oil filter. As for me, I prefer to buy the Td5 service kit (DA6004P) and also change the air filter and the fuel filter during the oil change. The letter ''P'' indicates that this kit includes ''Premium'' filters. These are filters from major brands with a good quality/price ratio.
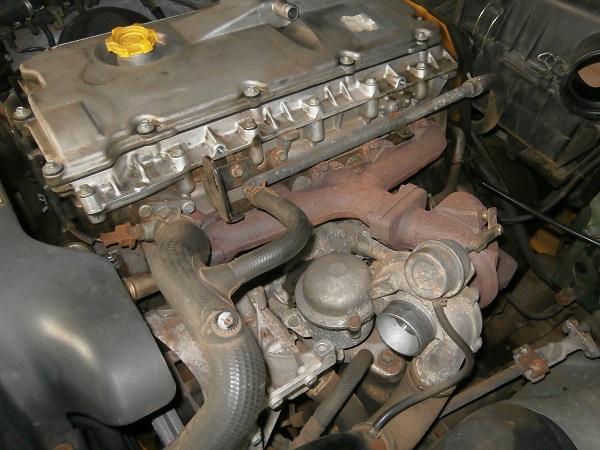
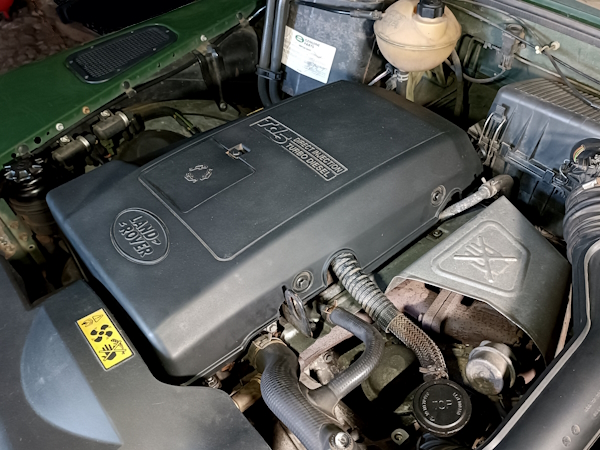
As you will see in this tutorial, we have removed the air duct and the turbo heat shield. This clears the work space and facilitates access to the oil filters. However, the removal of these 2 elements is not essential. If you want to save time, you can access the filters without removing them.
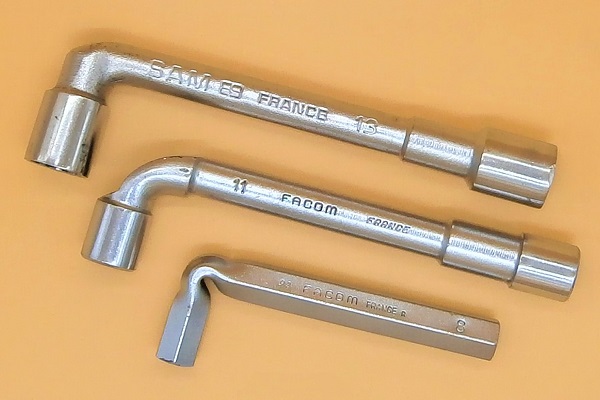
Required Tools
Sponsored links by


Spare Parts
Our Partner

Packaging :
•
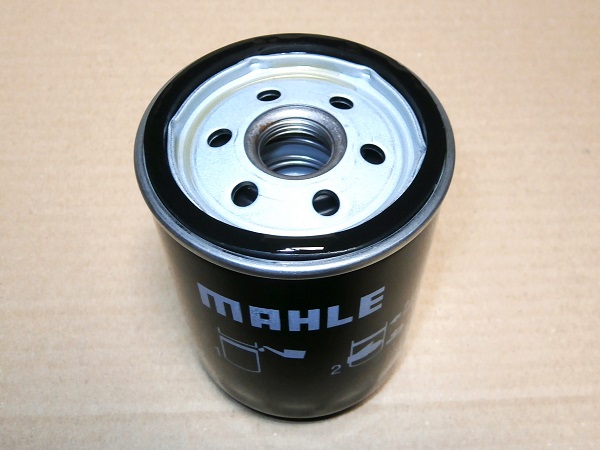
DA6004P : The Defender Td5 service kit includes 1 sealing washer (CDU1001L) + 1 oil filter (LPX100590) + 1 rotor oil filter & its O-ring (ERR6299) + 1 air filter (ESR4238) + 1 fuel filter (ESR4686).
Advertisement
Drain the engine oil
Op 01
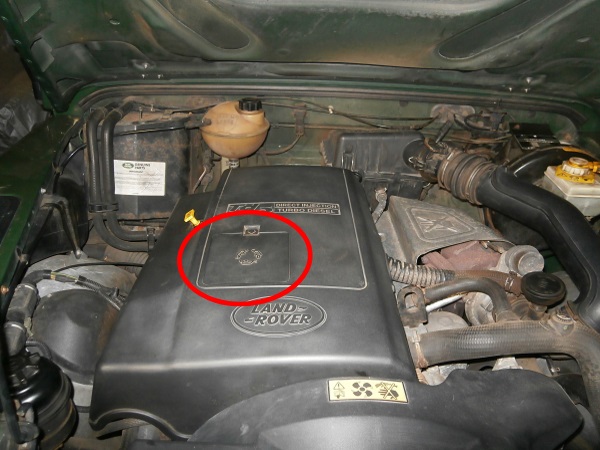
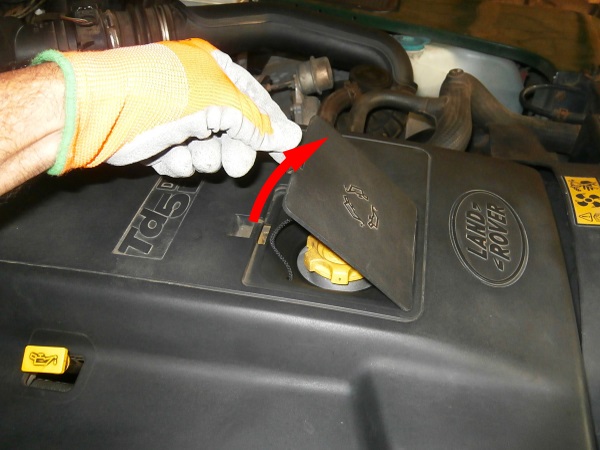
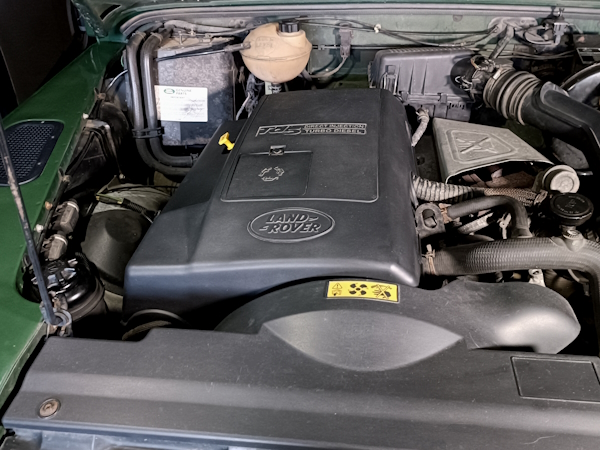
Open the bonnet
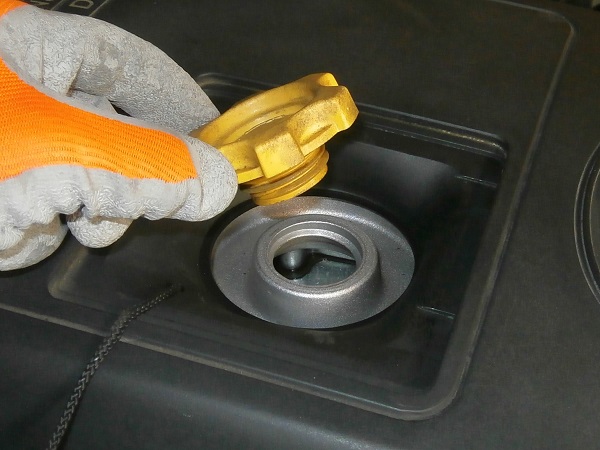
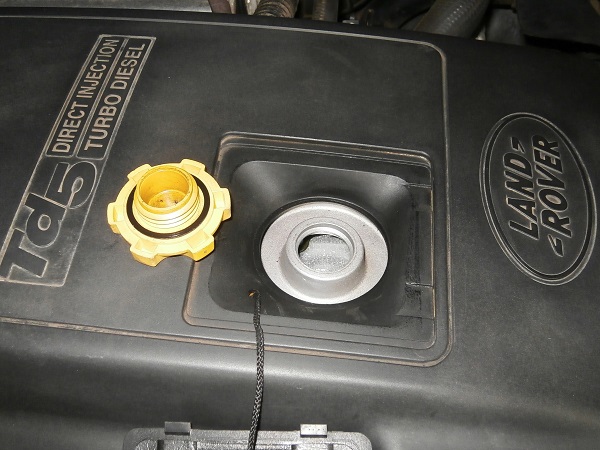
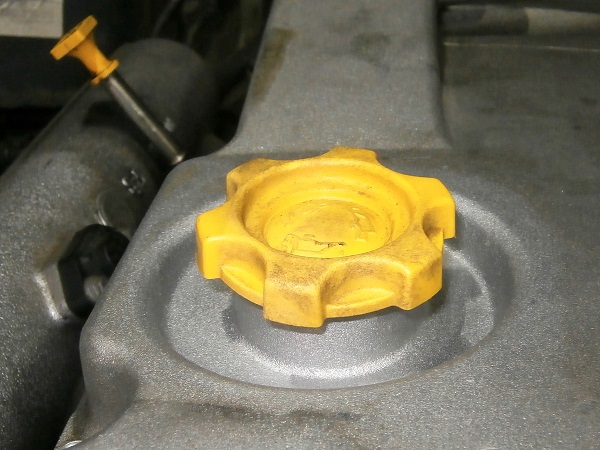
Remove the oil filler cap cover.

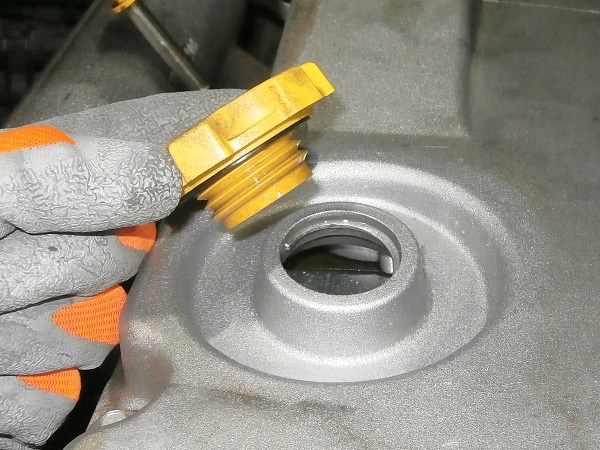
Op 02
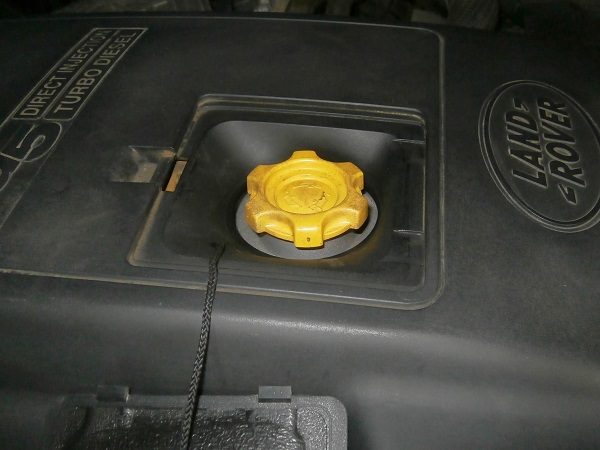
Remove the oil filler cap. Unscrew by hand.
Removing the oil filler cap will facilitate the flow of oil.
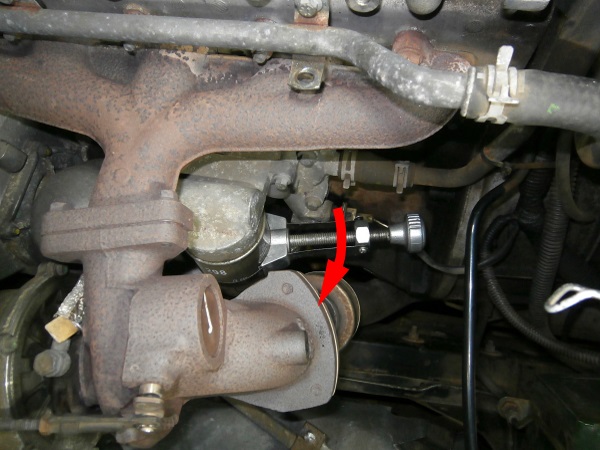
Op 03
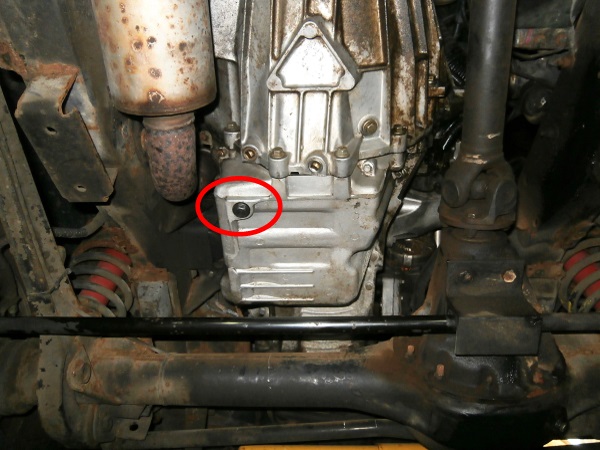
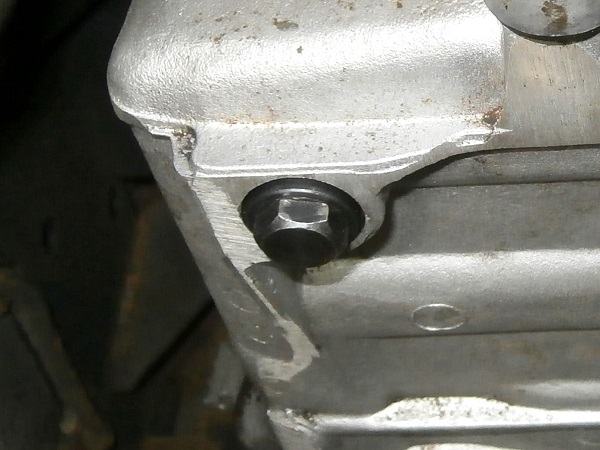
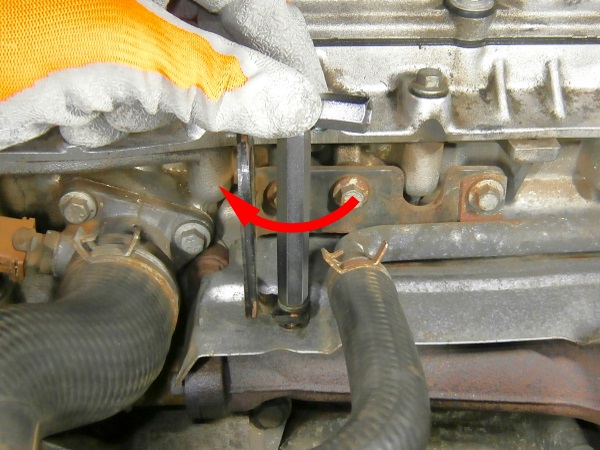
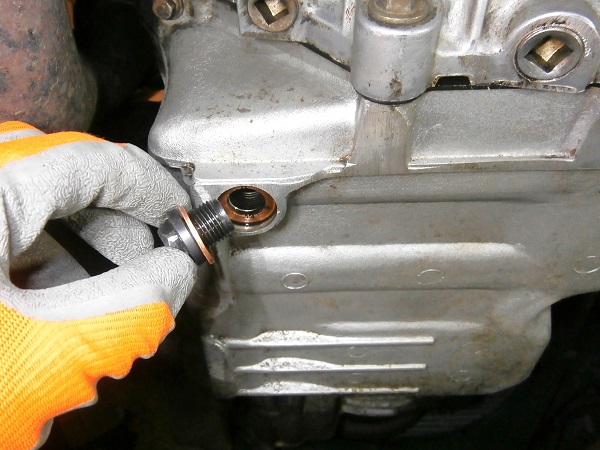
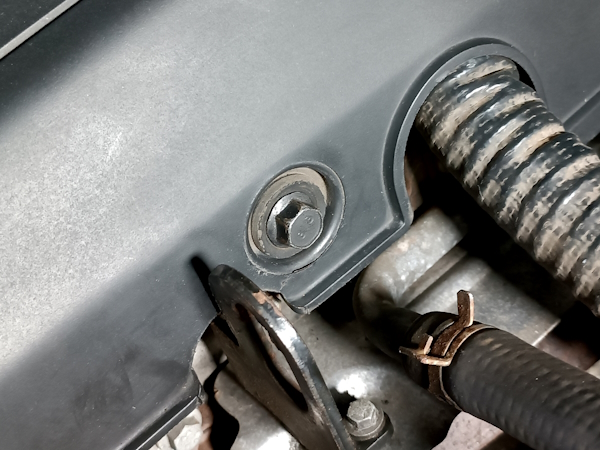
Locate the drain plug (1st photo).
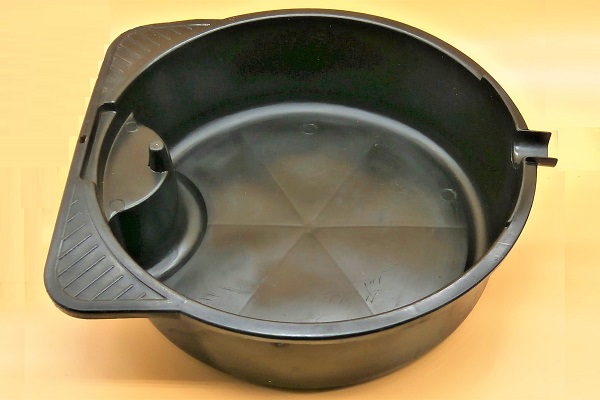
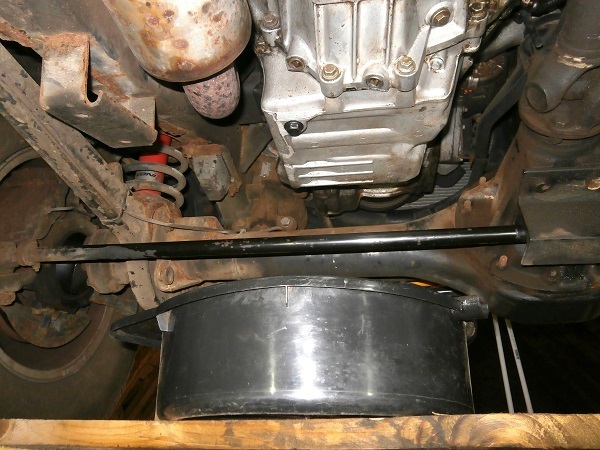
Place a drain pan under the engine oil sump.
Op 04
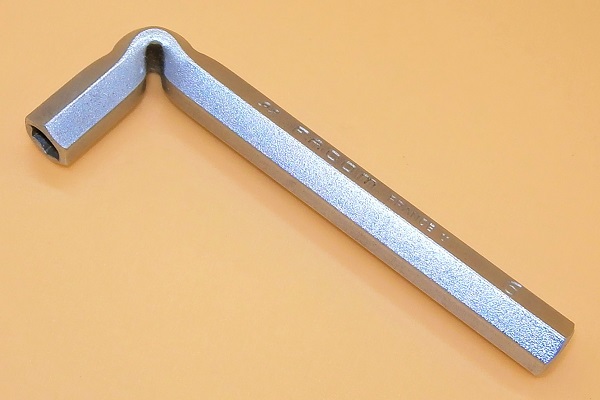
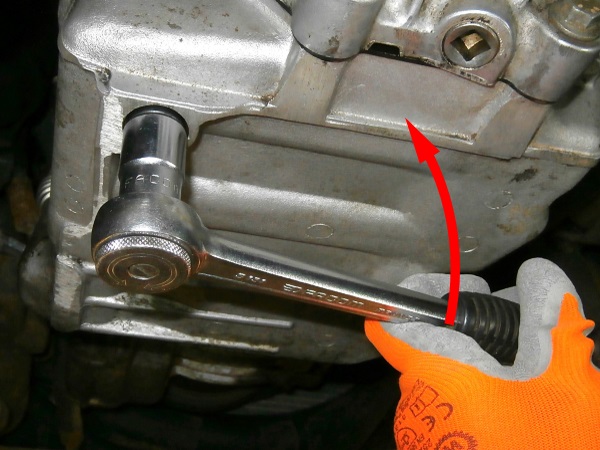
Unscrew the drain plug. Use a 17 mm socket.
Let the oil drain.
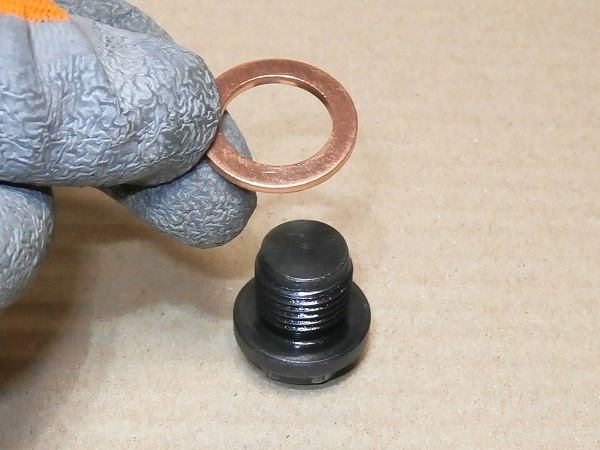
Discard the sealing washer.
The engine oil sump is made of aluminum and therefore very fragile. Think carefully about the direction of rotation before unscrewing the drain plug because you could damage the thread.
The oil and drain plug are very hot. Be careful not to burn yourself.
When the oil has drained, you can fit the oil filler cap.
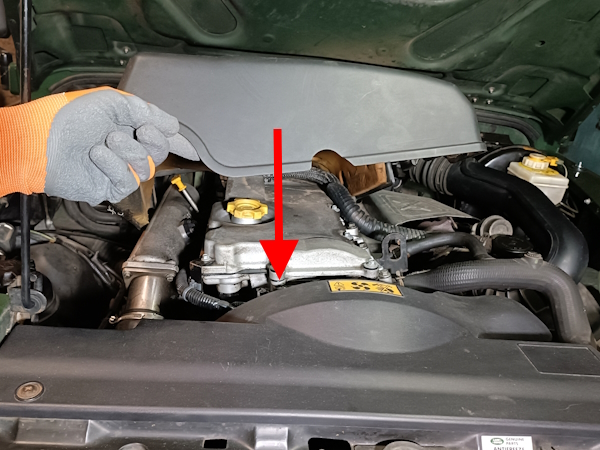
Remove the acoustic cover
Op 05
Remove the 3 fixing bolts of the acoustic cover. Use a 13 mm spanner.
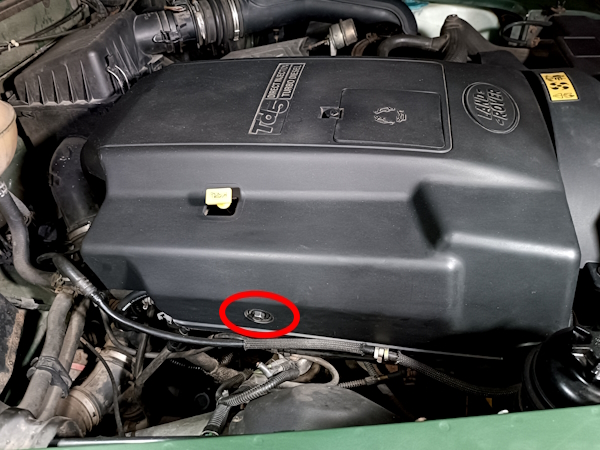
Op 06
Unclip the hose attached to the edge of the acoustic cover. Pull by hand.
Op 07
Remove the acoustic cover. Lift by hand.

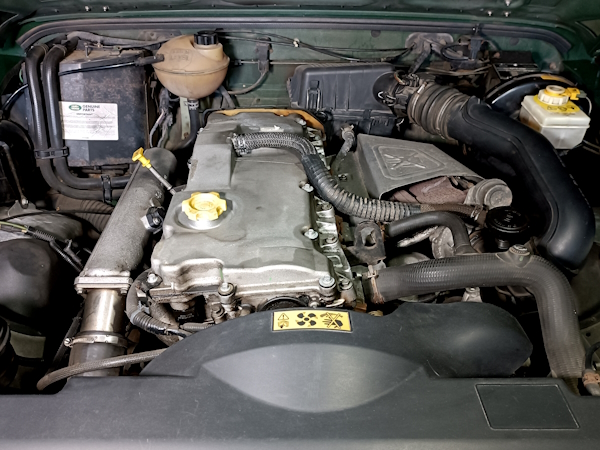
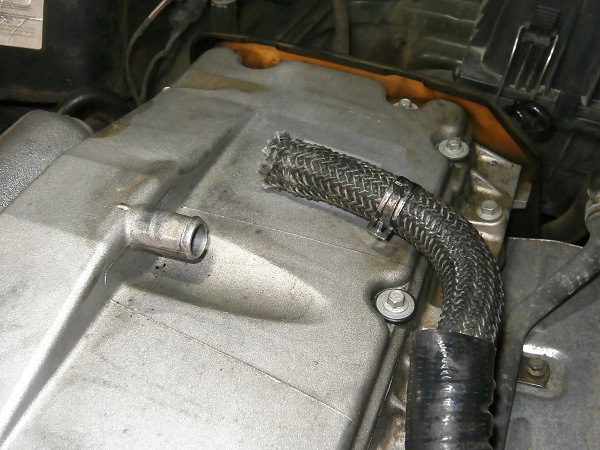
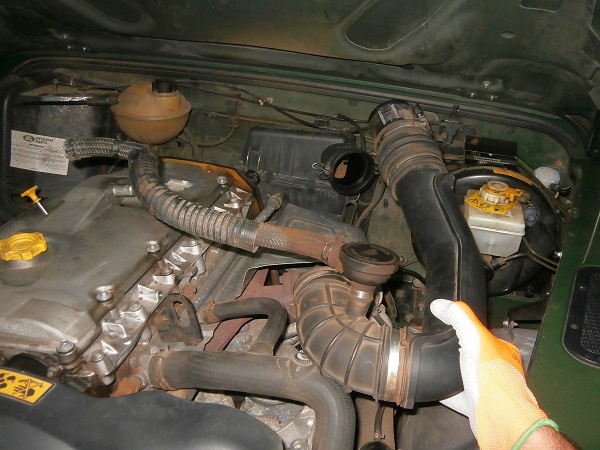
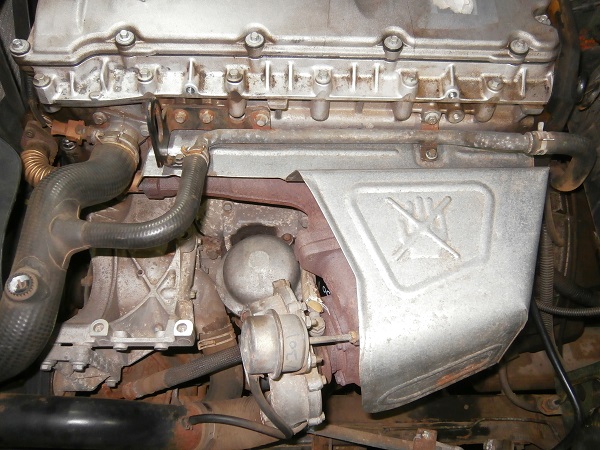
Remove the air duct
Op 08
Locate the air duct.
We will remove this hose to free up access to the oil filters.

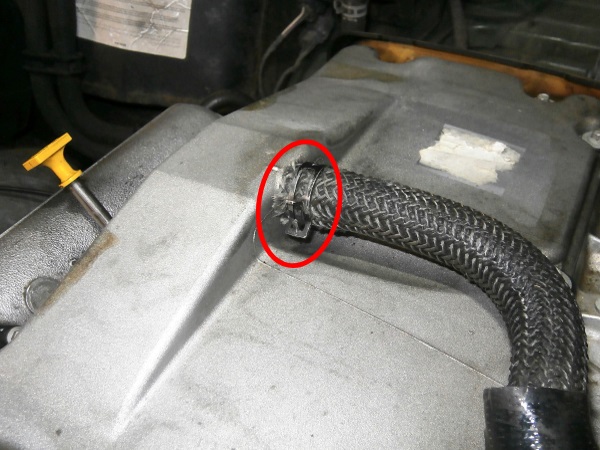
Op 09
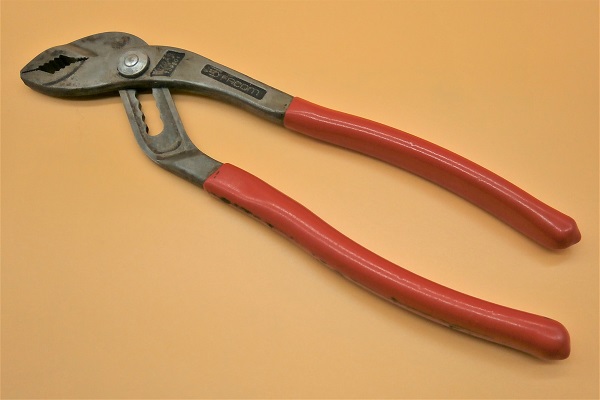
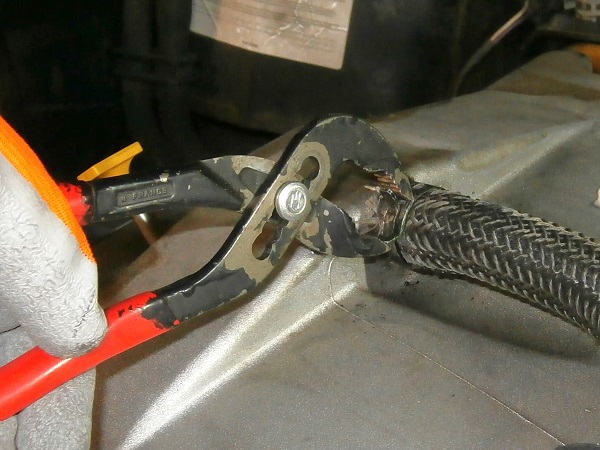
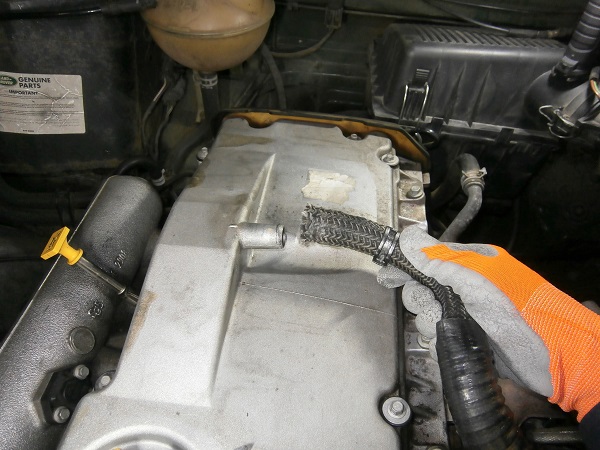
Move the breather hose clip. Use the multigrip pliers.
Disconnect the breather hose from the camshaft cover. Pull by hand.
There are sometimes some traces of oil inside this hose. Don't worry. It's a breather hose.
Op 10
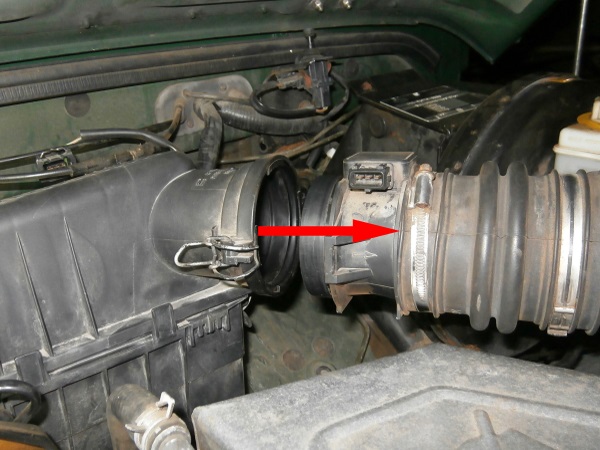
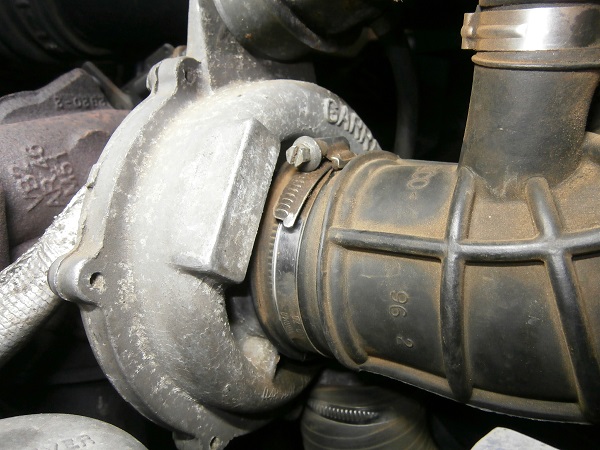
Unscrew the hose clip securing the air duct to the turbocharger. Use a 6 mm socket.
Disconnect the air duct. Pull by hand.
Using the socket spanner instead of a screwdriver allows you to loosen the hose clip without damaging the screw head.
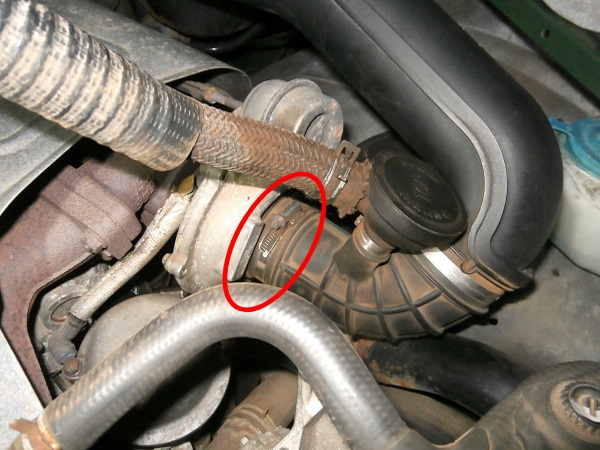
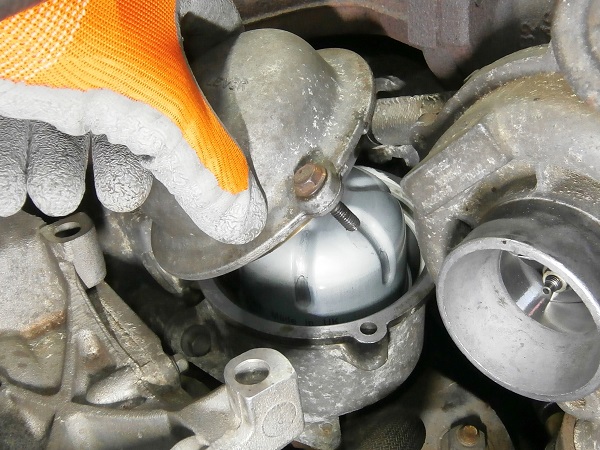
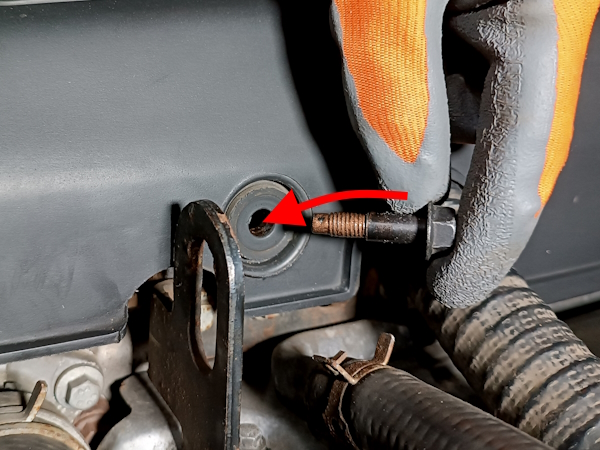
Op 11
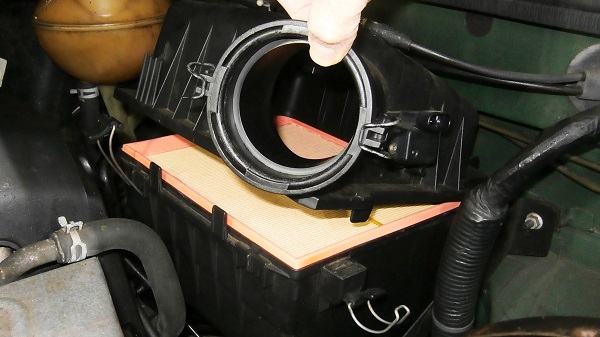
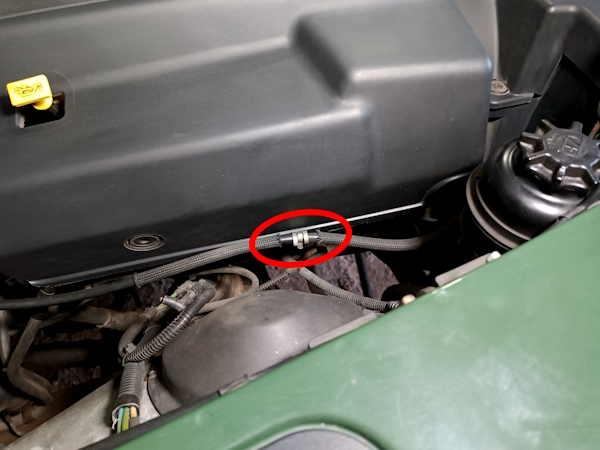
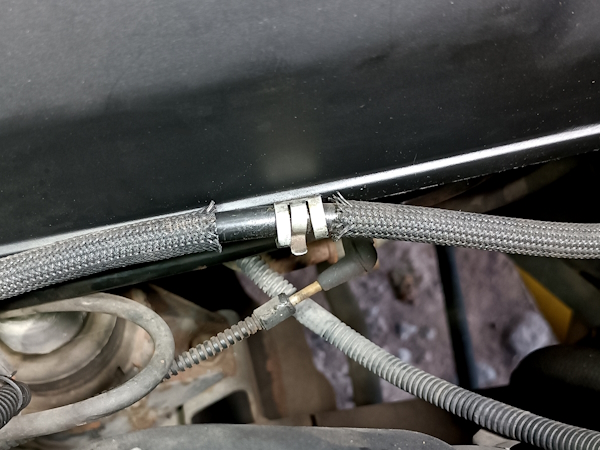
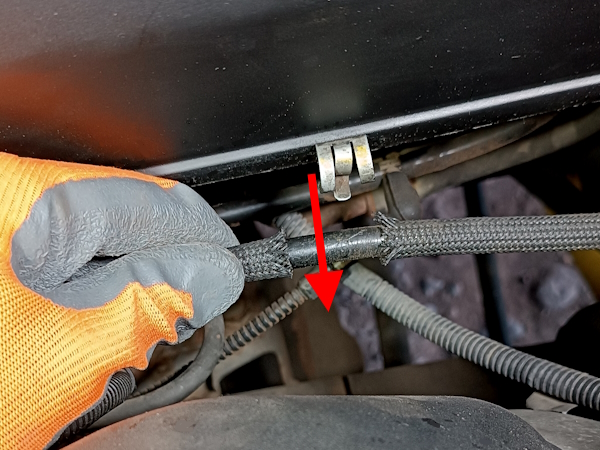
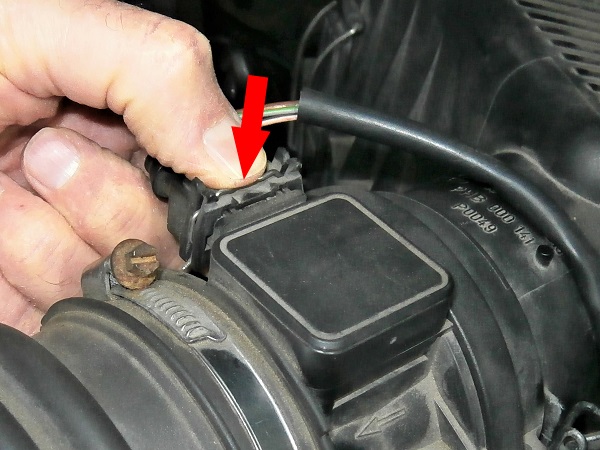
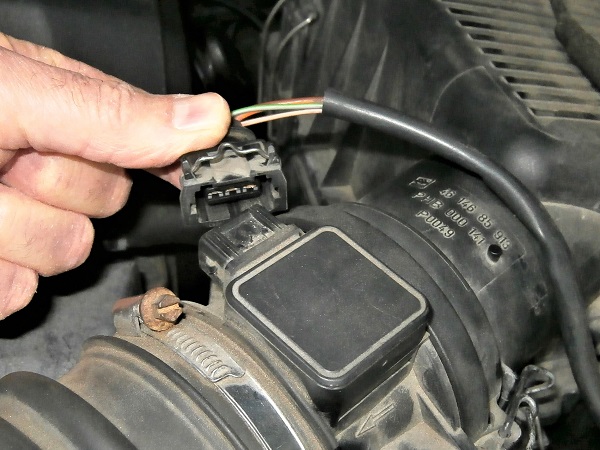
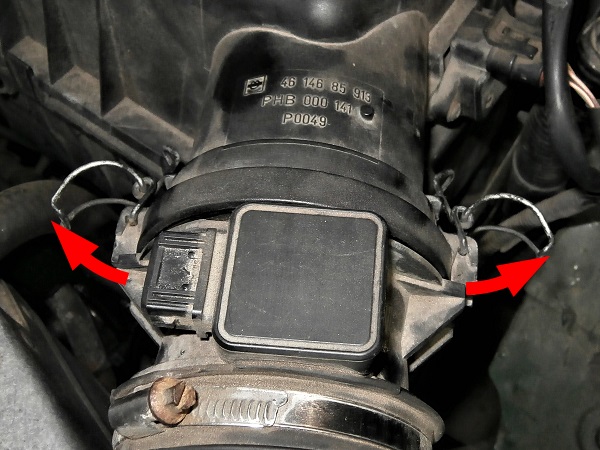
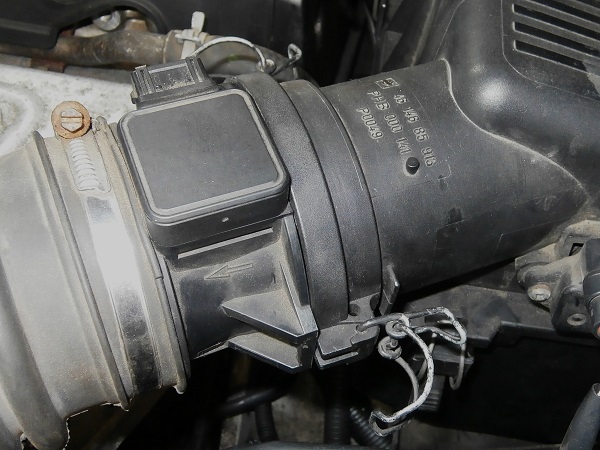
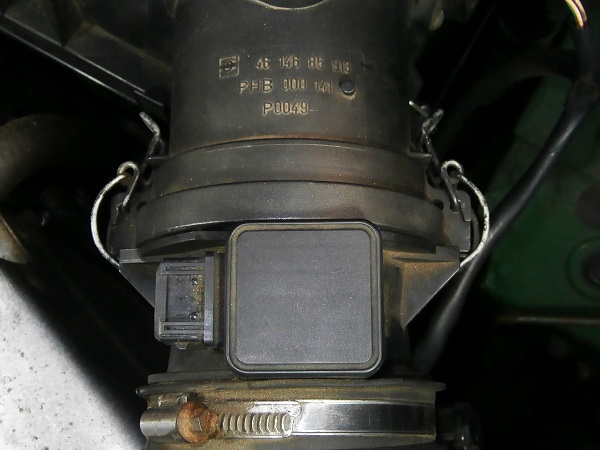
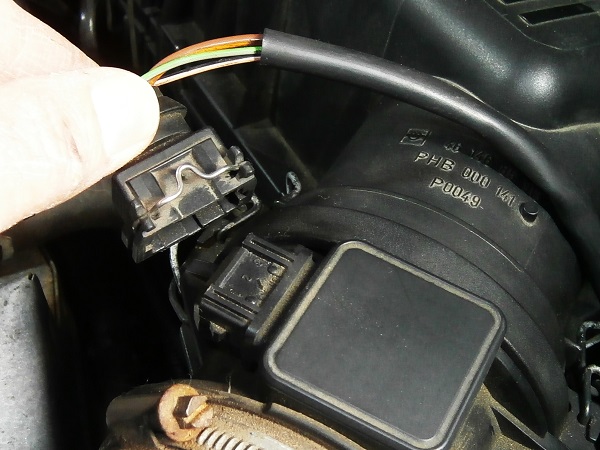
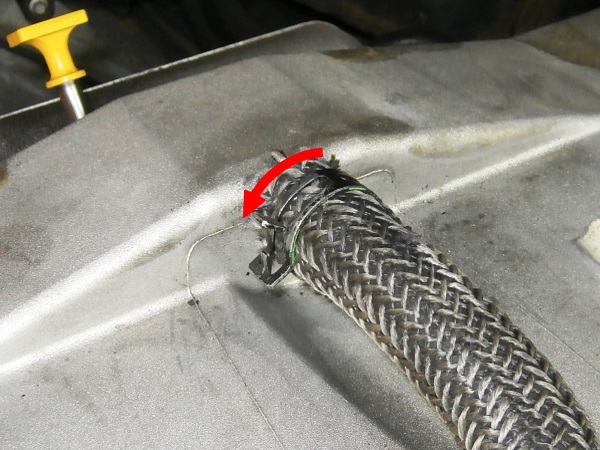
Disconnect the air flow sensor connector :
•
Press the metal locking clip with your finger (2nd photo).
•
Pull the connector by hand (3rd photo).

Op 12
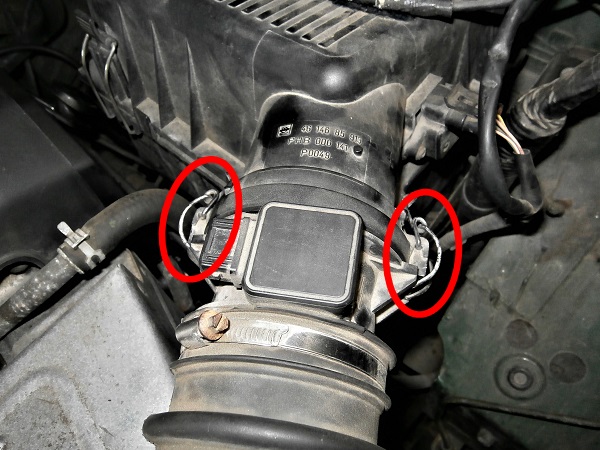
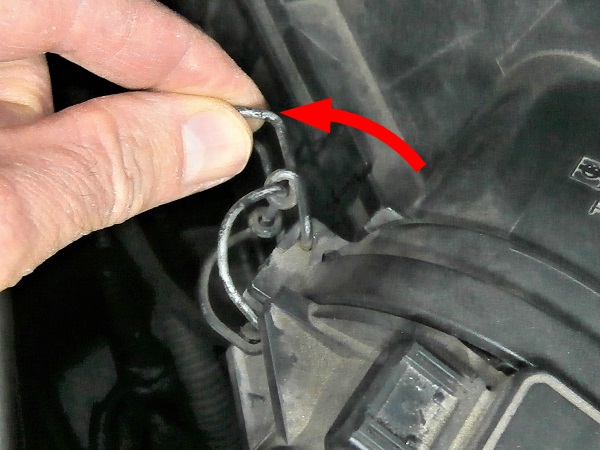
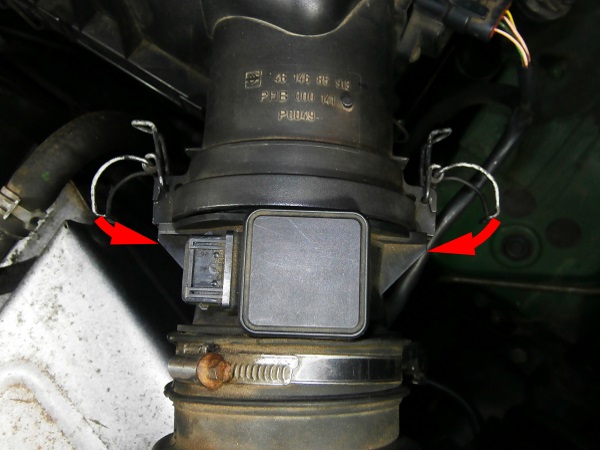
Unlock the 2 retaining clips securing the air flow sensor on the air filter box. Pull by hand.
Op 13
Disconnect the air flow sensor + air duct assembly from the air filter box. Pull by hand.
The air flow sensor is firmly fitted into the air filter box. Hold the air filter box in position when you pull.
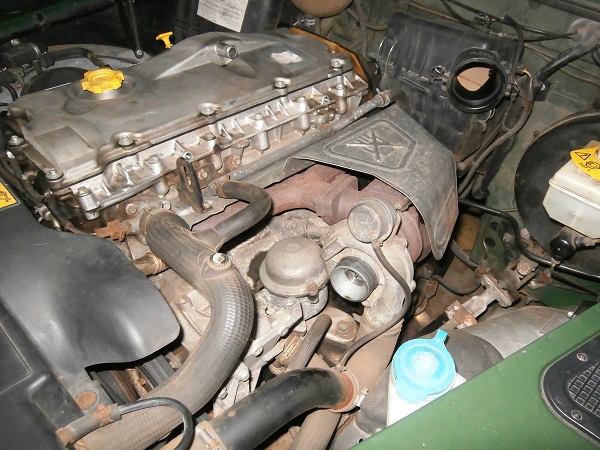
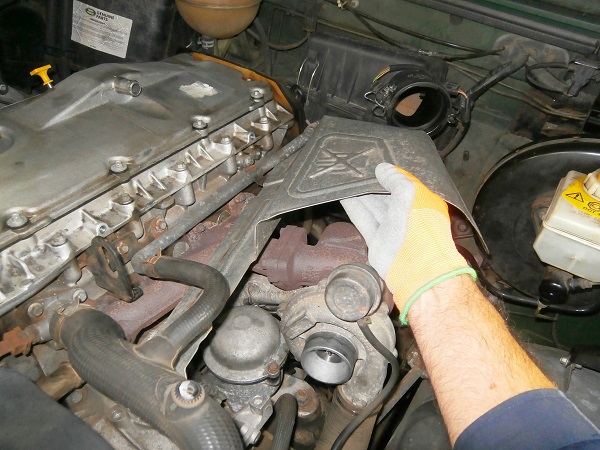
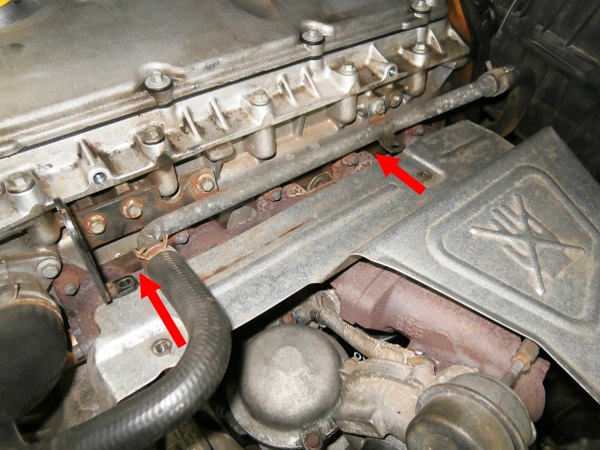
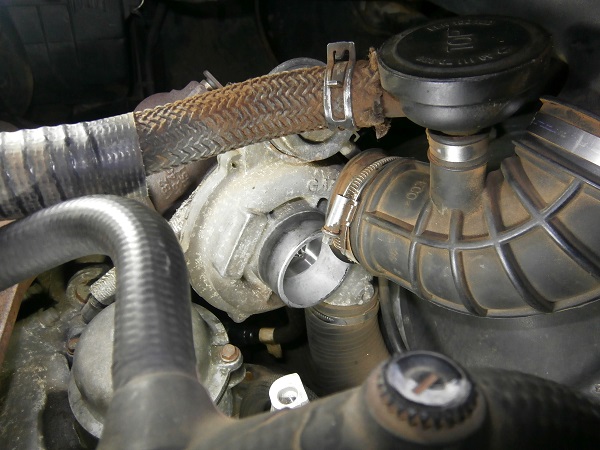
Remove the turbo heat shield
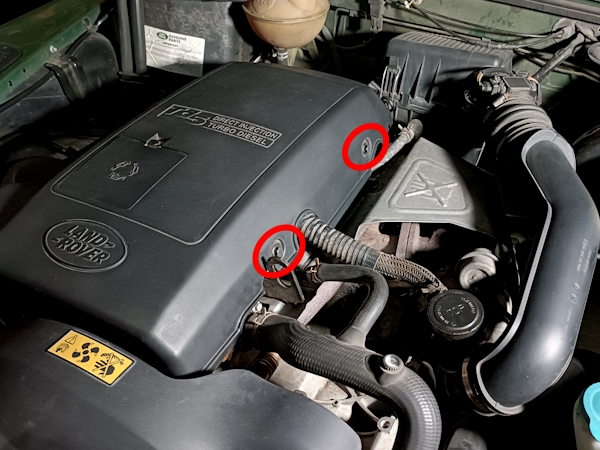
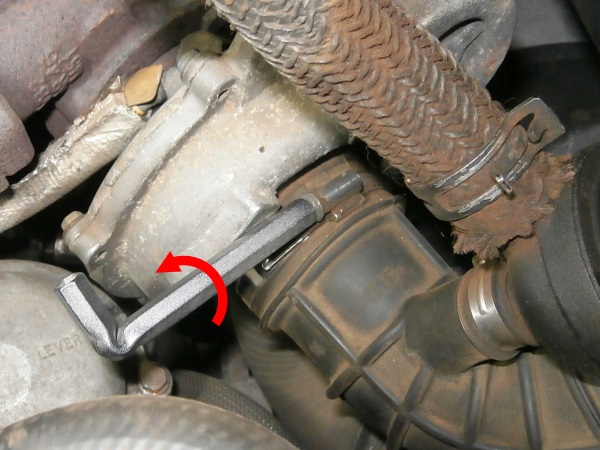
Op 14
Unscrew the 2 fixing bolts of the turbo heat shield on the cylinder head. Use an 8 mm socket.
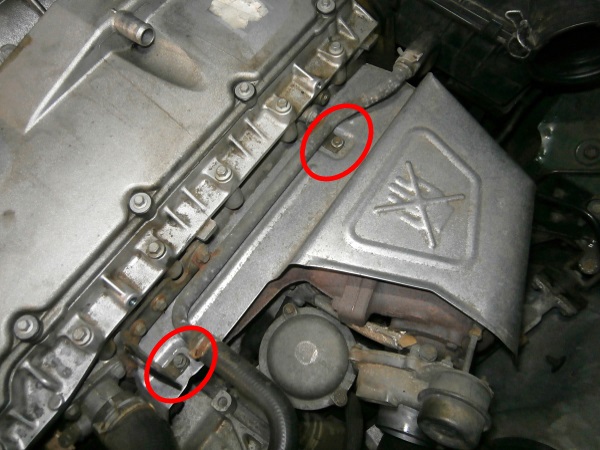
Op 15
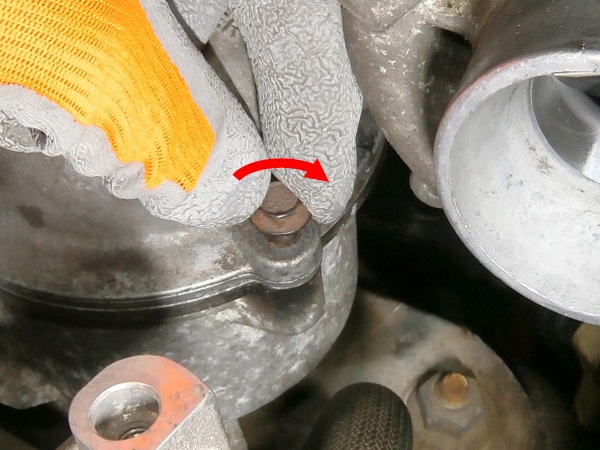
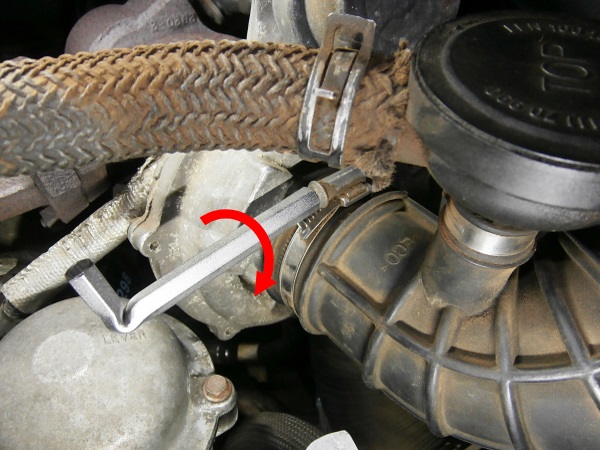
Unscrew the fixing bolt of the turbo heat shield on the exhaust manifold. Use a 10 mm socket.
This bolt is hidden by the turbo heat shield. You have to access it by touch.


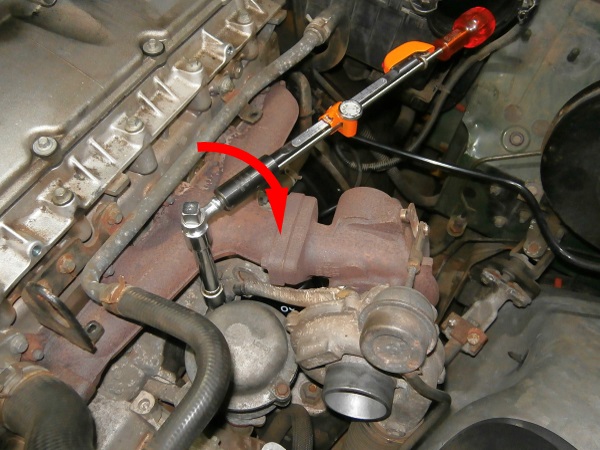
Op 16
Remove the turbo heat shield. Pull by hand.

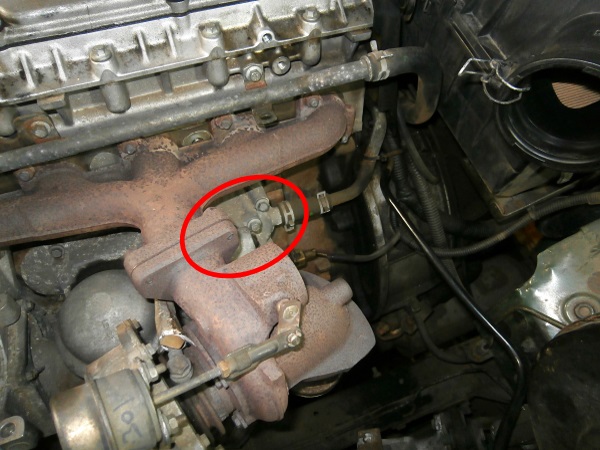
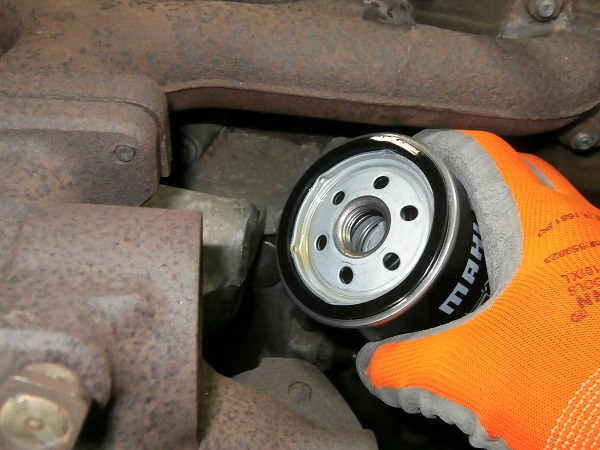
Change the oil filter
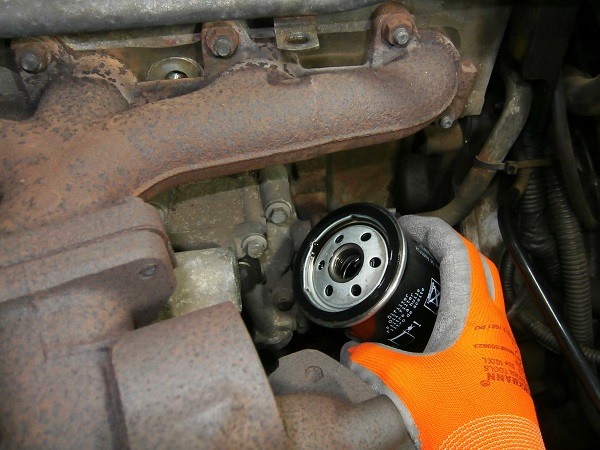
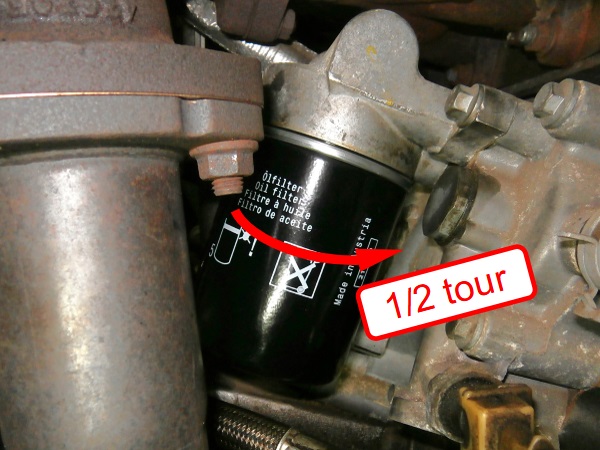
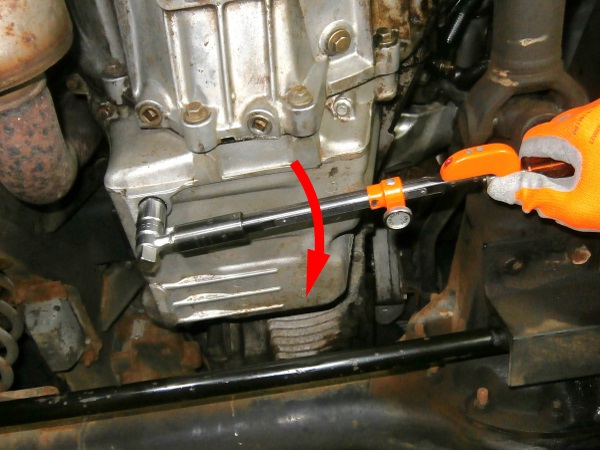
Op 17
Locate the oil filter.
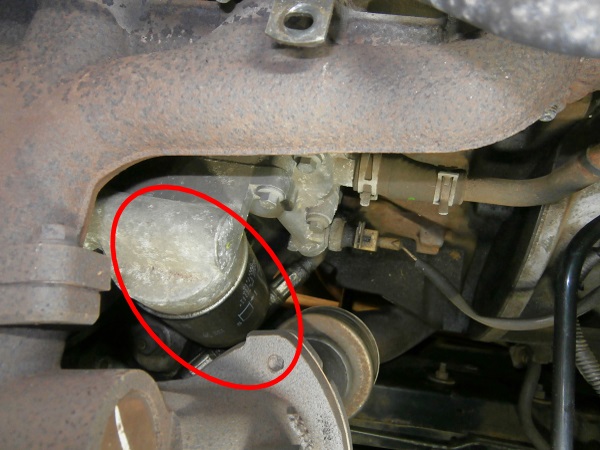
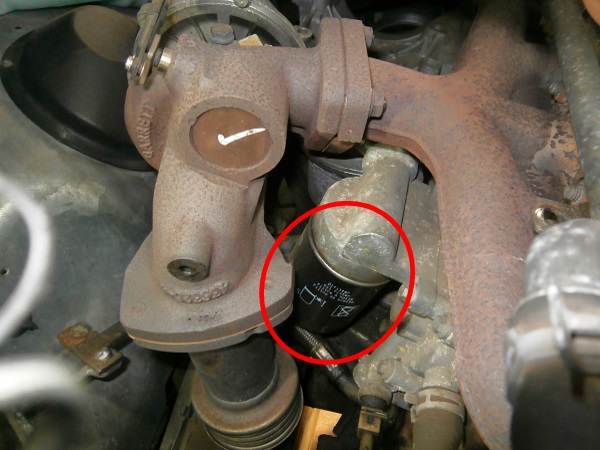
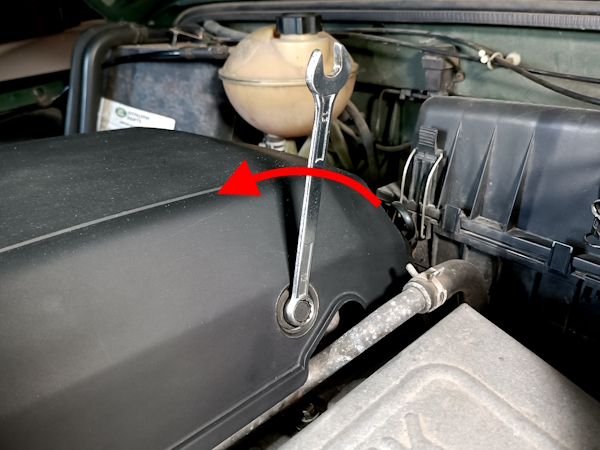
Op 18
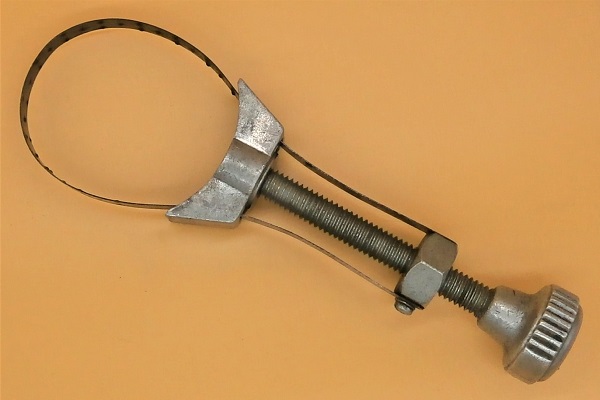
Unscrew and remove the oil filter. Use the oil filter wrench.
Place a drain pan under the filter because oil will flow out when it is removed.
Op 19
Thoroughly clean the oil filter mounting surface.

Op 20
Lightly lubricate the seal of the new oil filter (kit DA6004P) with engine oil.
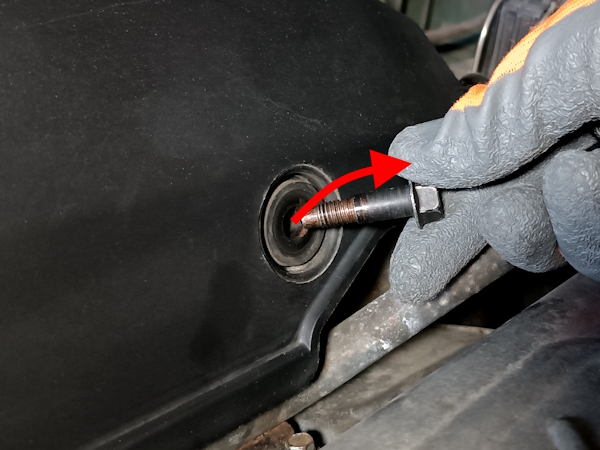
Op 21
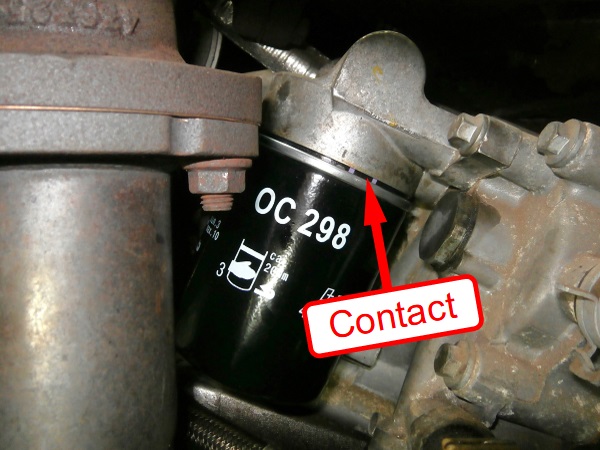
Screw on the new oil filter. Tighten by hand.
Tighten the filter until the filter seal makes contact with the support. Then, tighten the filter by 1/2 turn.
Never tighten the new filter with the filter wrench.
Advertisement
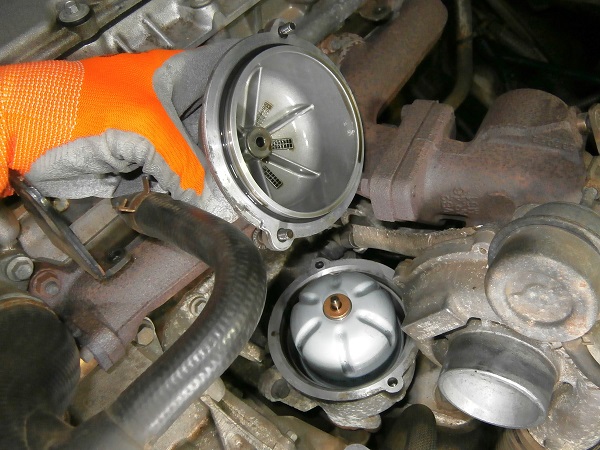
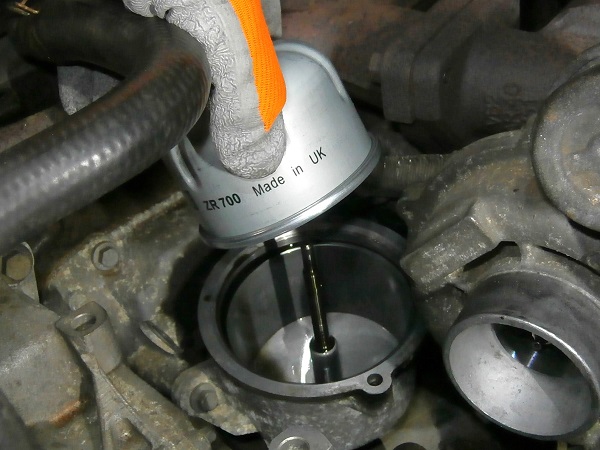
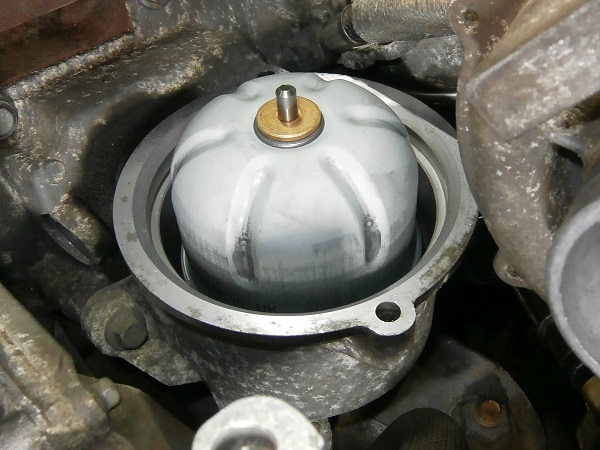
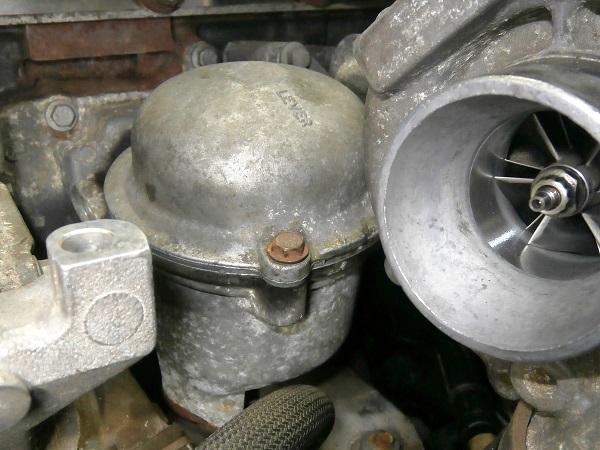
Change the rotor oil filter
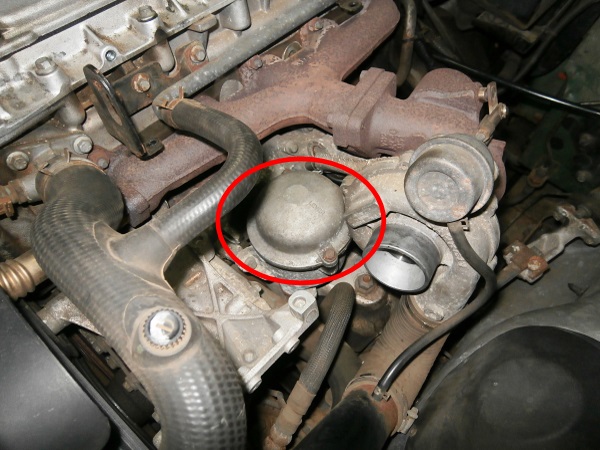
Op 22
Locate the rotor oil filter.
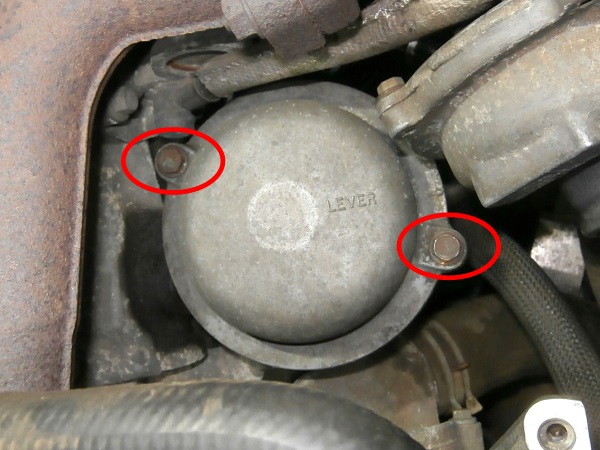
Op 23
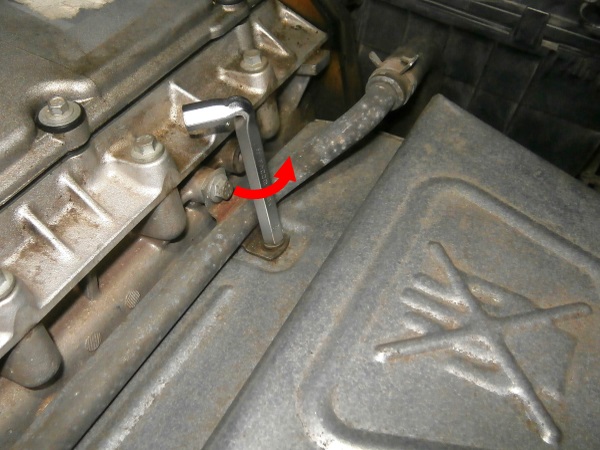
Unscrew the 2 rotor oil filter cover fixing bolts. Use a 10 mm socket.
The rotor oil filter cover fixing bolts are captive on the cover. They cannot be removed.
Op 24
Remove the rotor oil filter cover. Pull by hand.

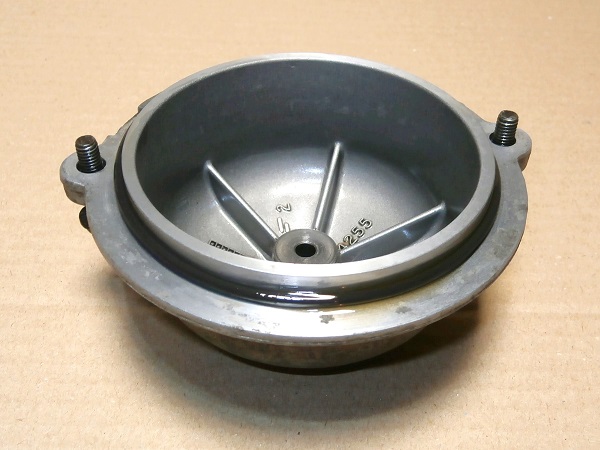
Op 25
Remove the rotor oil filter. Pull by hand.
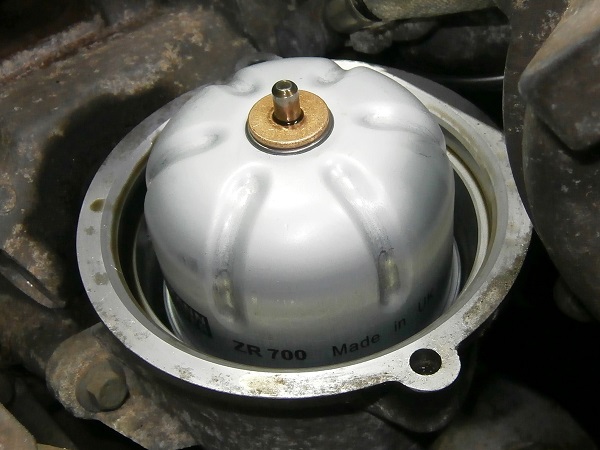
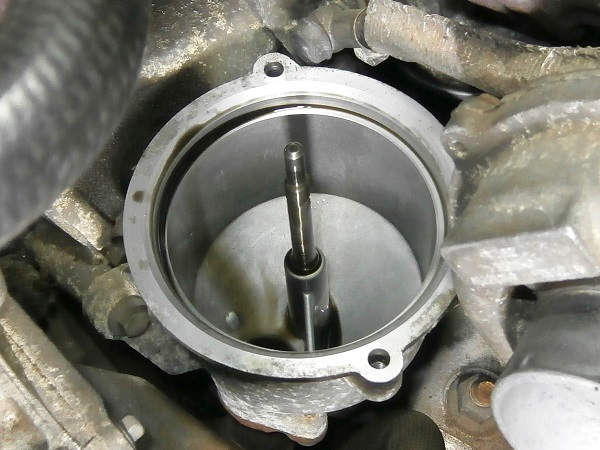
Op 26
Remove the O-ring from the rotor oil filter cover. Pull by hand.
Discard the O-ring.
Thoroughly clean the rotor oil filter cover.
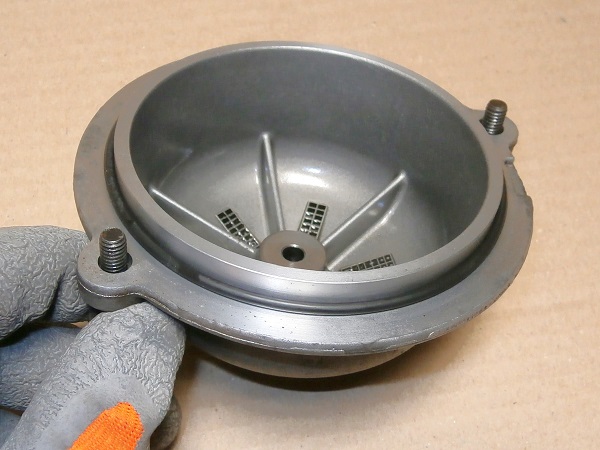

Op 27
Lubricate the new O-ring (kit DA6004P) with engine oil.
Position the new O-ring on the rotor oil filter cover. Push by hand.
The O-ring is packed in the same box as the rotor filter.
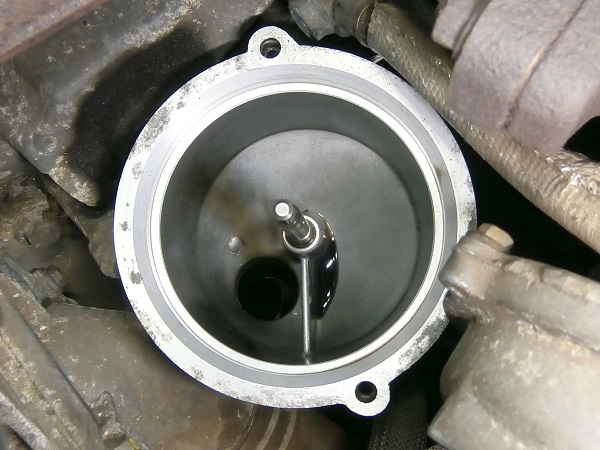
Op 28
Thoroughly clean the rotor oil filter body.
Position the new rotor oil filter (kit DA6004P) on the body. Engage it on its axis by hand.
Check that the rotor rotates freely on its axis.
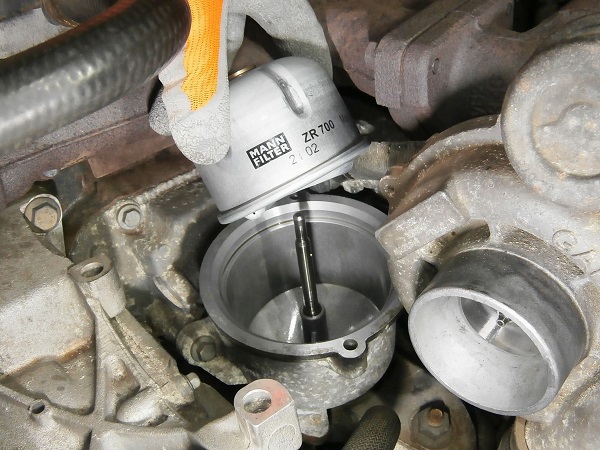
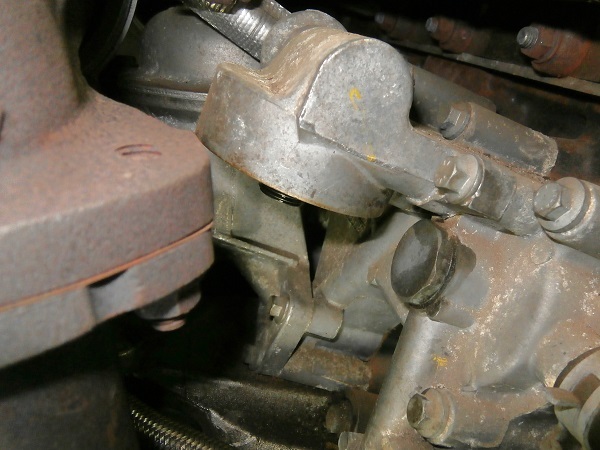
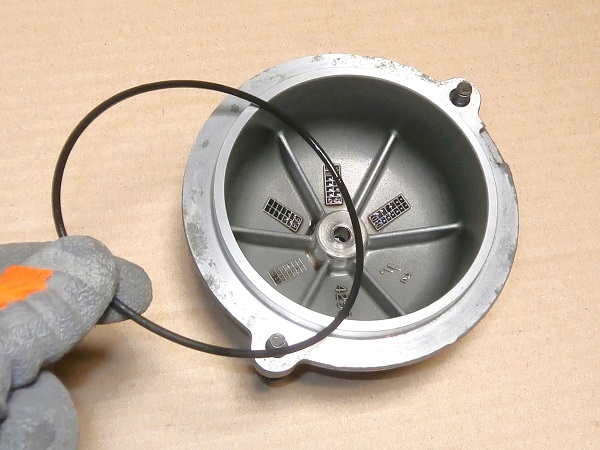
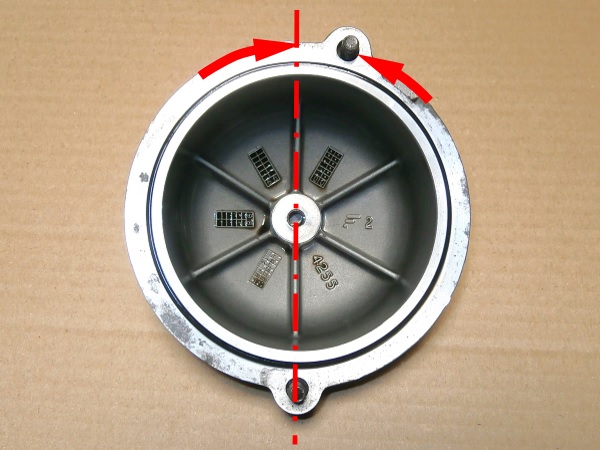
Op 29
Position the cover on the rotor oil filter body. Place it by hand.
The position of the 2 cover fixing bolts is not symmetrical. There is therefore a direction to position the cover (1st photo).
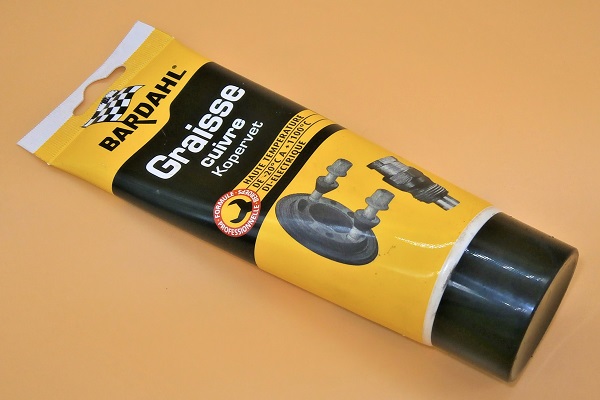
Apply a little copper grease on the thread of the fixing bolts. This will limit oxidation and make it easier to unscrew during the next disassembly.
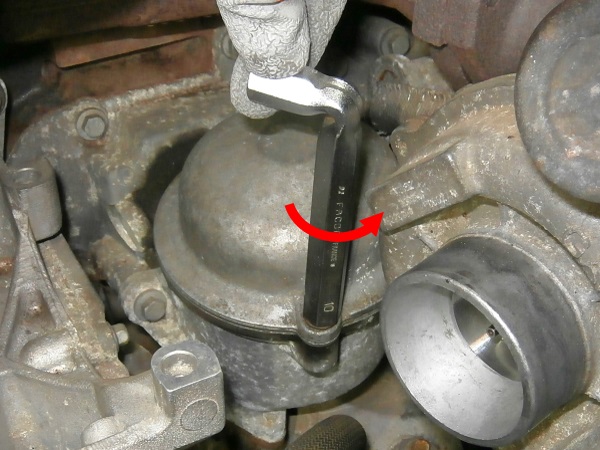
Op 30
Screw in the 2 rotor oil filter cover fixing bolts. Start by screwing in by hand.
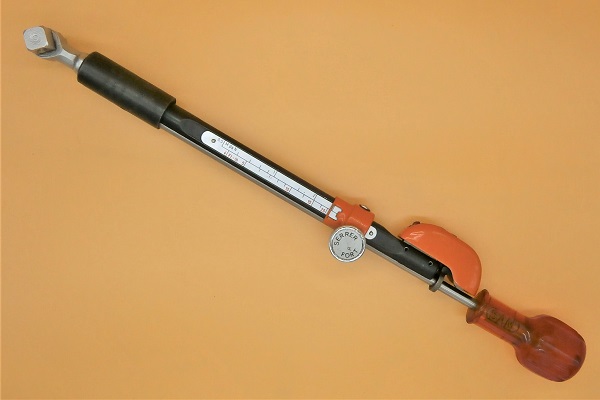
Tighten the bolts to 9 mN. Use a 10 mm socket and a torque wrench.
The rotor oil filter body in which the 2 bolts are screwed is made of aluminum. It is therefore very fragile. Start screwing the bolts by hand, taking every precaution not to strip the threads.
For those who do not have a torque wrench, do not tighten the 2 bolts too tight because you risk stripping the threads.
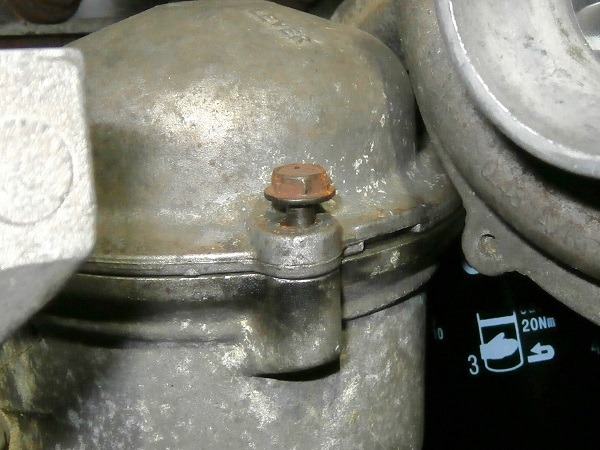
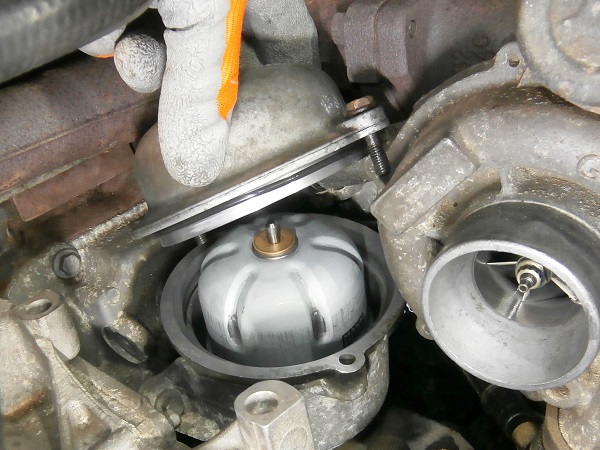
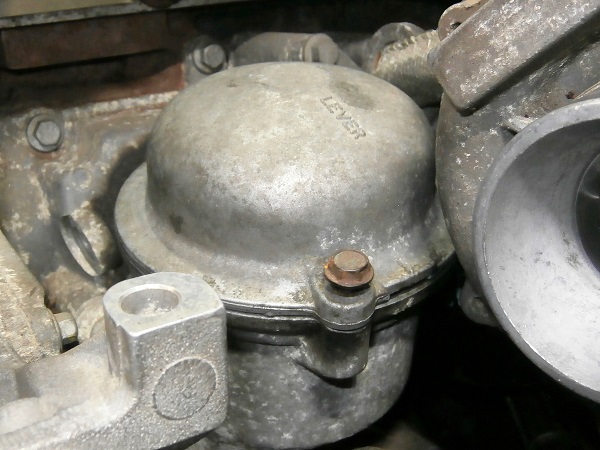
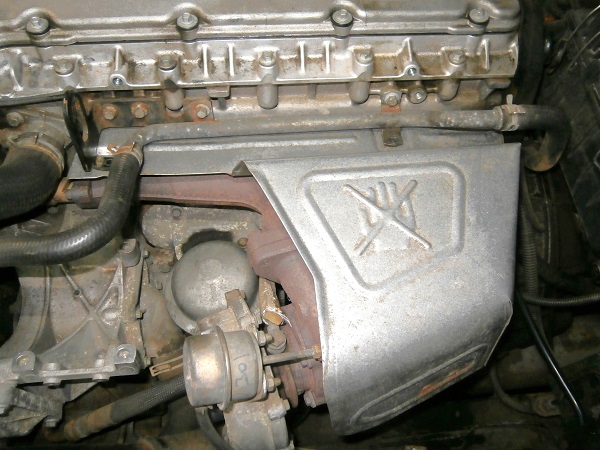
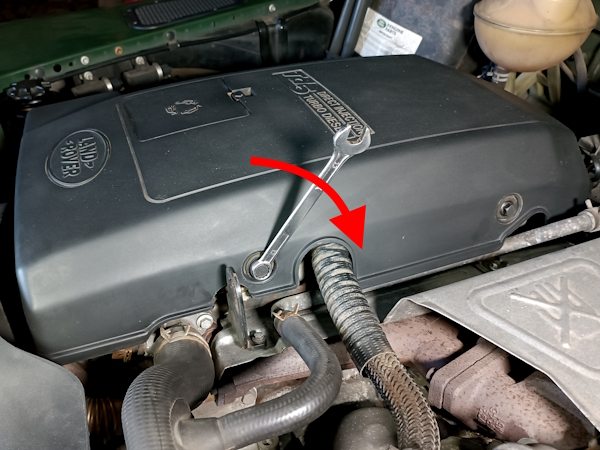
Fit the turbo heat shield
Op 31
Locate where the turbo heat shield fixing bolt should be screwed onto the exhaust manifold.
The area will be completely hidden when the shield is in place. The bolt must be positioned and screwed blindly.

Op 32
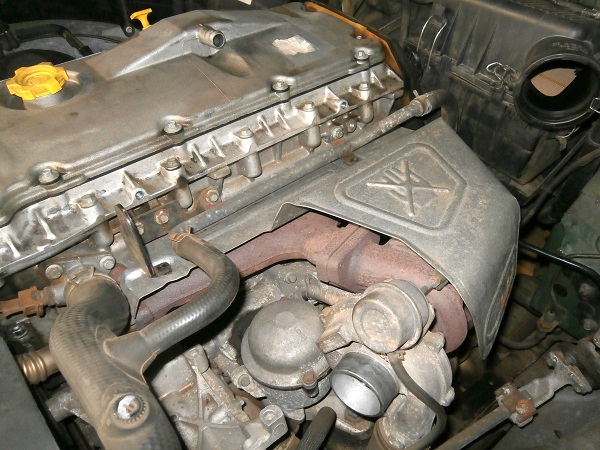
Fit the turbo heat shield. Push by hand.
Slide the turbo heat shield under the 2 fixing lugs on the cylinder head (2nd photo).
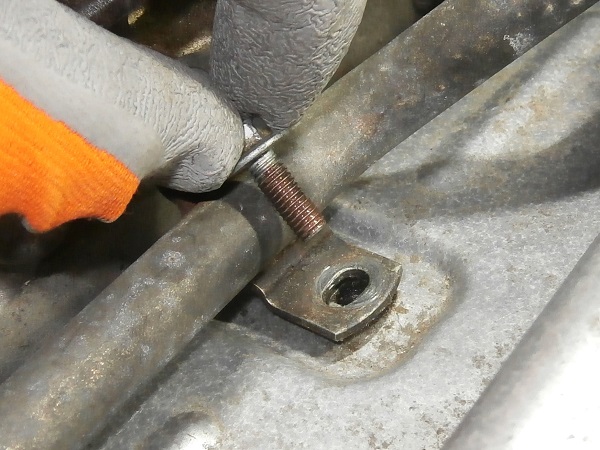
Op 33
Screw in the 2 fixing bolts of the turbo heat shield on the cylinder head. Use an 8 mm socket.
Apply a little copper grease on the thread of the fixing bolts. This will limit oxidation and make it easier to unscrew during the next disassembly.
Op 34
Screw in the fixing bolt of the turbo heat shield on the exhaust manifold. Use a 10 mm socket.
Apply a little copper grease on the thread of the fixing bolt. This will limit oxidation and make it easier to unscrew during the next disassembly.


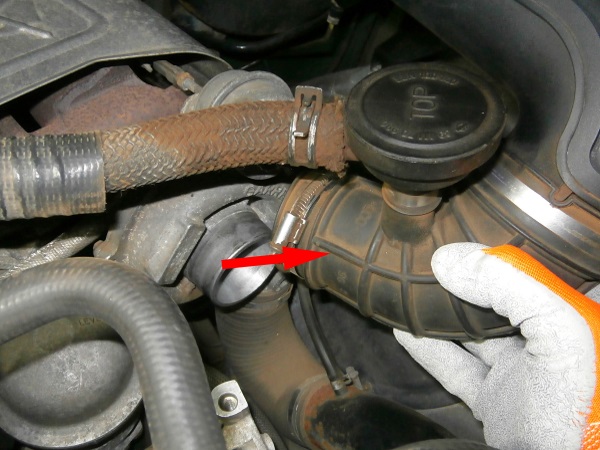
Fit the air duct
Op 35
Fit the air flow sensor + air duct assembly onto the air filter. Push by hand.


Op 36
Lock the 2 air flow sensor retaining clips onto the air filter. Push by hand.

Op 37
Connect the connector to the air flow sensor. Push by hand.

Op 38
Engage the air duct onto the turbocharger. Push by hand.
Tighten the hose clip. Use a 6 mm socket.
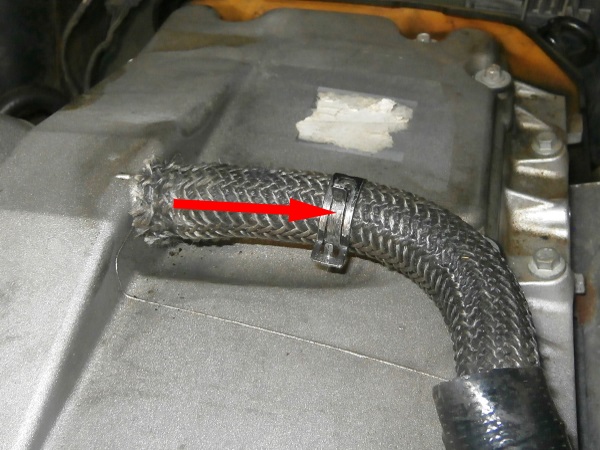
Op 39
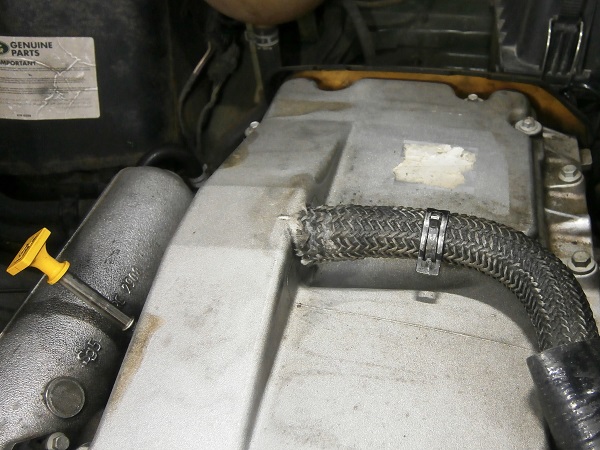
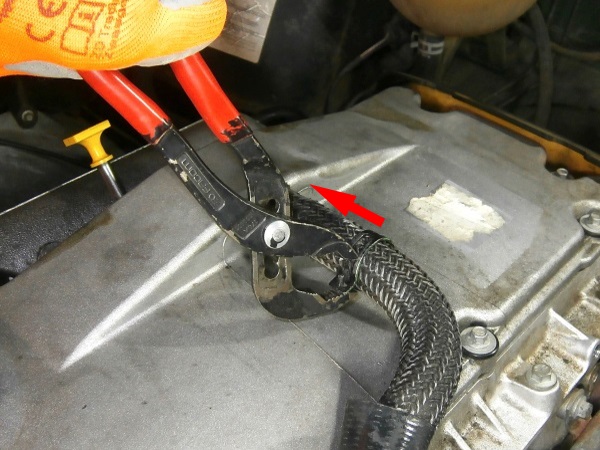
Fit the breather hose :
•
Engage the breather hose onto the camshaft cover. Push by hand.
•
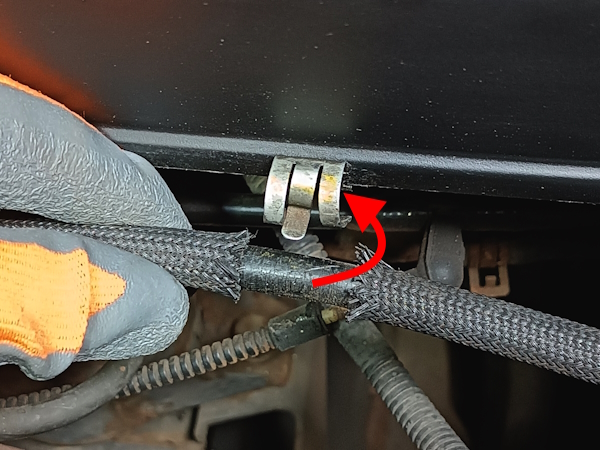
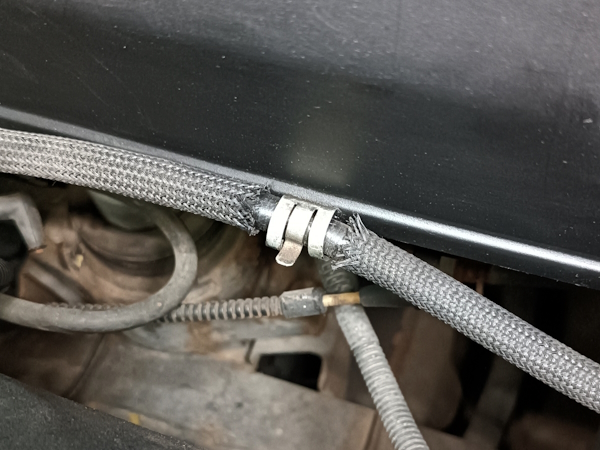
Fit the clip. Use the multigrip pliers.
Place the clip ears on the side of the hose so that they do not come into contact with the acoustic cover (4th photo).
Advertisement
Add oil
Op 40
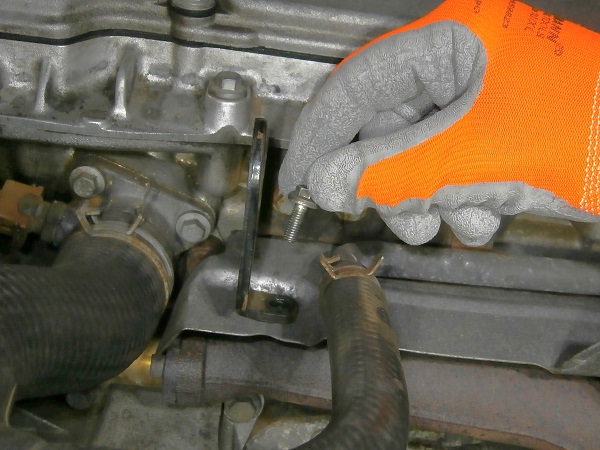
Clean the drain plug thoroughly.
Position the new sealing washer (kit DA6004P) on the drain plug.
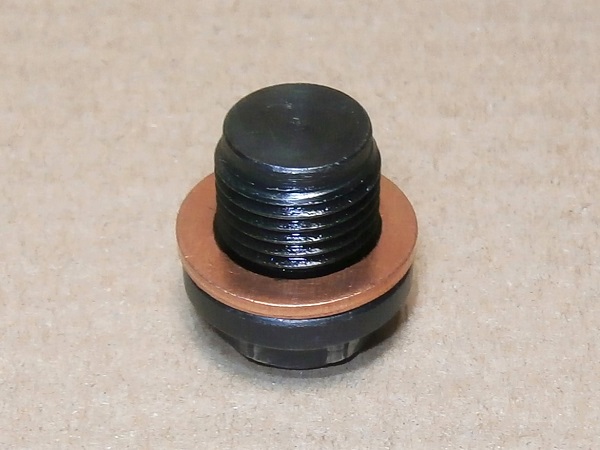
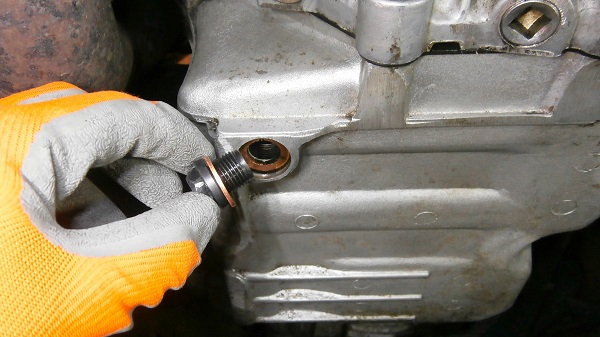
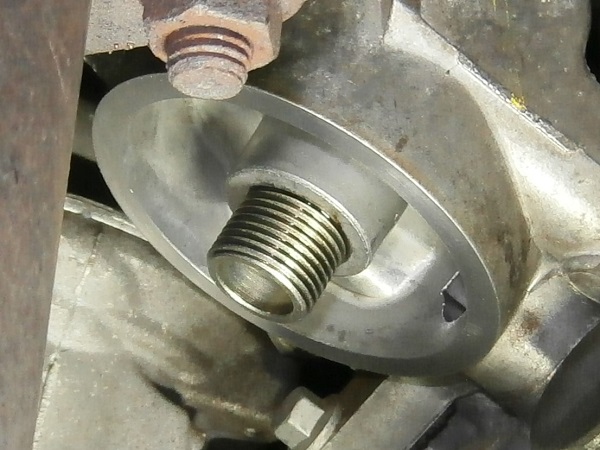
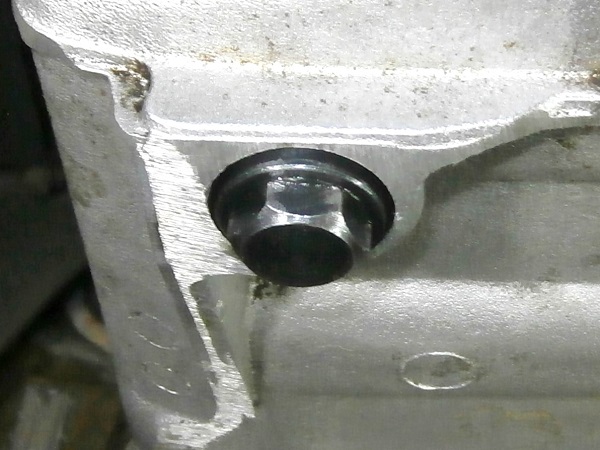
Op 41
Screw in the drain plug with its washer. Tighten by hand.
Tighten to a torque of 23 mN. Use a 17 mm socket and a torque wrench.
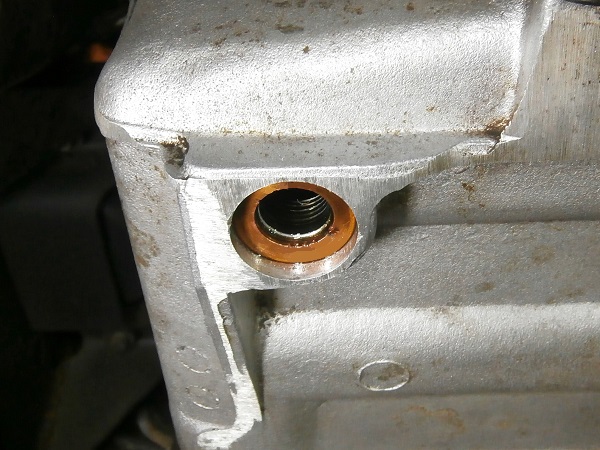
You can see a sealing washer crimped into the oil pan just before the drain plug thread (1st photo). Do not attempt to remove it. It is part of the oil pan and contributes to the drain plug seal.
The oil pan is made of aluminum. It is therefore very fragile. Start screwing the drain plug by hand, taking every precaution not to strip the thread.
Op 42
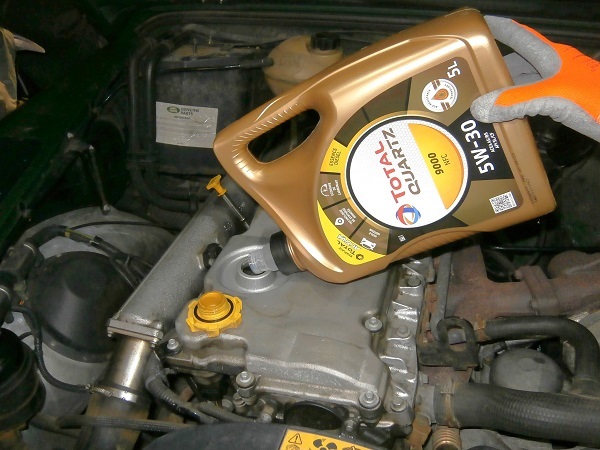
Pour 6.5 liters of oil into the engine.
Fit the oil filler cap. Screw in by hand.
Op 43
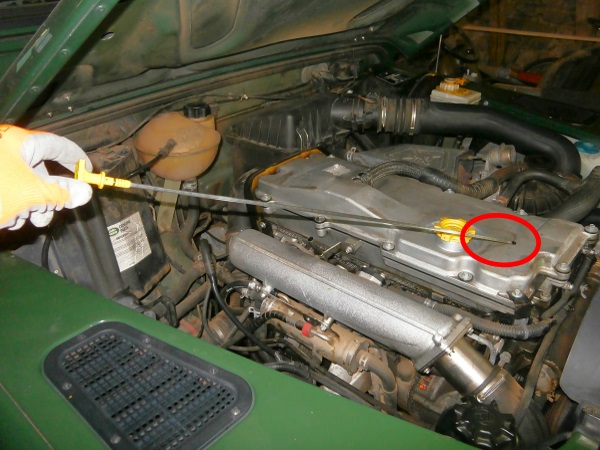
Start the engine for a few seconds. Turn off the engine.
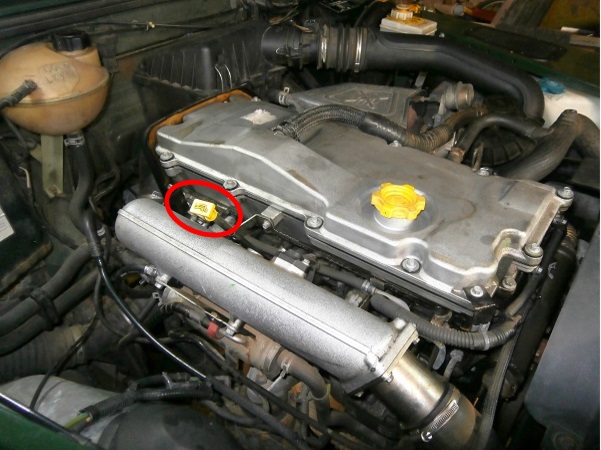
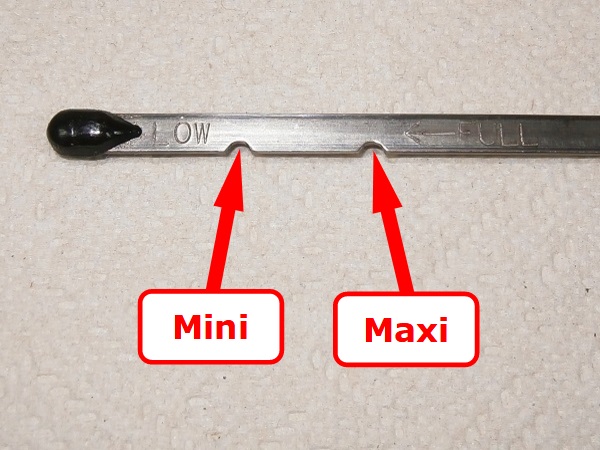
Check the oil level. Use the dipstick.
Add engine oil if necessary until approaching the ''max'' mark on the dipstick.
Check that there are no leaks at the 2 oil filters and the drain plug.
After turning off the engine, wait a few minutes for the oil to drain back into the engine oil sump before checking the oil level. If you do not respect this delay, the level reading may be distorted.
Do not exceed the maximum oil level (''max'' mark). This could damage the engine.
The oil filter is unfortunately hidden by the turbo heat shield. To check for leaks, run your hand along the lower part of the filter and check that it is dry.
Fit the acoustic cover
Op 44
Position the acoustic cover on the engine.

Op 45
Screw in the 3 fixing bolts (LYG000230) of the acoustic cover. Use a 13 mm spanner.
Op 46
Clip the hose attached to the edge of the acoustic cover. Push by hand.
Op 47
Drive a few kilometers with the vehicle.
Check the oil level again and the absence of leaks at the oil filters and the drain plug.
The End