This tutorial is also available in French
➔

Wheel removal on Defender
Vehicle ➔ Defender all types
Difficulty ➔ Easy

Time ➔ 20 minutes
Summary
Advertisement
Advertisement

Recommendations

Before lifting the Defender, carefully follow the Land Rover recommendations for immobilizing the vehicle
(➔ see Op 01).
The handbrake does not lock the rear wheels, but it locks the rear output of the transfer box. This requires special precautions.

Only the anti-theft nut has a nut cover
(➔ see Op 03).
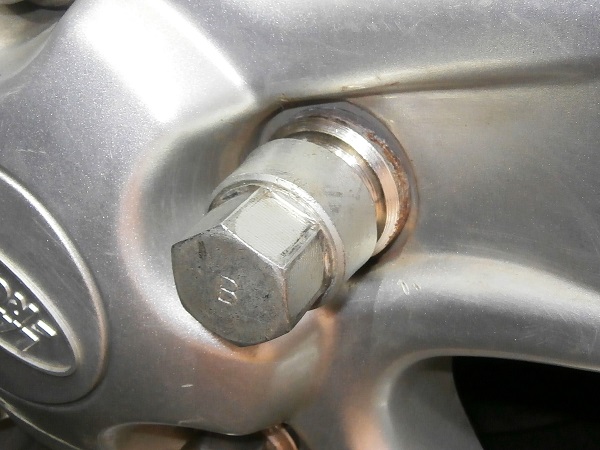
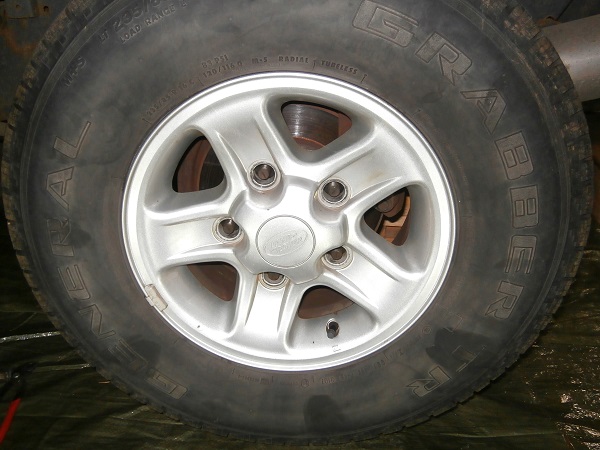
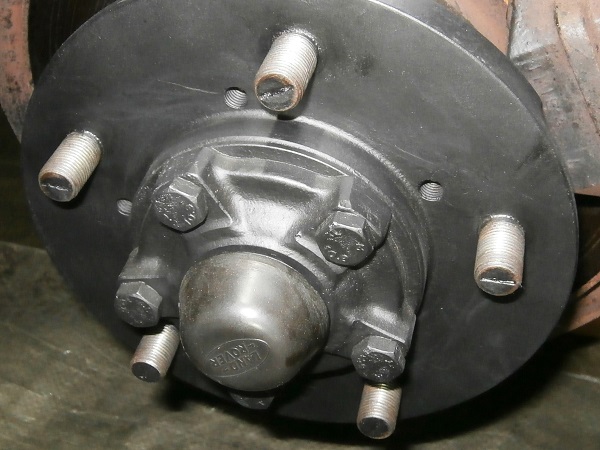
The other 4 nuts are one-piece.
When reassembling, lightly grease the surfaces of the rim that will come into contact with the hub. This will prevent electrolytic corrosion between the aluminum of the rim and the steel of the hub. The next time the wheel is removed, it will not be stuck on the hub.
Should the studs be lightly greased before screwing on the wheel nuts ?
Our answer is yes, but opinions are divided on this point :
• Those in favor of ''Yes'' argue : easier unscrewing of the nuts when removing a wheel, absence of unpleasant ''creaking'' noise when screwing, and protection against oxidation.
• Those in favor of ''No'' argue : risk of nuts loosening prematurely, retention of dirt by the grease, and risk of applying too much force on the stud when tightening the nuts to the torque.
Some Land Rover owners prefer to put a small amount of oil on the studs rather than grease them. Oil is less likely to retain dirt.
Required Tools
Sponsored links by


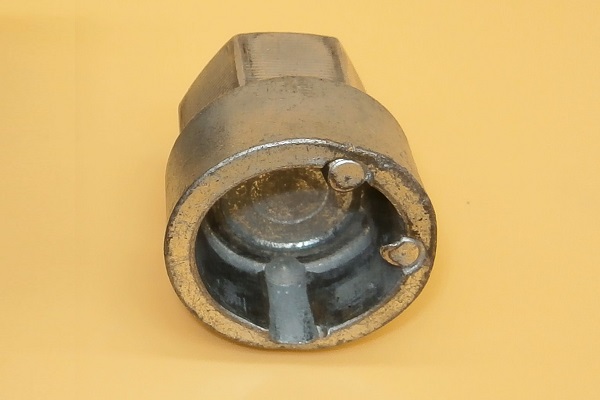
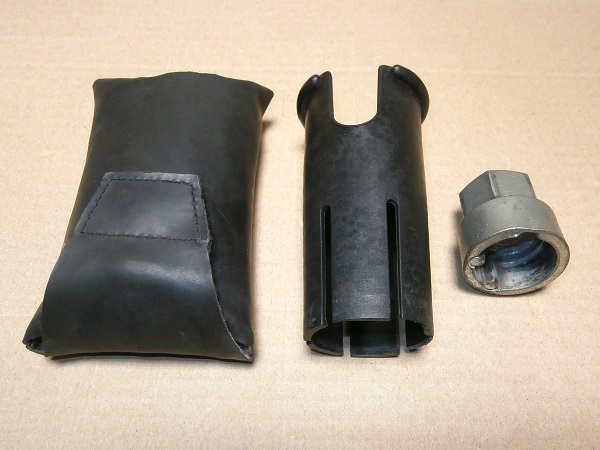
Anti-theft nut socket
ANR5436 : The anti-theft nut cover extractor is supplied as standard with the Defender.
The anti-theft nut socket is either supplied as standard with the Defender or included in the anti-theft nut kit. Of course, it is specific to the anti-theft nuts.
Advertisement
Remove the wheel
Op 01
Immobilize the Defender.
On the Defender, the handbrake does not lock the rear wheels like on most cars. It locks the rear output shaft of the transfer box. Therefore, the Defender is not immobilized when lifting a rear wheel because the differential allows the wheel remaining on the ground to rotate.
Here are Land Rover's recommendations for immobilizing the Defender before lifting a wheel :
• Engage the differential lock (its indicator light turns on).
• Set the transfer box to ''L'' position.
• Engage first gear.
• Apply the handbrake.
• Place wheel chocks in front of and behind the diagonally opposite wheel to the one being lifted.
• Engage the differential lock (its indicator light turns on).
• Set the transfer box to ''L'' position.
• Engage first gear.
• Apply the handbrake.
• Place wheel chocks in front of and behind the diagonally opposite wheel to the one being lifted.
Op 02
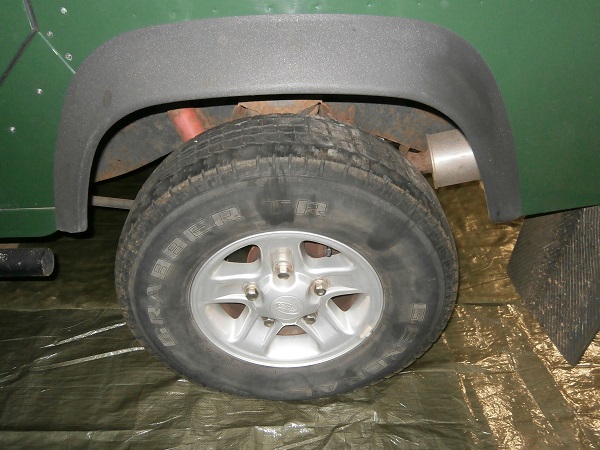
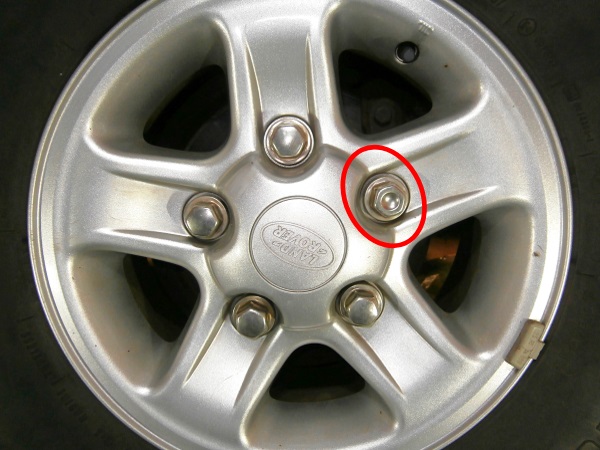
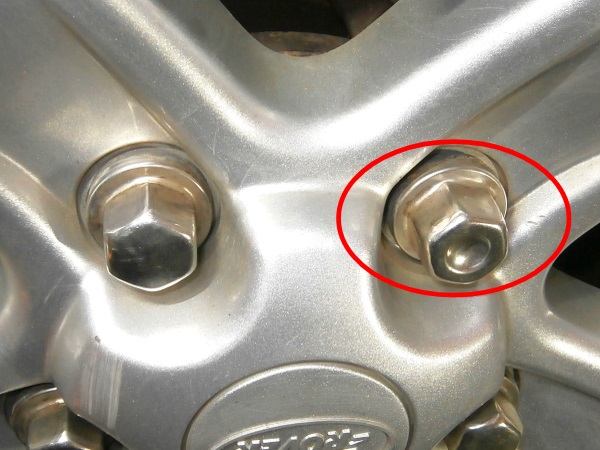
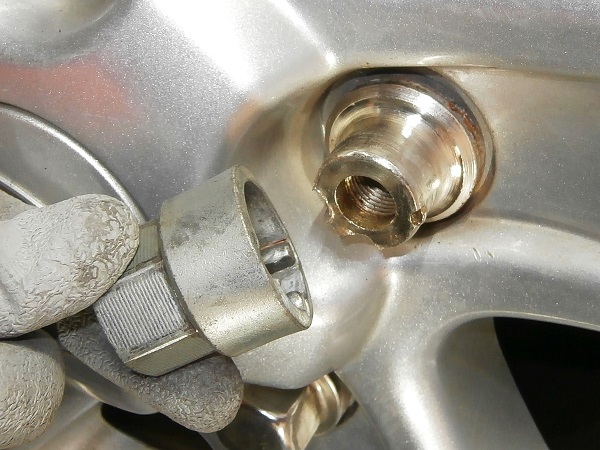
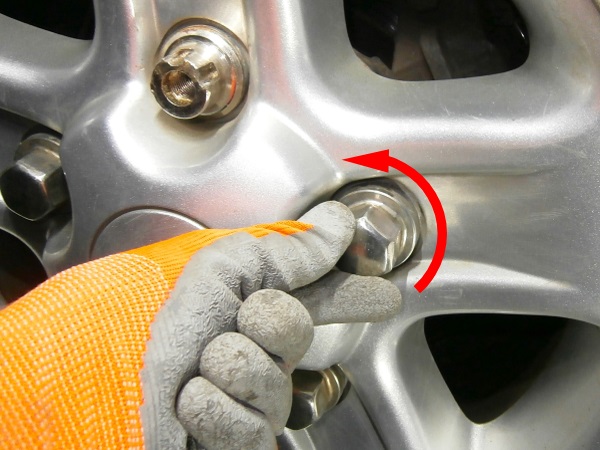
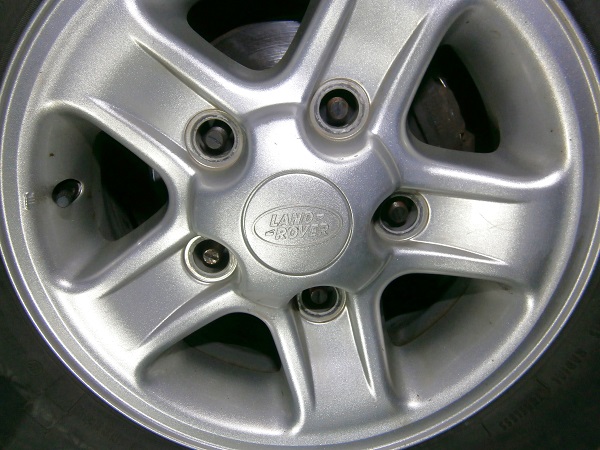
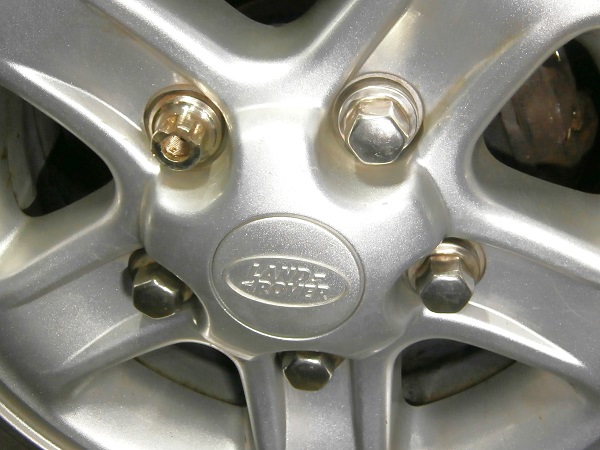
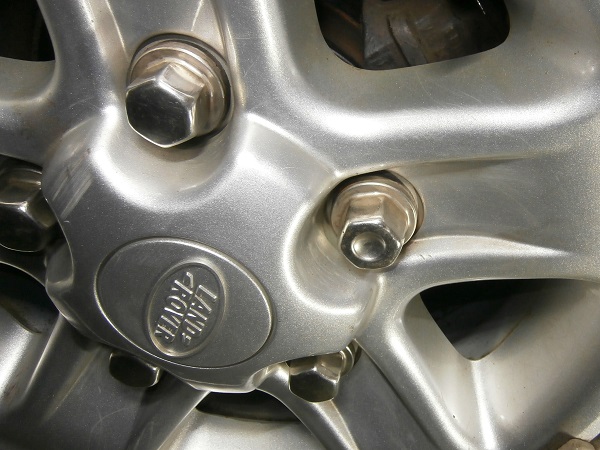
Identify the anti-theft nut among the 5 wheel fixing nuts (2nd photo).
The end of the anti-theft nut cover is curved, while the ends of the other 4 nuts are rounded (3rd photo).
Op 03
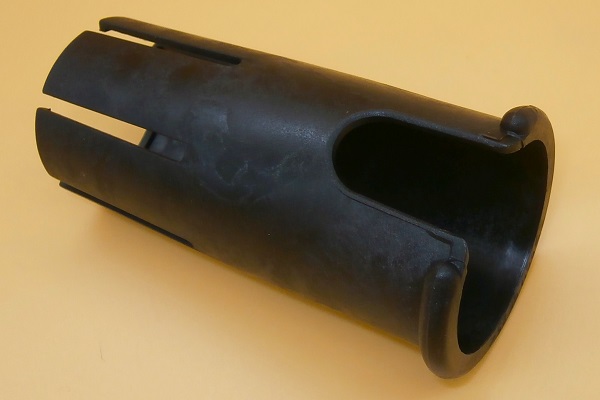
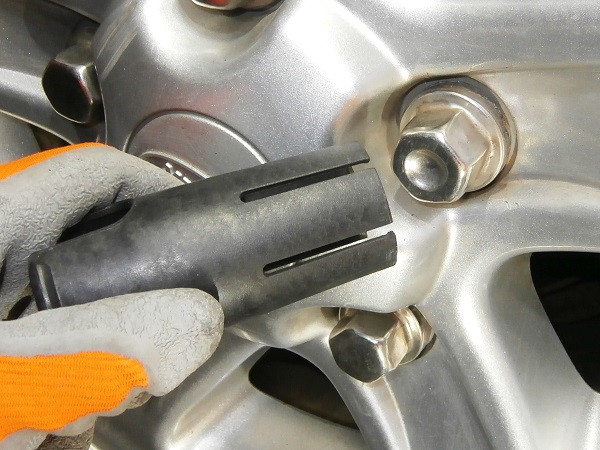
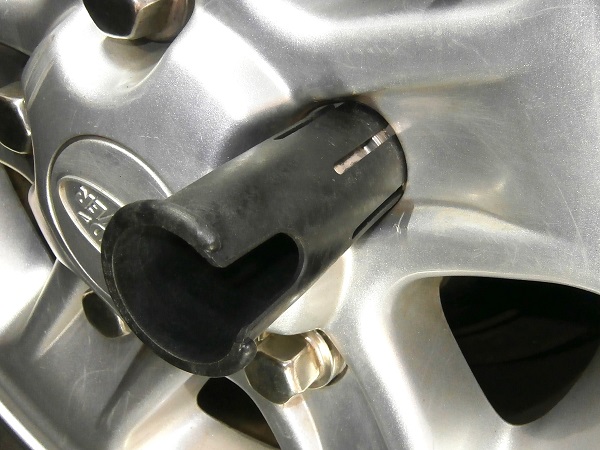
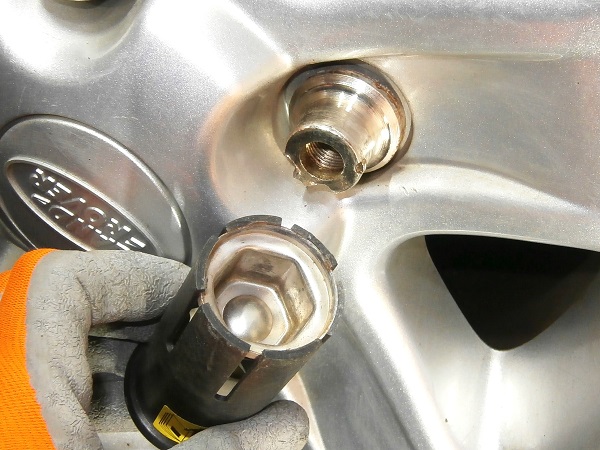
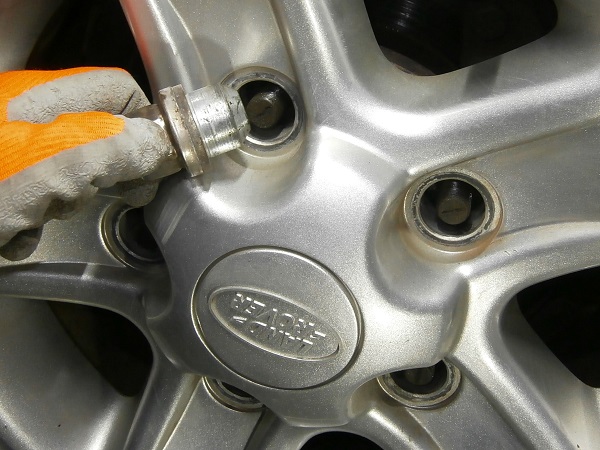
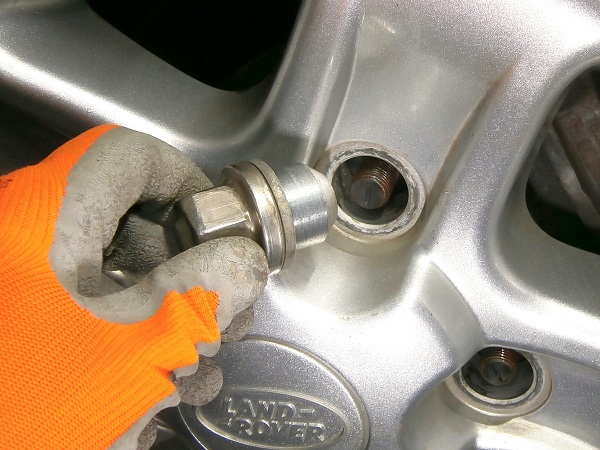
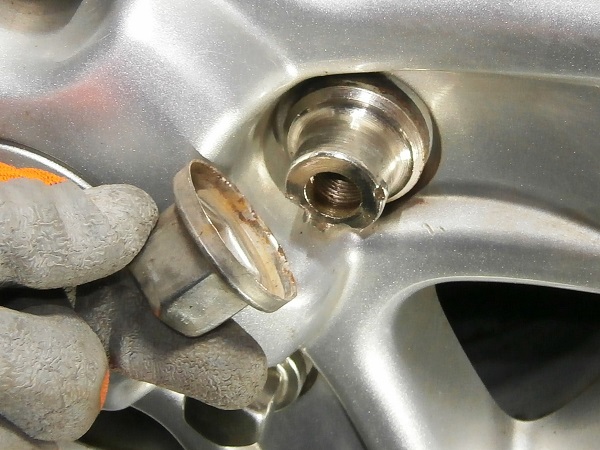
Remove the cover of the anti-theft nut. Use the nut cover extractor (ANR5436) and pull by hand.
The extractor is usually stored with the anti-theft nut socket in a small black bag (1st photo).
Only the anti-theft nut has a cover. The other 4 nuts are one-piece.
If you can't extract the nut cover, turn it a few times to unblock it. Use the 27 mm socket.
Op 04
Position the anti-theft nut socket on the anti-theft nut. Engage it by hand (2nd photo).
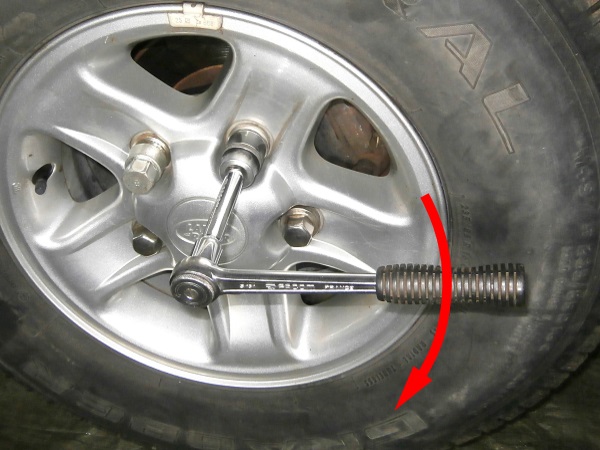
Slightly loosen the 5 wheel nuts including the anti-theft nut. Use the 27 mm socket.
Do not remove the nuts for now.
The wheel nuts are much easier to loosen when the wheel is on the ground.
Op 05
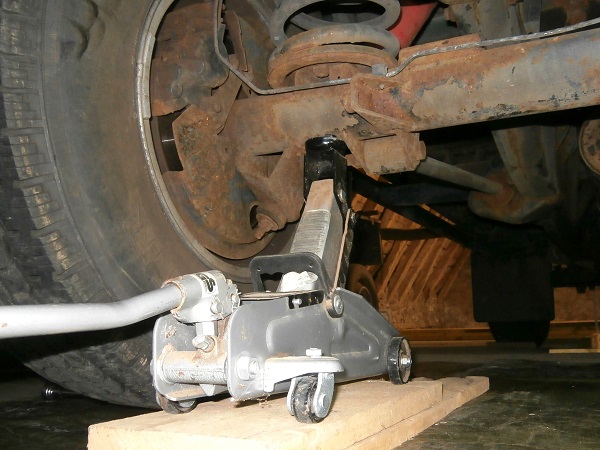
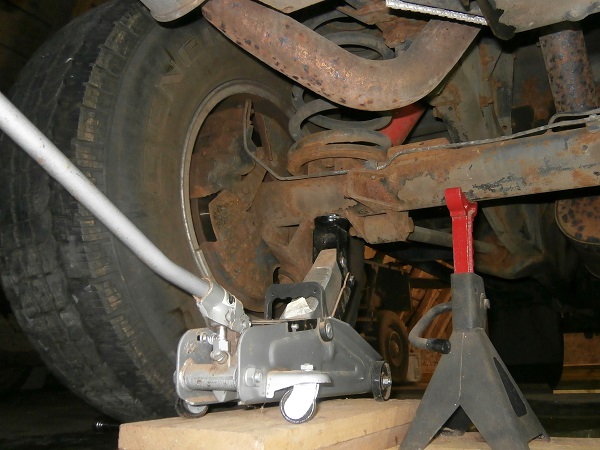
Lift the wheel. Use the jack.
Fit jack stands or rigid chocks to guarantee your safety.
Before working under the vehicle, make sure to secure it properly with jack stands or rigid chocks. Never work under a vehicle supported only by a jack. It is too dangerous.
Op 06
Remove the 5 wheel nuts. Unscrew by hand.
Op 07
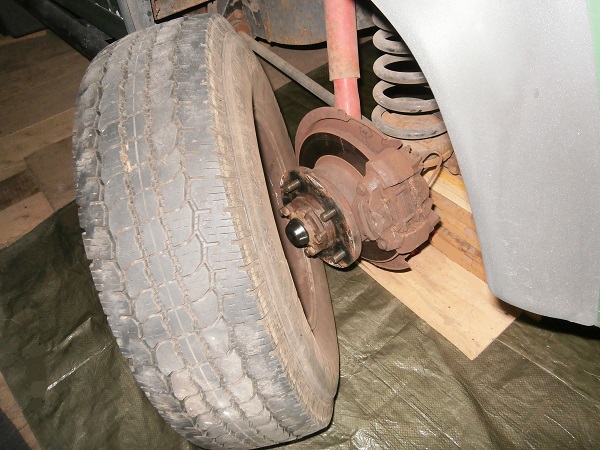
Remove the wheel. Pull by hand.
Sometimes the rim is stuck on the hub. This problem is due to electrolytic corrosion that occurs between the aluminum of the rim and the steel of the hub. In this case, tap the rim with a rubber or plastic mallet (from the inside out) while rotating the wheel gradually. The wheel should eventually come off.
Advertisement
Fit the wheel
Op 08
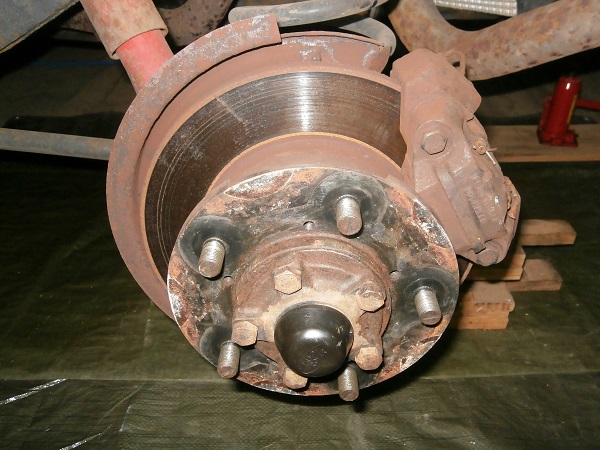
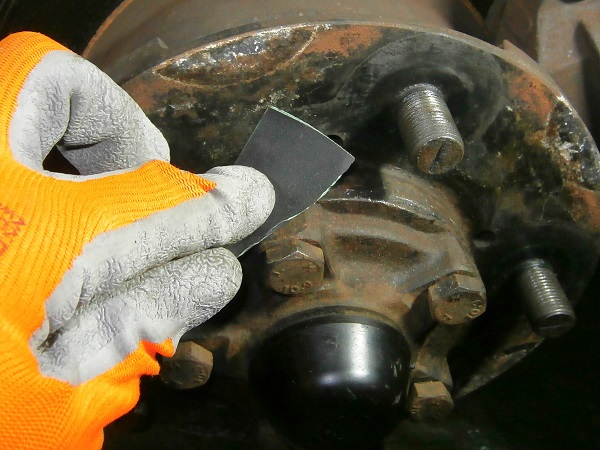
Remove any traces of oxidation on the surfaces of the hub that are in contact with the rim. Use very fine sandpaper.
Op 09
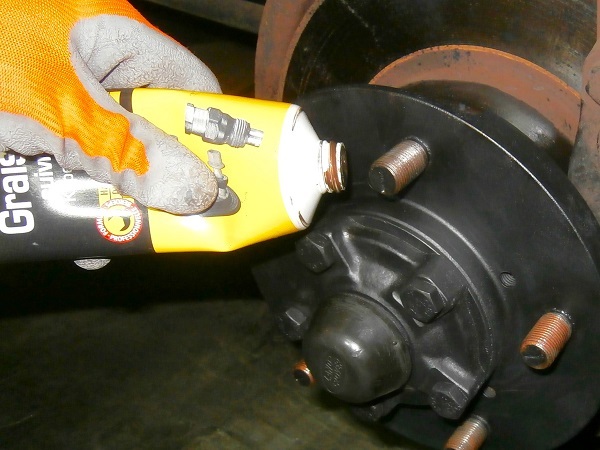
Thoroughly clean the wheel studs. Use a cloth.
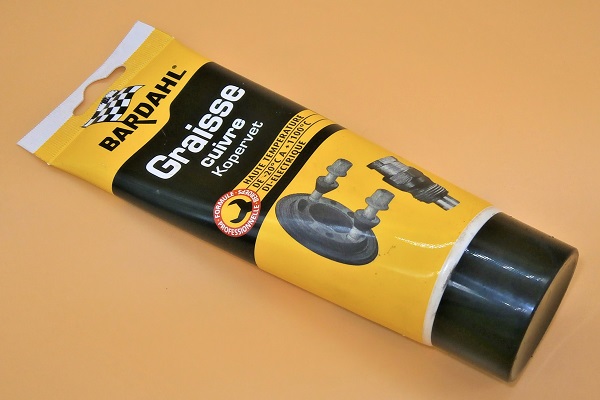
Lightly grease the wheel studs. Use copper grease.
The studs must be perfectly clean when tightening the nuts. Any dirt on the stud thread will distort the tightening torque.
With this thin film of grease, the nuts will be easier to unscrew during the next removal.
Opinions are divided on greasing the wheel studs. Some people strongly advise against greasing them. For my part, I have been greasing them for many years and I have never lost a wheel. It's up to you to choose.
Op 10
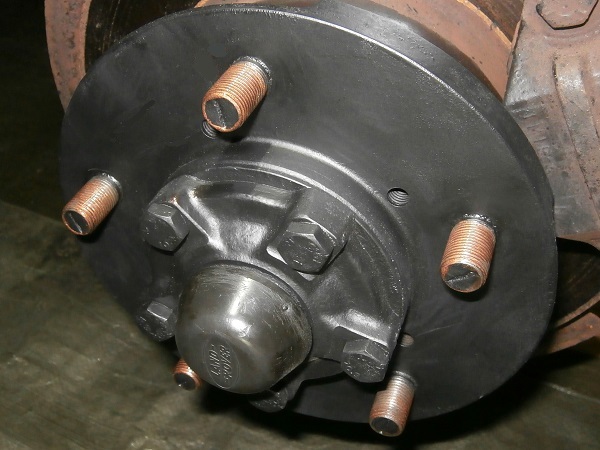
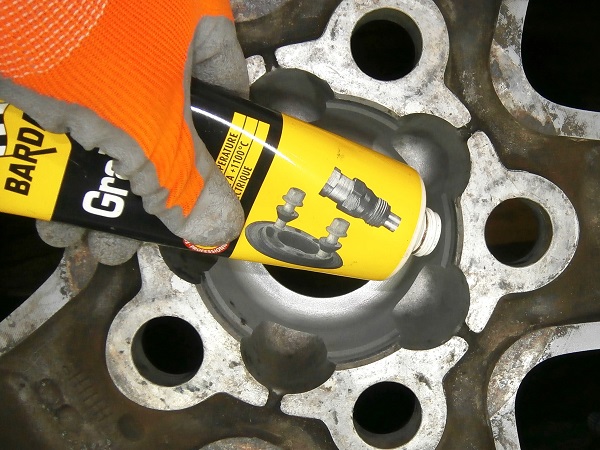
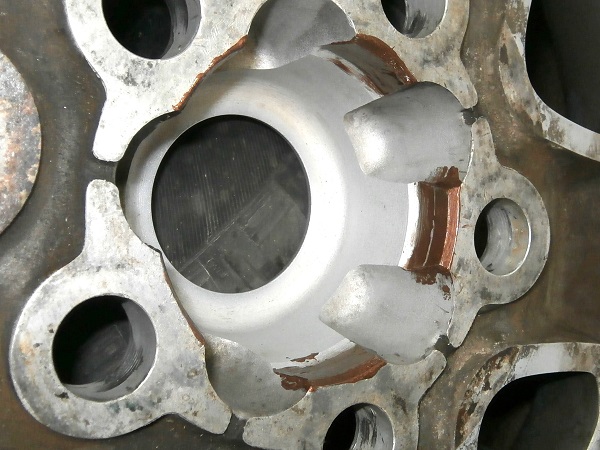
Lightly grease the surfaces of the rim that will come into contact with the hub, especially those that ensure the centering of the rim on the hub (1st photo). Use copper grease.
The grease will isolate the rim (in aluminum) from the hub (in steel). Electrolytic corrosion will be eliminated (or at least reduced).
Op 11
Position the wheel on the hub.
Op 12
Screw on the 5 wheel nuts. Start screwing them by hand.
Tighten the 4 wheel nuts (2nd photo) and the anti-theft nut (3rd photo). Use the anti-theft nut socket and the 27 mm socket.
Always start by screwing the wheel nuts by hand. This will prevent you from stripping the threads.
No need to overtighten. The final tightening will be done with the torque wrench when the wheel is on the ground.
Op 13
Lower the Defender to the ground. Remove the axle stands or supports.
Op 14
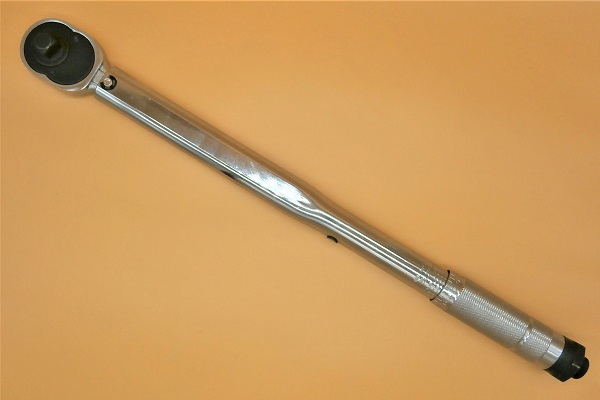
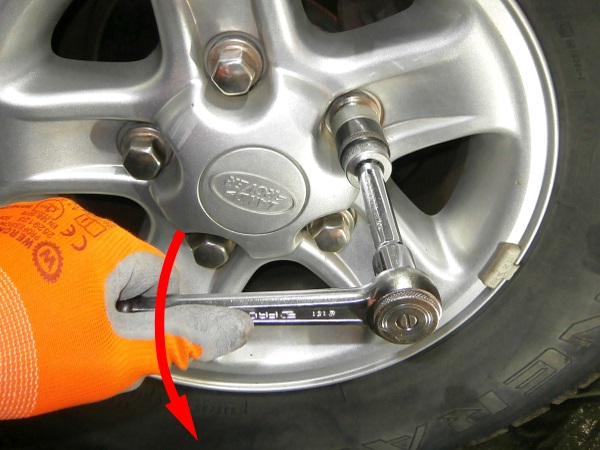
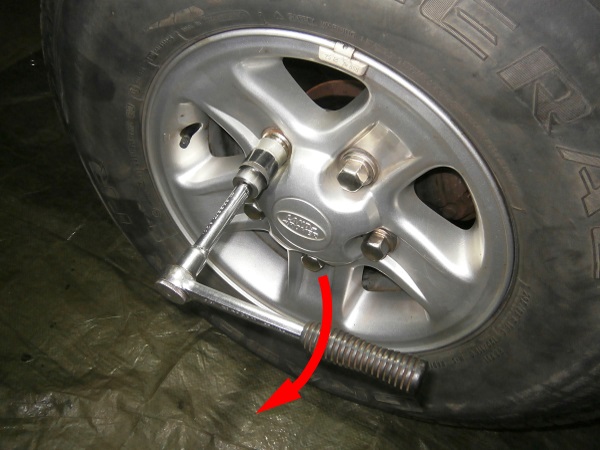
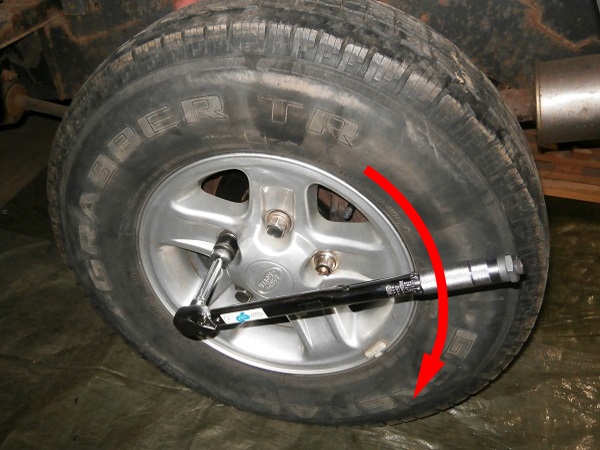
Tighten the 5 wheel nuts to the torque corresponding to the type of rim. Use the anti-theft nut socket, the 27 mm socket and the torque wrench.
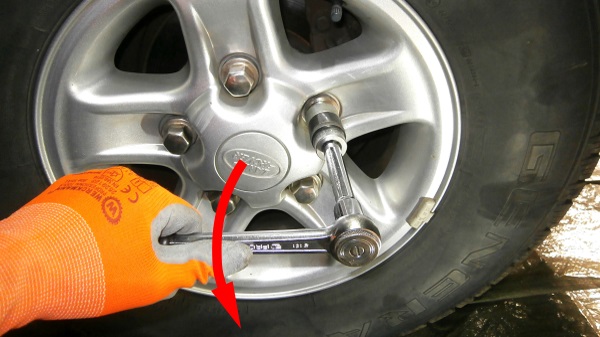
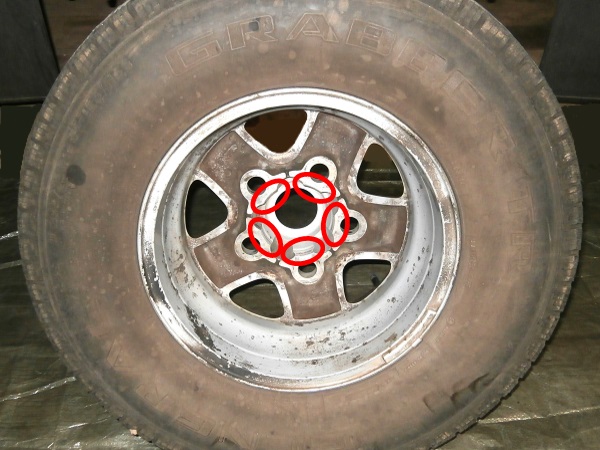
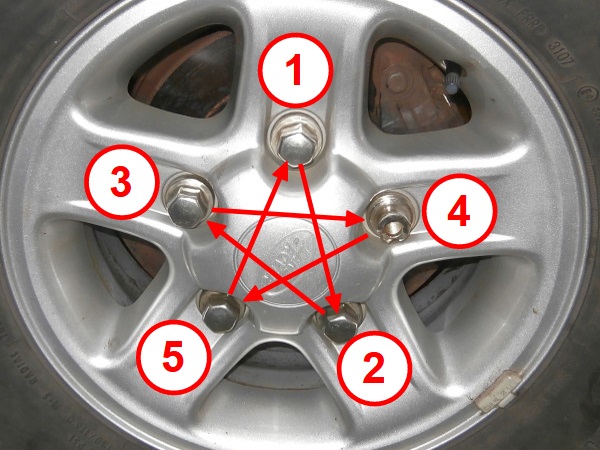
It is preferable to respect the tightening order of the nuts diagonally (1st photo).
The tightening torque of the wheel nuts is :
• 100 mN for steel rims.
• 130 mN for alloy rims.
• 170 mN for reinforced steel rims (Wolf).
• 100 mN for steel rims.
• 130 mN for alloy rims.
• 170 mN for reinforced steel rims (Wolf).
Op 15
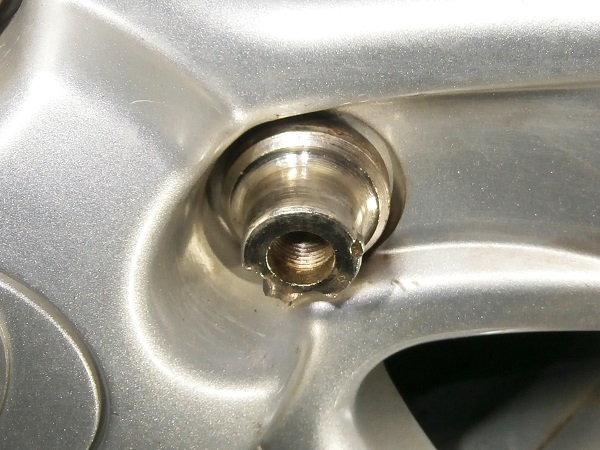
Position the anti-theft nut cover. Push by hand.
The End