This tutorial is also available in French
➔

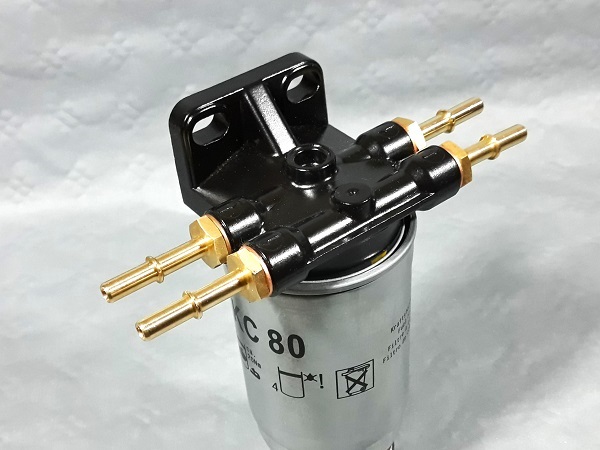
Fuel filter bracket valves change on Defender Td5
Vehicle ➔ Defender 110 Td5 2002
Difficulty ➔ Easy

Time ➔ 2 hours
Summary
Advertisement
Advertisement

Recommendations

Is the in-tank fuel pump in your Defender noisy ? Does the fuel system lose its prime during prolonged stops ?
Feel free to change the non return valve and the air bleed valve. These 2 parts may be the cause of your problem (faulty non return valve or defective O-ring).
Feel free to change the non return valve and the air bleed valve. These 2 parts may be the cause of your problem (faulty non return valve or defective O-ring).
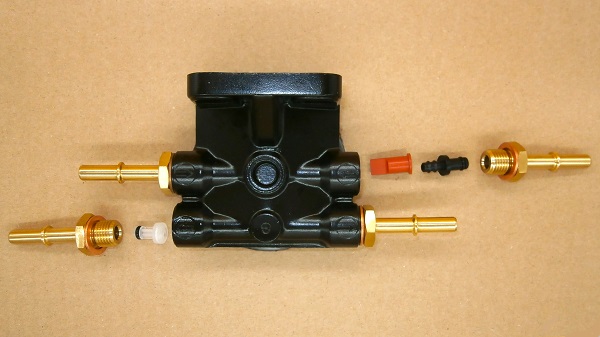
Fuel filter specificities

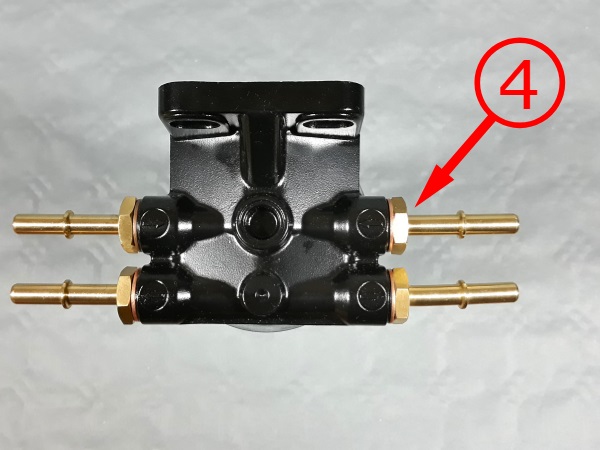
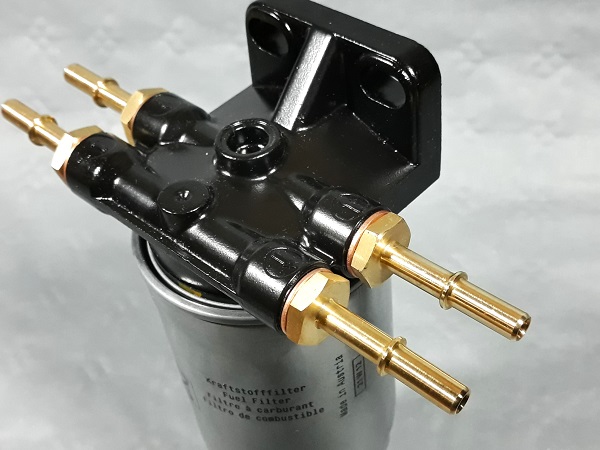
4 hoses are connected to the fuel filter bracket :
• No. 1 : Fuel inlet from the low pressure stage (0.75 bar) of the in-tank fuel pump.
• No. 2 : Return to tank / air bleed.
• No. 3 : Fuel outlet to the high pressure stage (4 bar) of the in-tank fuel pump and then to the engine.
• No. 4 : Inlet of excess fuel returning from the fuel pressure regulator.
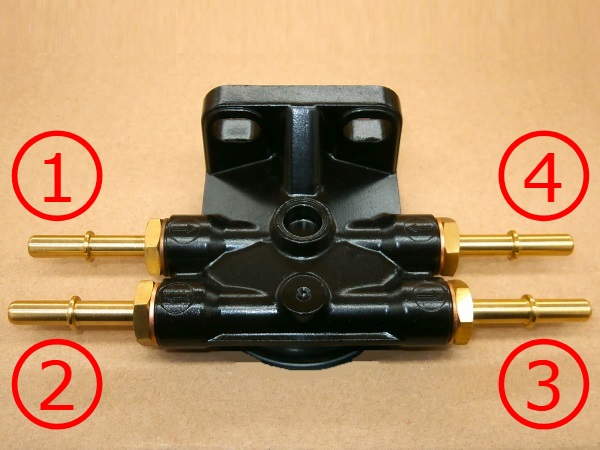
The non return valve is located on the excess fuel inlet (No. 4).
The air bleed valve is located on the return to tank / air bleed (No. 2).
Required Tools
Sponsored links by


Spare Parts
Our Partner

Packaging :
•
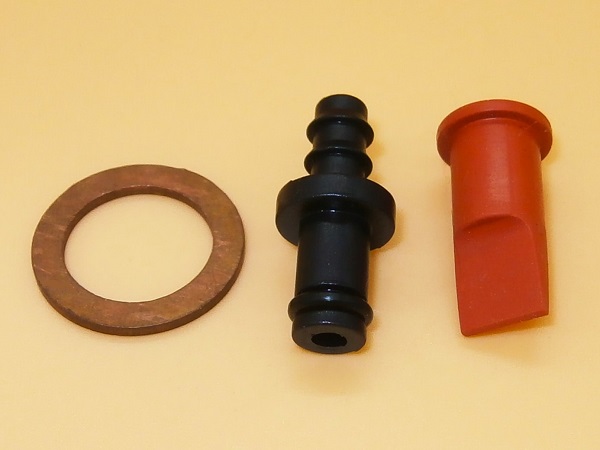
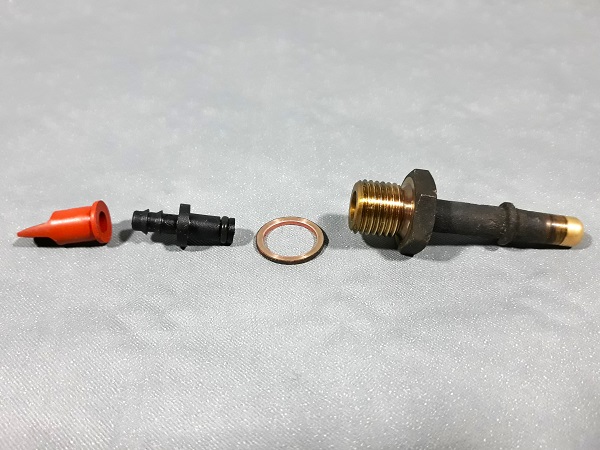
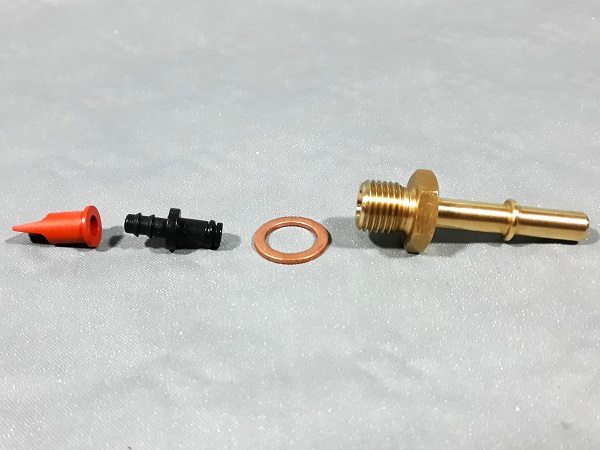
DA3950 : The kit includes 1 sealing washer, 1 junction piece (black piece), 1 O-ring and 1 non return valve (red duckbill-shaped piece).
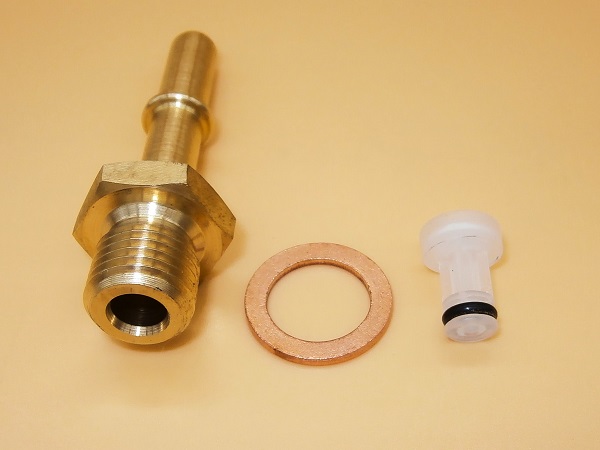
• WJN500110 : The kit includes 1 male connector, 1 sealing washer, 1 bleed valve and 1 O-ring.
• WJN500110 : The kit includes 1 male connector, 1 sealing washer, 1 bleed valve and 1 O-ring.
There is also the VUB503950 kit called a non return valve, but it does not include the duckbill. It is therefore preferable to order the DA3950 kit.
Advertisement
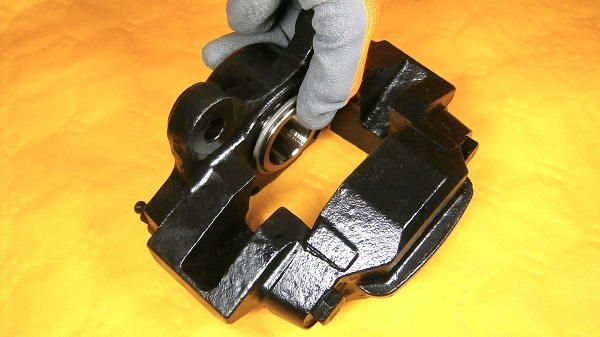
Remove the fuel filter bracket
Op 01
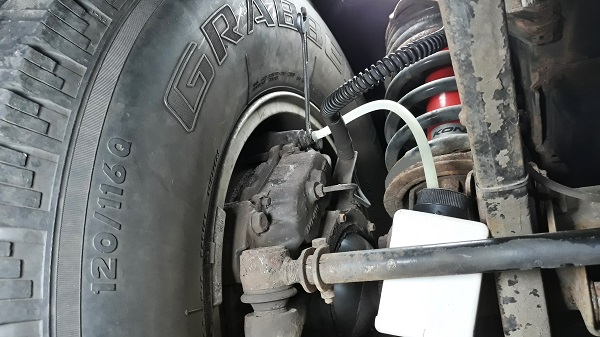
Remove the RH rear wheel (➔ see the tutorial ''Wheel removal on Defender'' Op 01 to 07).
Before working under the vehicle, make sure to secure it properly with jack stands or rigid chocks. Never work under a vehicle supported only by a jack. It is too dangerous.
Op 02
Remove the fuel filter shield (➔ see the tutorial ''Fuel filter change on Defender Td5'' Op 02 to 04).
Op 03
Remove the fuel filter bracket (➔ see tutorial ''Fuel filter bracket change on Defender Td5'' Op 03 to 10).
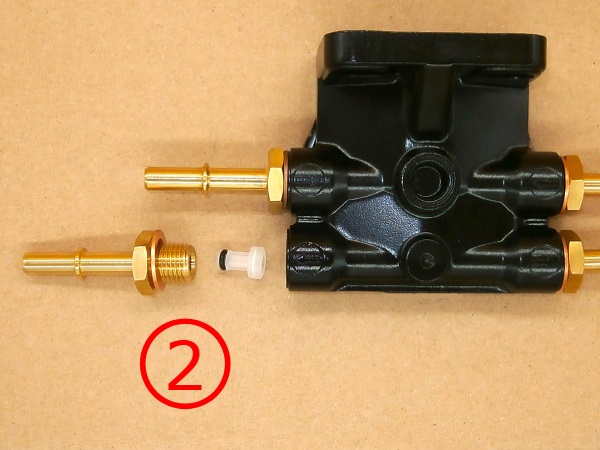
Change the non return valve
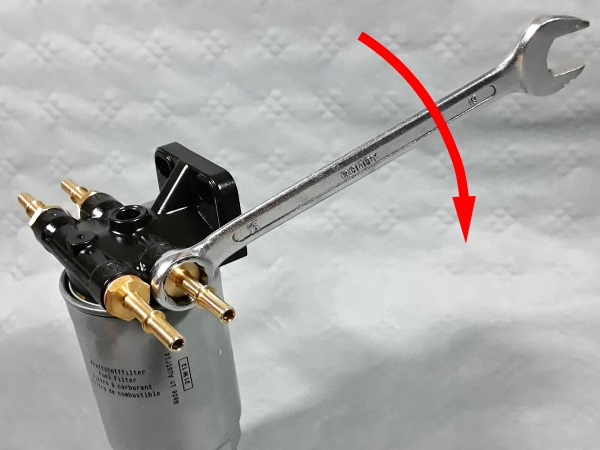
Op 04
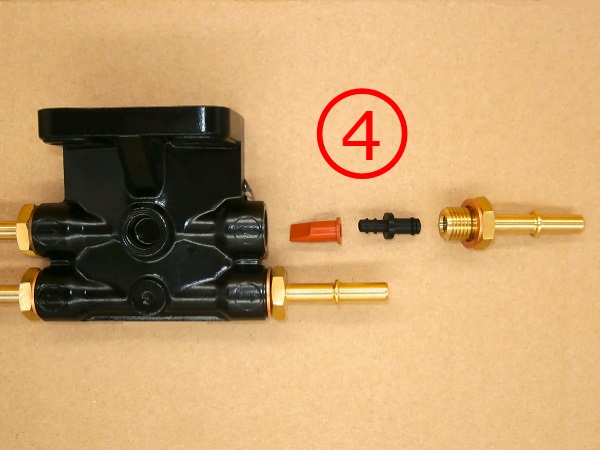
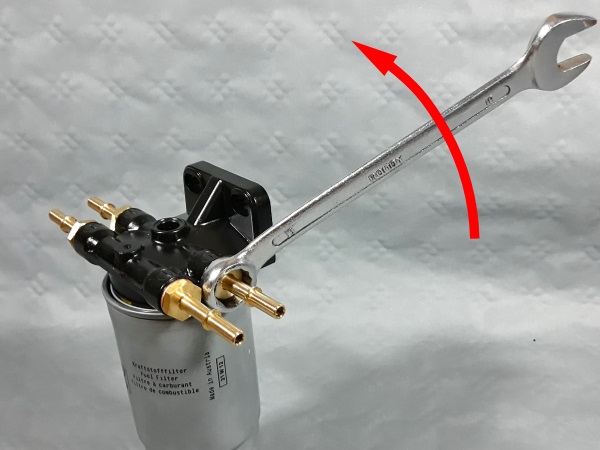
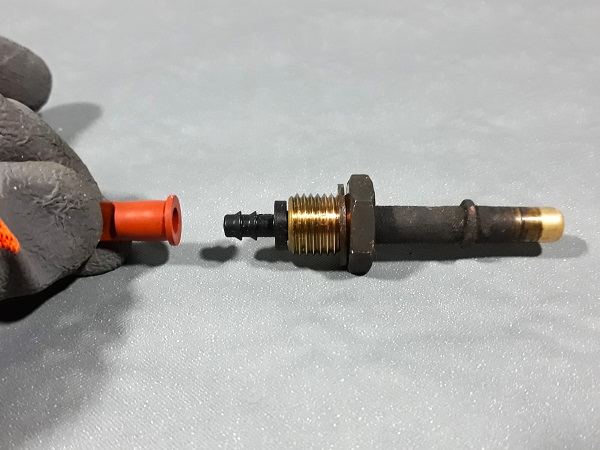
Unscrew connector No. 4. Use the 19 mm spanner.
Connector No. 4 is screwed onto the fuel filter bracket towards the front of the Defender on the chassis side.
This is the inlet for excess fuel returning from the fuel pressure regulator.
This is the inlet for excess fuel returning from the fuel pressure regulator.
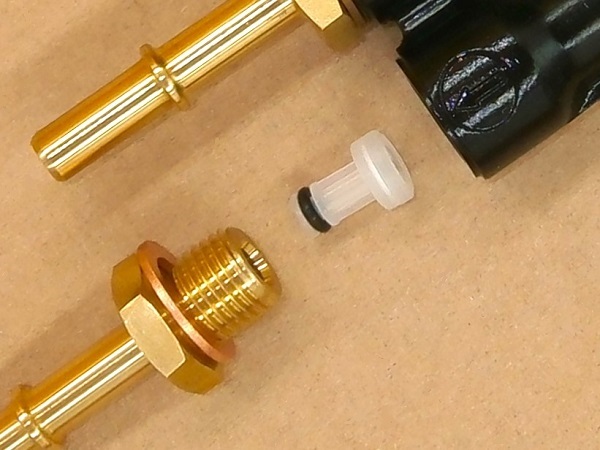
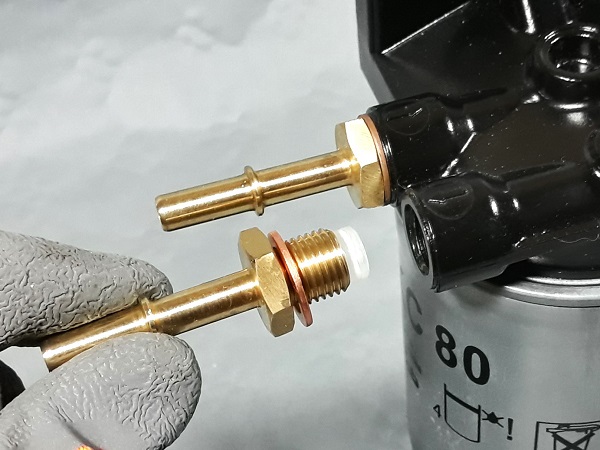
Op 05
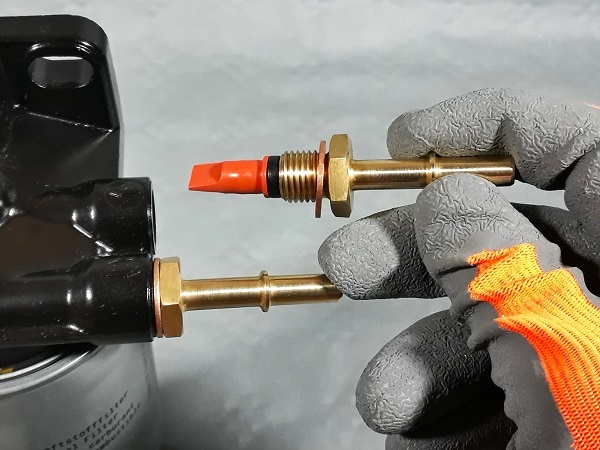
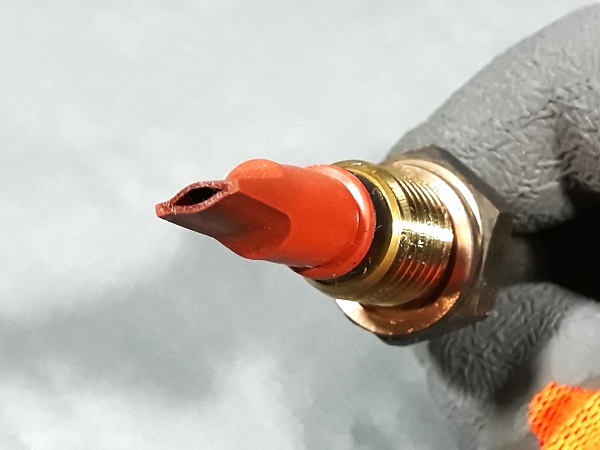
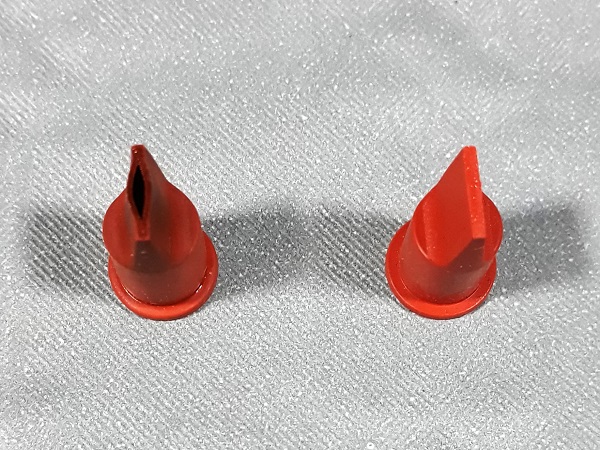
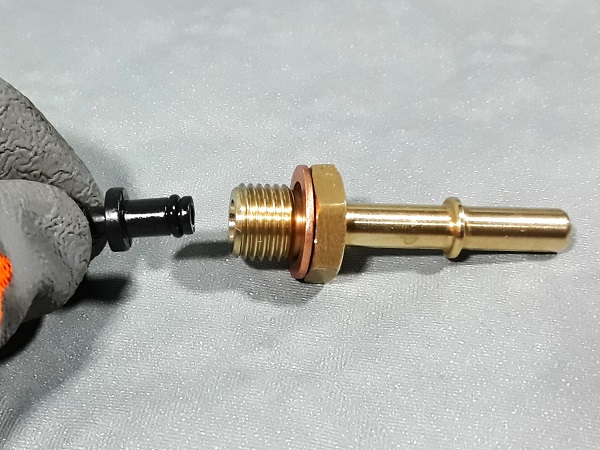
Check the condition of the non return valve.
If the non return valve remains open (1st photo) it must be replaced with a new valve.
In the 2nd photo, you can see the difference between a used non return valve (LH) and a new one (RH).
Op 06
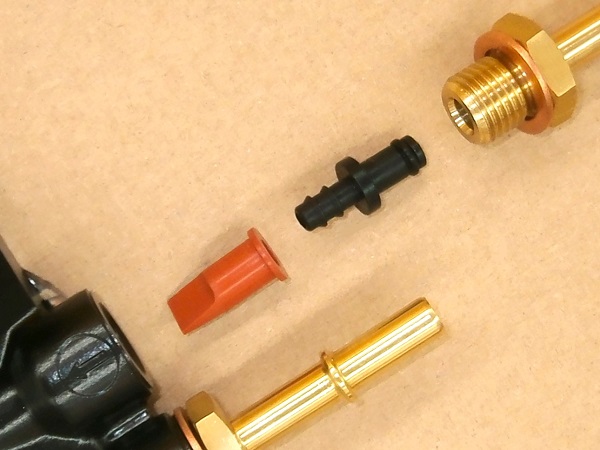
Remove the non return valve, junction piece and sealing washer from the connector. Pull by hand.
Op 07
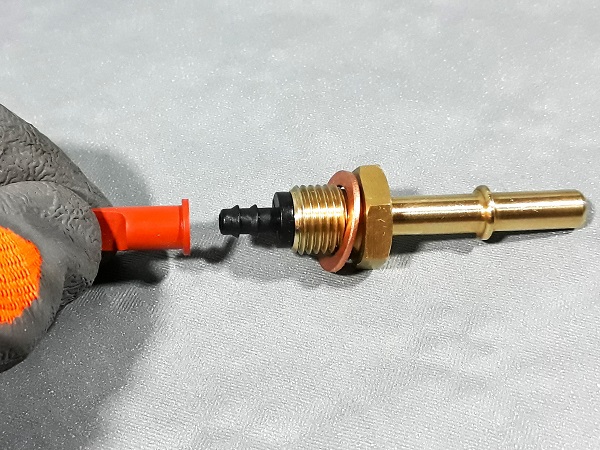
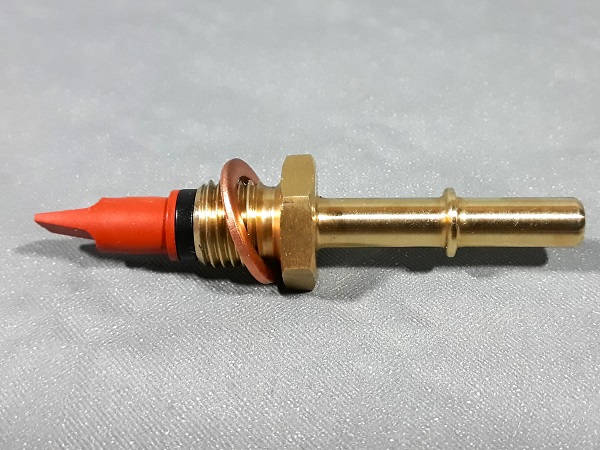
Fit the new non return valve kit (DA3950) on the connector. Engage the parts by hand.
Put a few drops of fuel on the O-ring of the junction piece before placing it in the connector (2nd photo).
Op 08
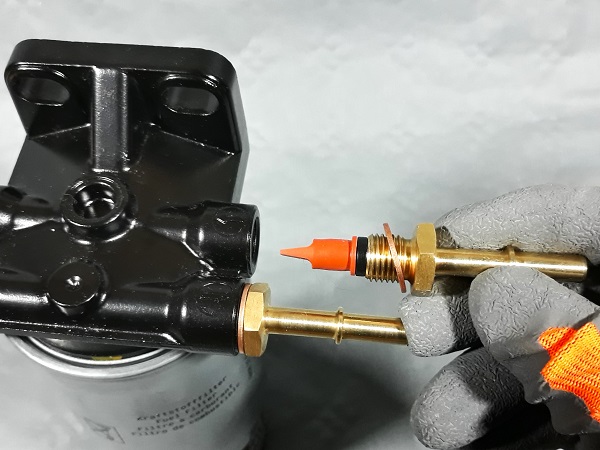
Screw the connector onto the fuel filter bracket. Use the 19 mm spanner.
Advertisement
Change the air bleed valve
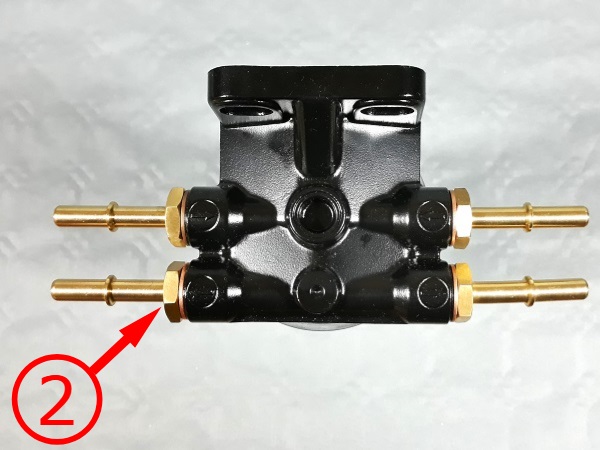
Op 09
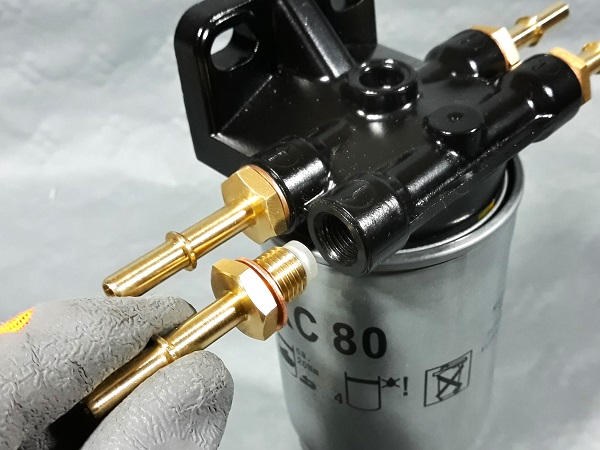
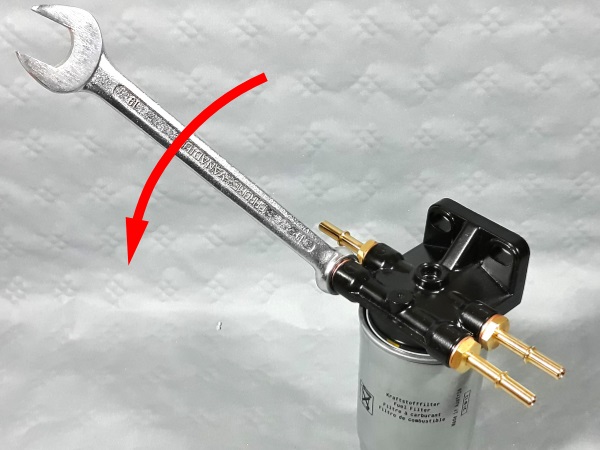
Unscrew connector No. 2. Use the 19 mm spanner.
Connector No. 2 is screwed onto the fuel filter bracket towards the rear of the Defender away from the chassis.
This is the return to tank / air bleed.
This is the return to tank / air bleed.

Op 10
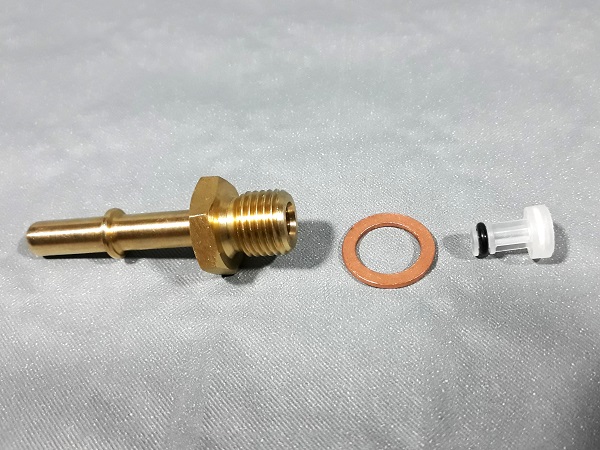
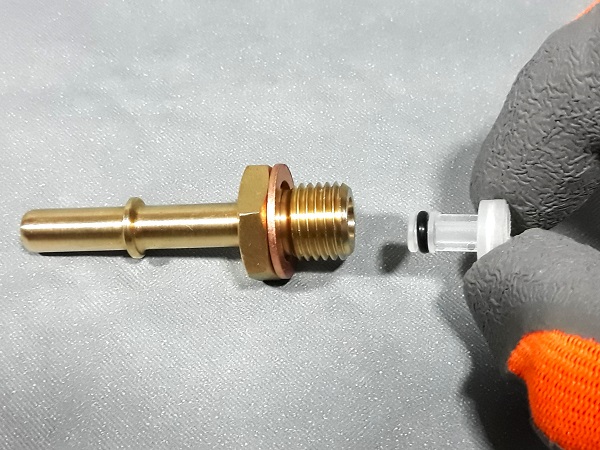
Assemble the new bleed valve kit (WJN500110). Engage the parts by hand.
Put a few drops of fuel on the O-ring of the bleed valve before placing it in the connector (2nd photo).

Op 11
Screw the connector onto the fuel filter bracket. Use the 19 mm spanner.
Advertisement
Fit the fuel filter bracket
Op 12
Fit the fuel filter bracket (➔ see tutorial ''Fuel filter bracket change on Defender Td5'' Op 11 to 13).
Op 13
Fit the fuel filter shield (➔ see the tutorial ''Fuel filter change on Defender Td5'' Op 12 to 15).
Op 14
Put the wheel back in place (➔ see the tutorial ''Wheel removal on Defender'' Op 08 to 15).
Bleed the fuel system
Op 15
Bleed the fuel system and check for leaks (➔ see the tutorial ''Fuel filter change on Defender Td5'' Op 17 and 18).
The End