This tutorial is also available in French
➔

Transfer box rear oil seal change on Defender Td4
Vehicle ➔ Defender 90 Td4 2013
Difficulty ➔ Medium

Time ➔ 3 hours
Summary
Advertisement
Advertisement

Recommendations

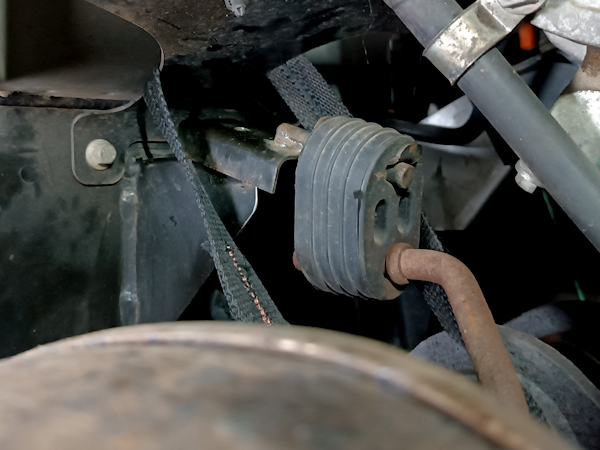
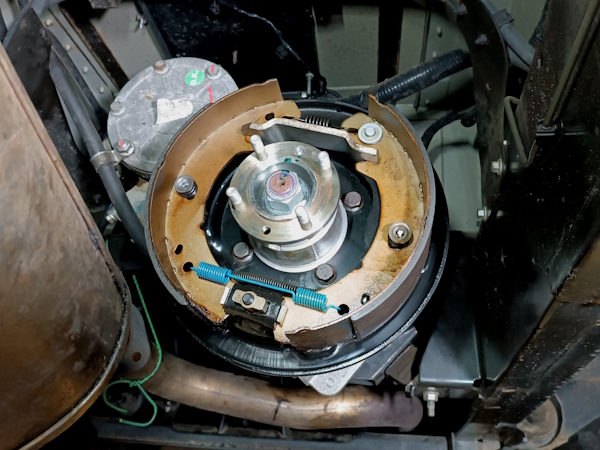
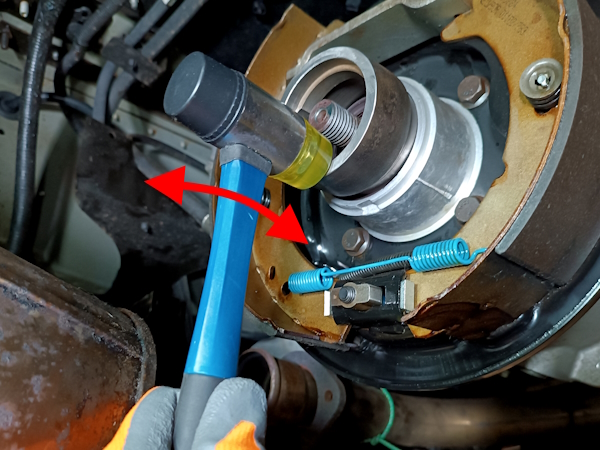
As soon as you see an oil leak in the lower part of the handbrake drum, don't hesitate to change the rear transfer box oil seal. Indeed, if you delay, the oil may pollute the brake shoes. The handbrake would then be ineffective.
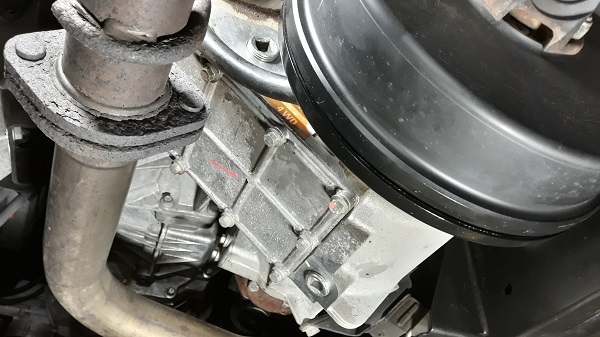
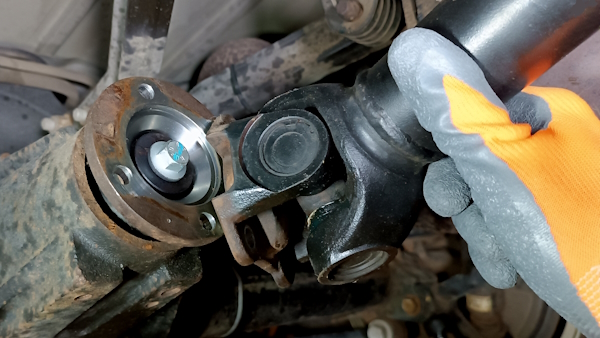
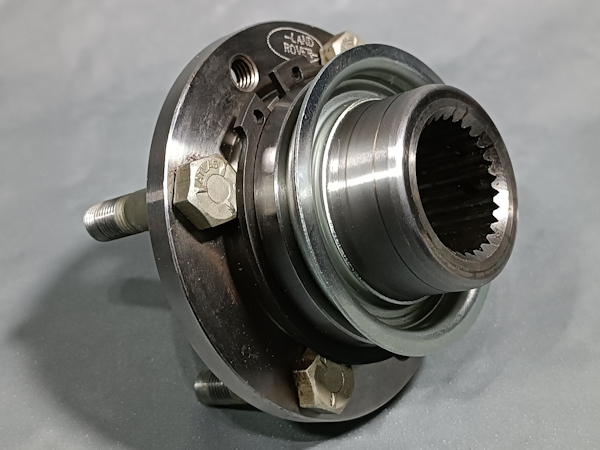
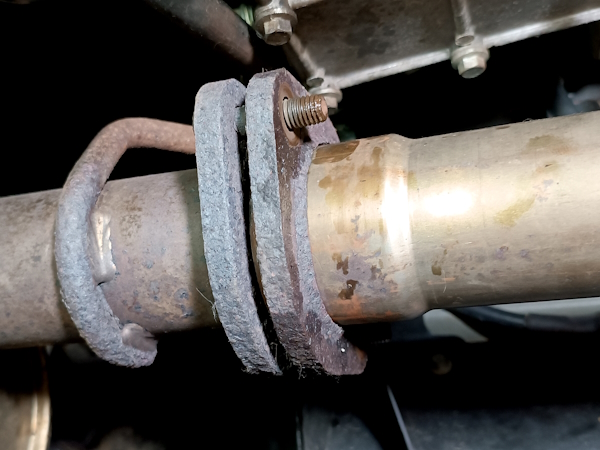
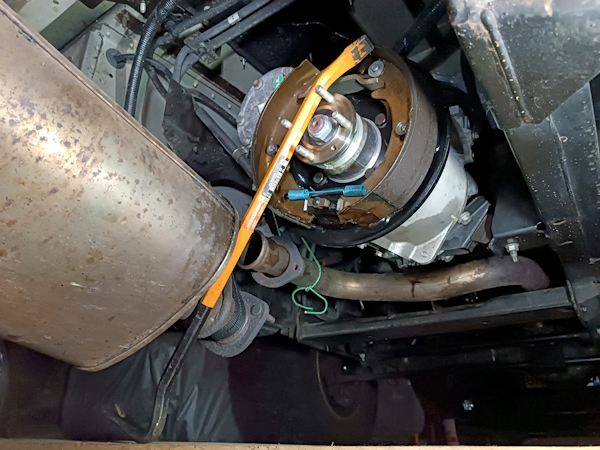
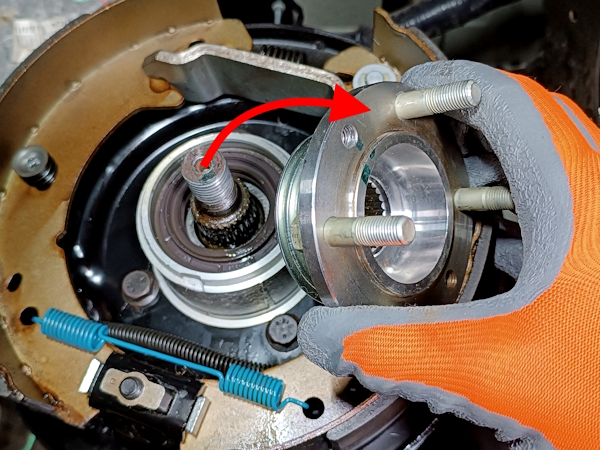
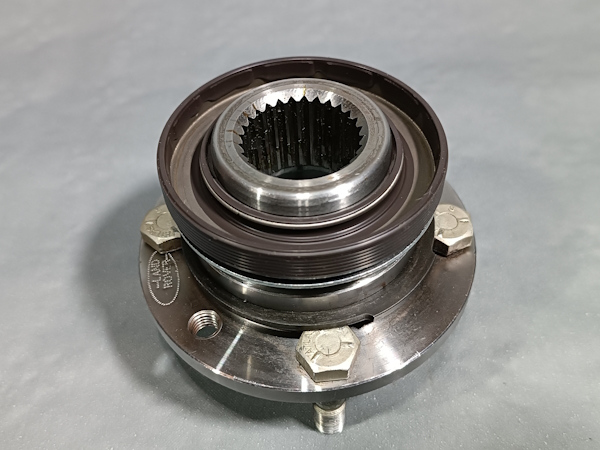
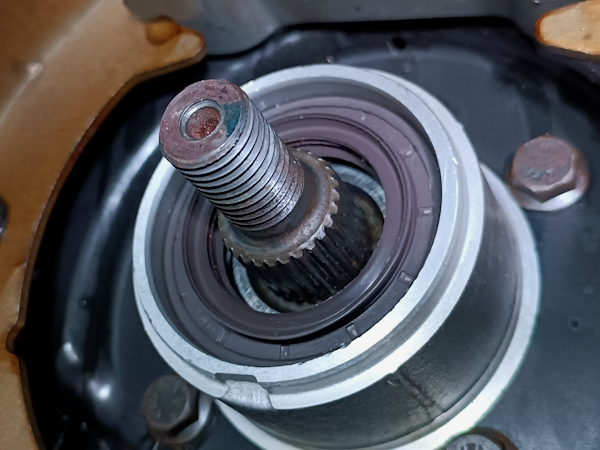
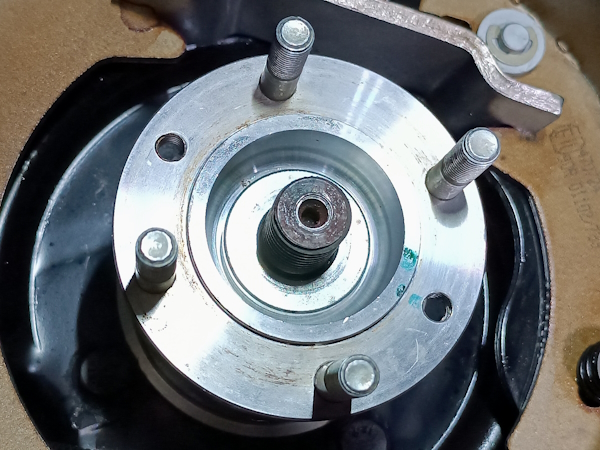
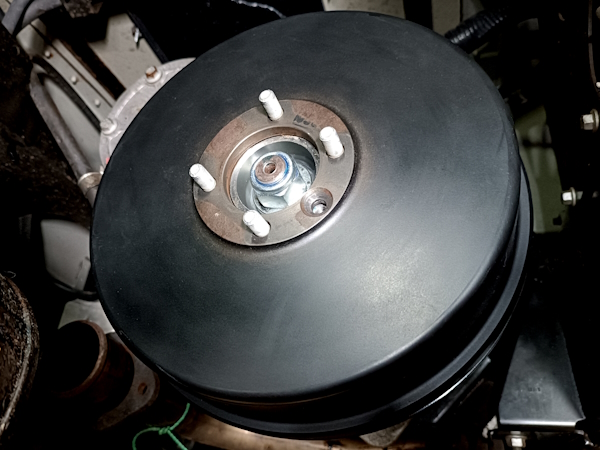
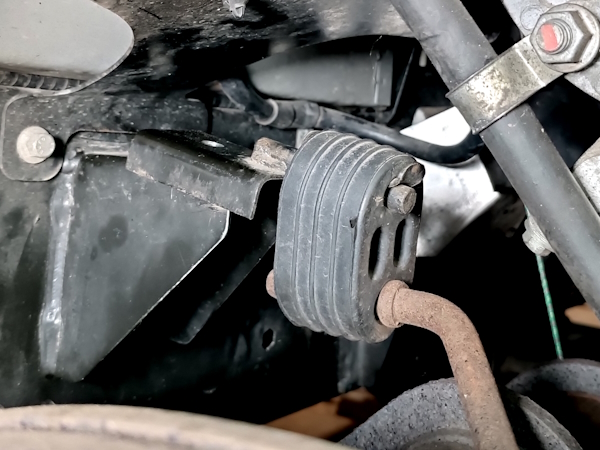
On our Defender, a 2013 90 Td4, the rear transfer box flange has an integrated mudguard (2nd photo). The mudguard is force-fitted and cannot be separated from the flange (except by heating the mudguard very slightly).

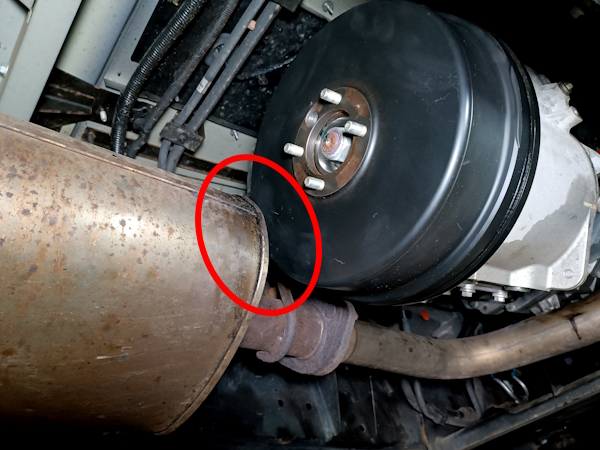
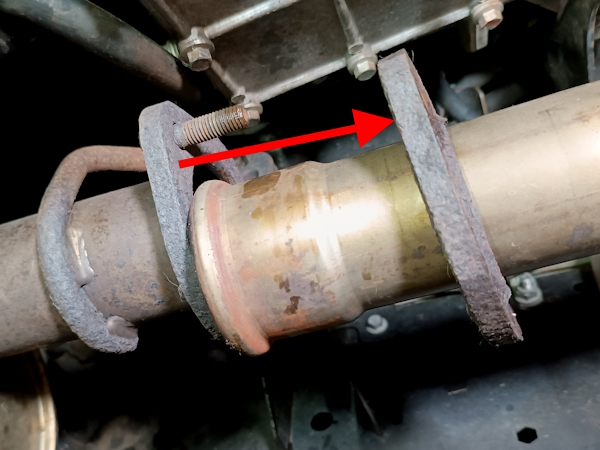
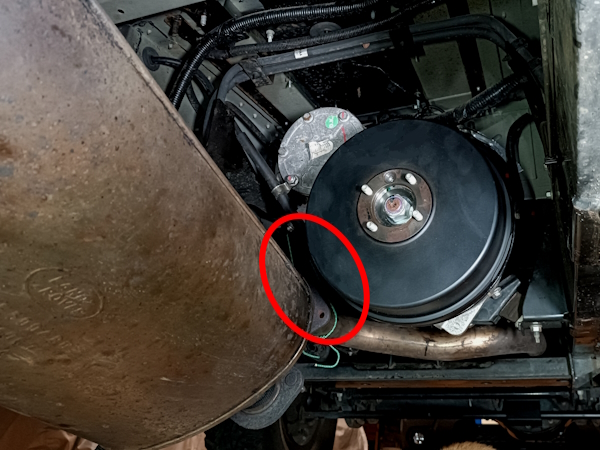
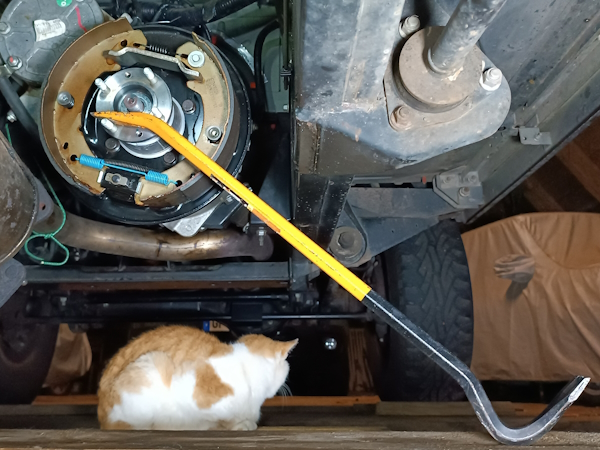
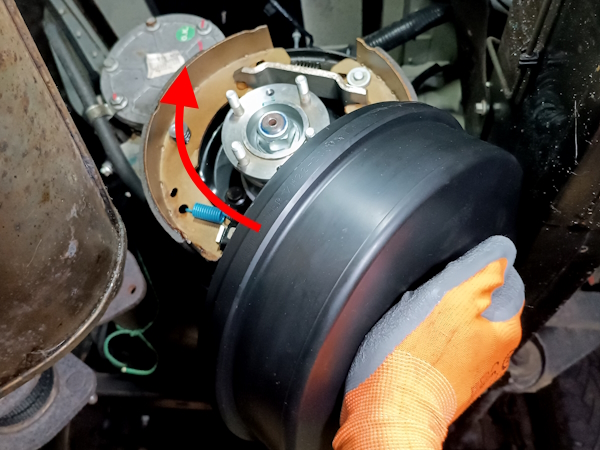
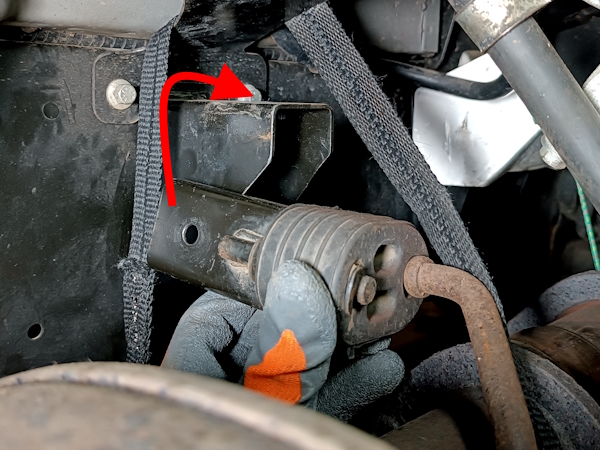
On the Defender 90 Td4, when removing it, the handbrake drum hits against the central exhaust silencer (1st photo). To move this silencer to the side, simply disconnect it from the downpipe and release its front mounting rubber. The front part of the silencer can then be lowered and the drum removed (2nd photo).

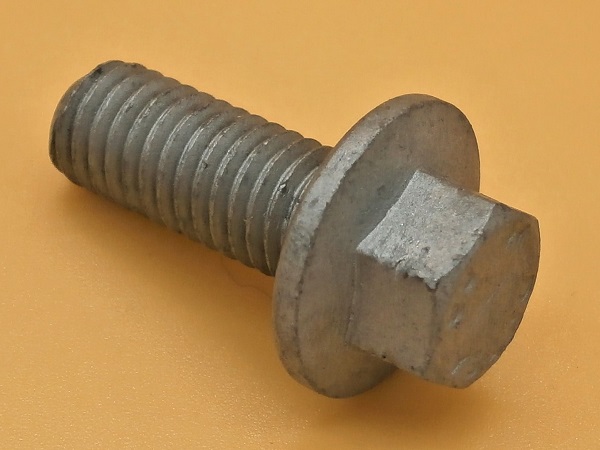
Despite all the precautions you will take when unscrewing it, you will almost certainly damage the head of the drum fixing bolt (SA108201L). As a precaution, include a new bolt in your order.
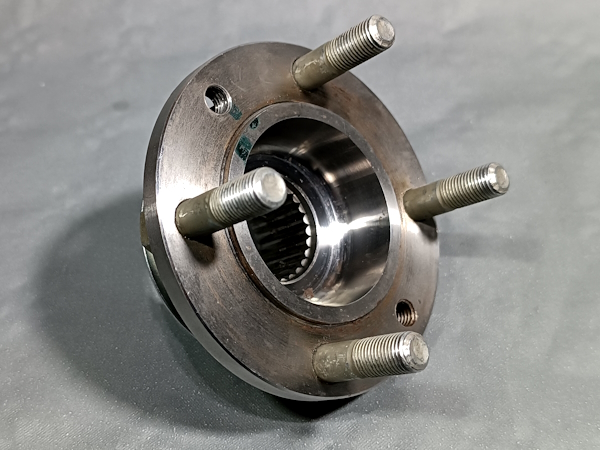
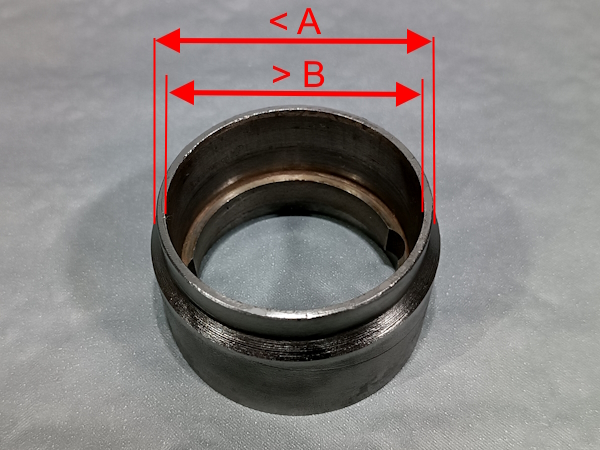
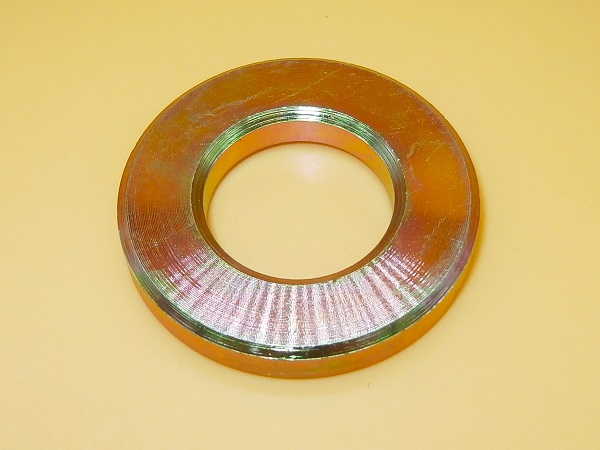
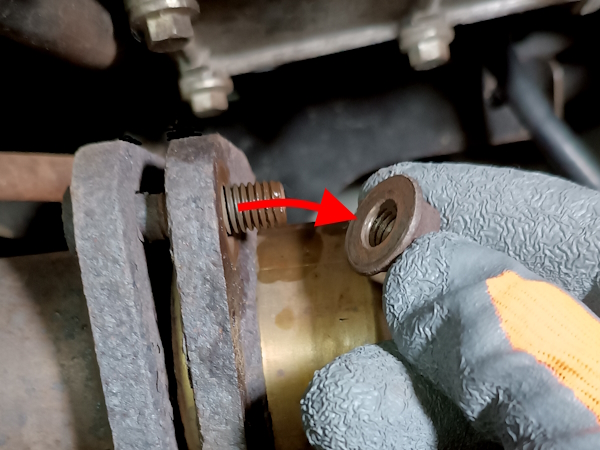
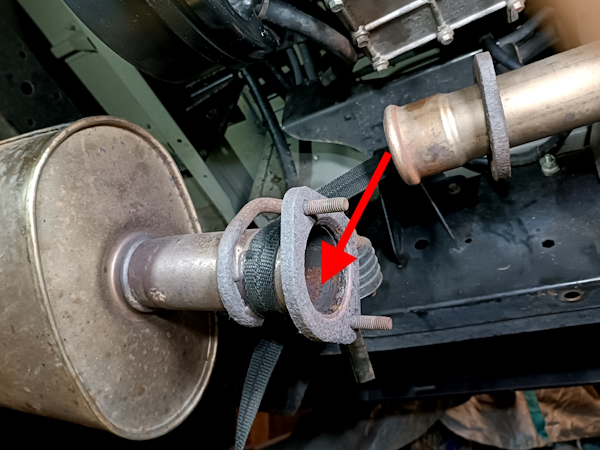
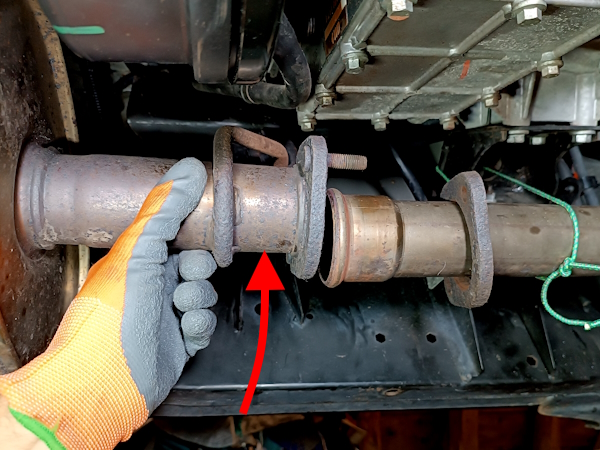
For installing the new oil seal (1st photo), you will need a bushing (2nd photo). Take what you can find.
The bushing simply needs to have :
• An external Ø slightly smaller than the external Ø of the oil seal : 72 mm (mark A).
• An internal Ø larger than the Ø of the lip located on the side of the oil seal : 60 mm (mark B).
This bushing will allow you to insert the seal into its housing without deforming its frame.

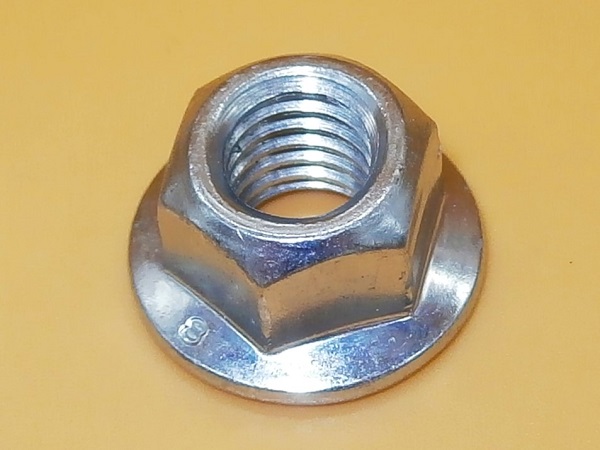
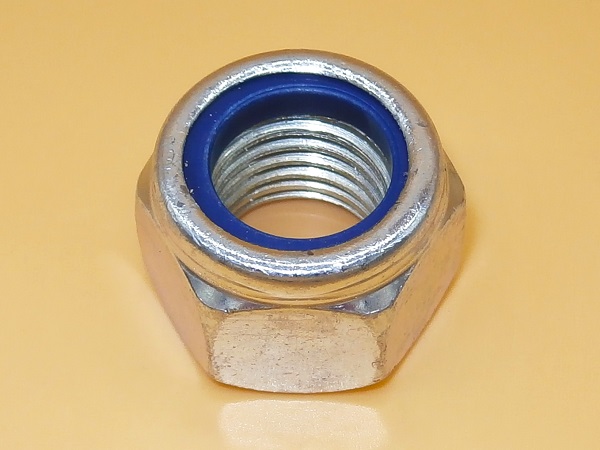
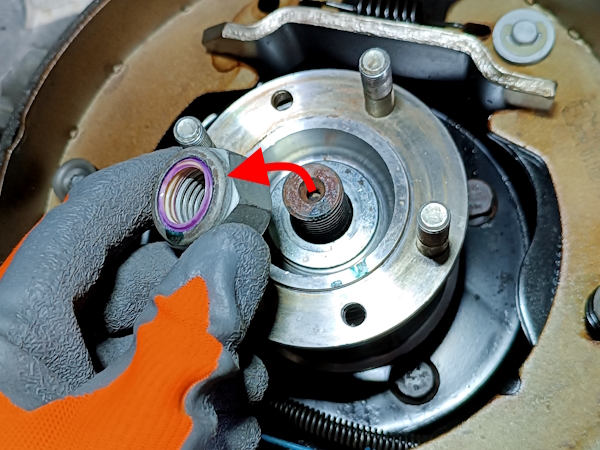
The transfer box flange nut (NY120041L) is a nyloc nut. As a safety measure, whenever a nyloc nut is removed, it is preferable to refit a new nut.
Required Tools
Sponsored links by


Spare Parts
Our Partner


Advertisement
Drain the transfer box
Op 01
Drain the transfer box (➔ see the tutorial ''Transfer box oil change on Defender Td4'' Op 01 to 04).
Remove the rear propshaft
Op 02
Remove the rear propshaft (➔ see the tutorial ''Rear propshaft removal on Defender 90 Td4'' Op 01 to 08).
Move the exhaust silencer
Op 03
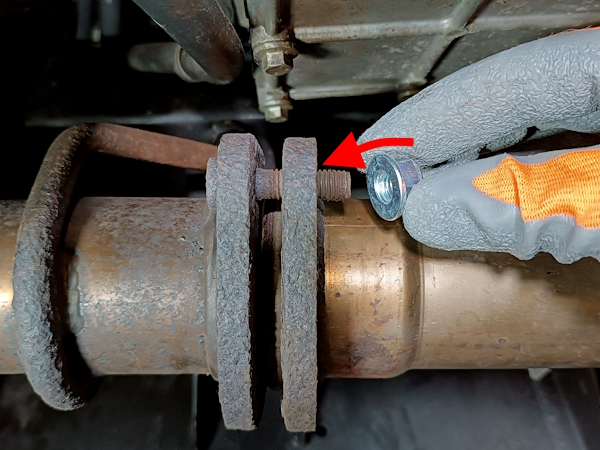
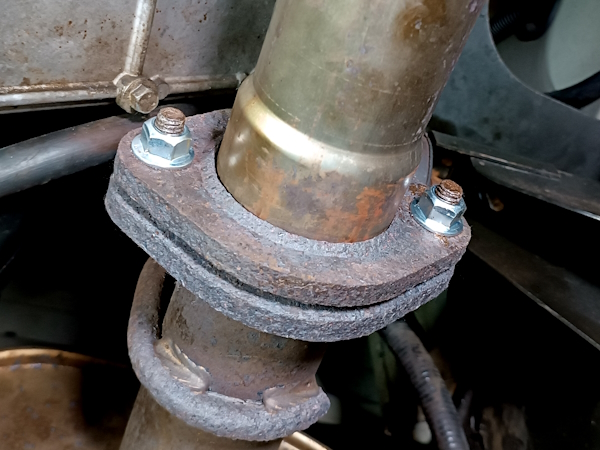
Unscrew the 2 fixing nuts of the downpipe on the central silencer. Use a 15 mm spanner.
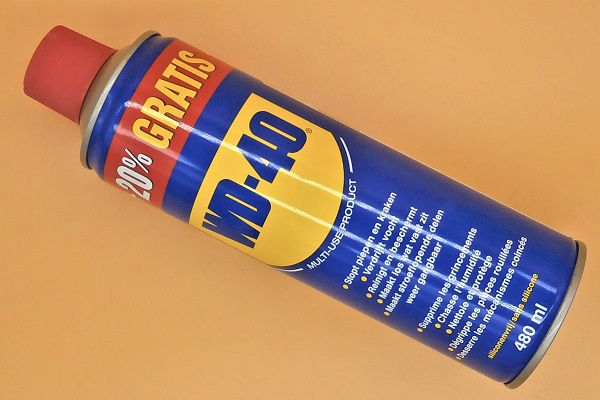
Do not hesitate to spray penetrating oil on the bolts because they are very often oxidized.

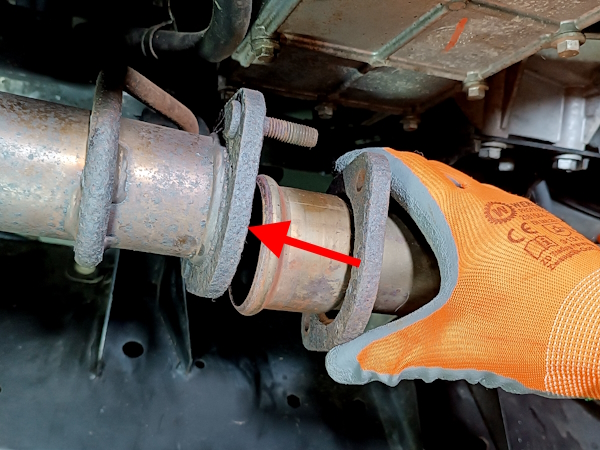
Op 04
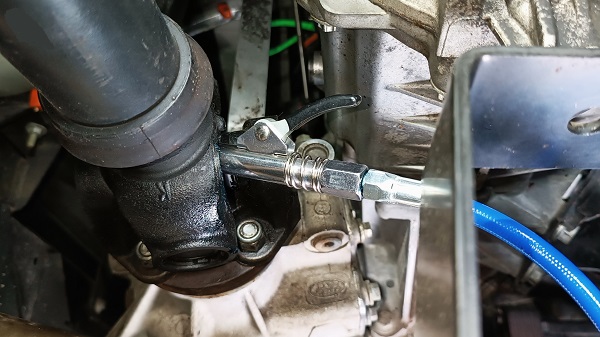
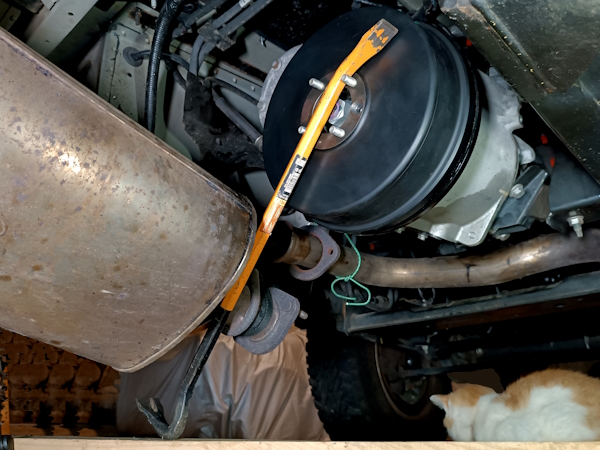
Move the downpipe flange forwards. Pull by hand.
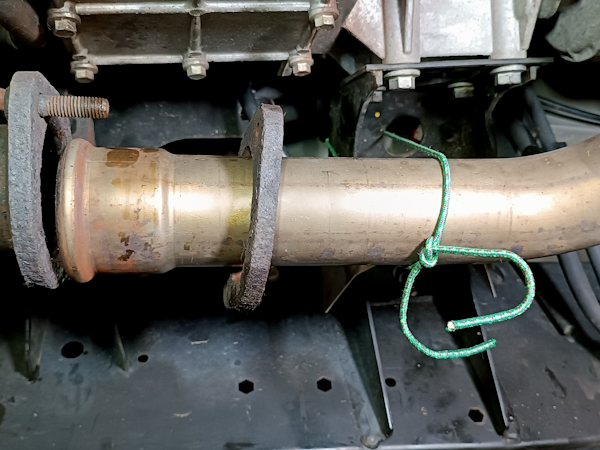
Suspend the downpipe to the chassis (3rd photo). Use a string.
Op 05
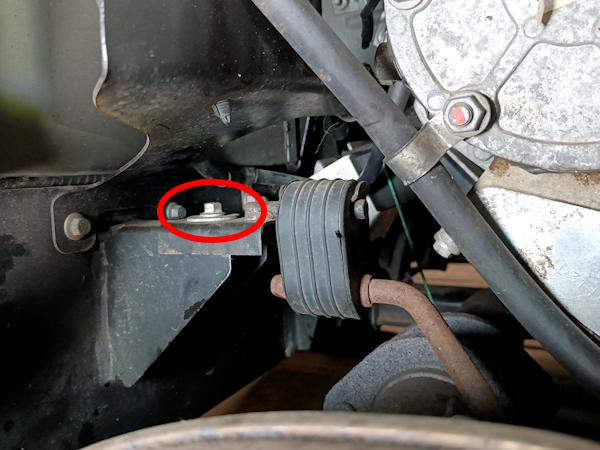
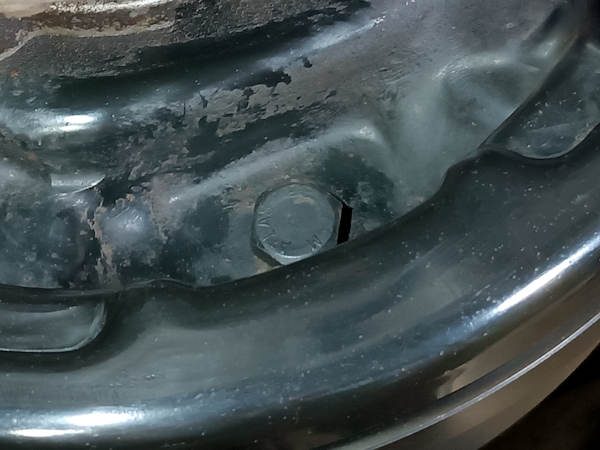
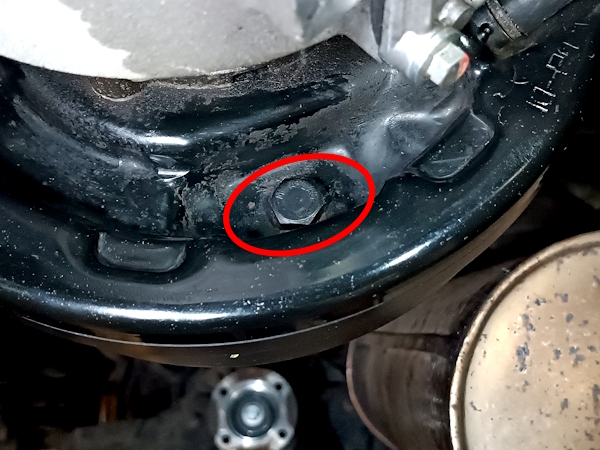
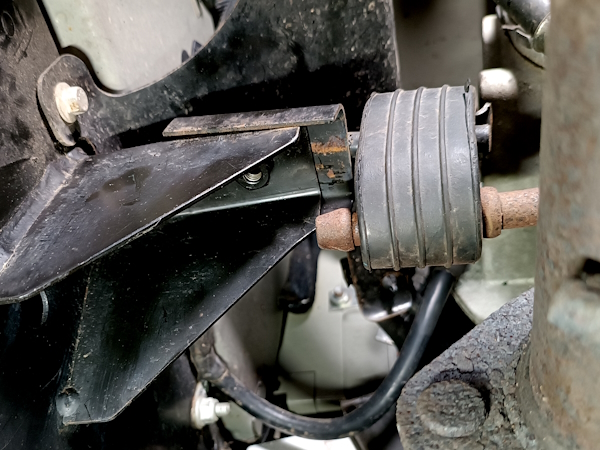
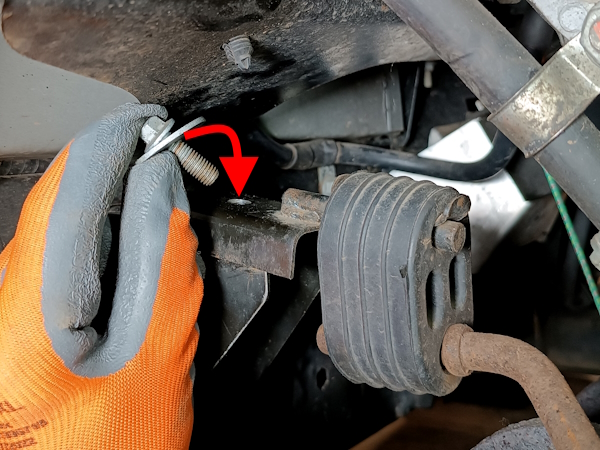
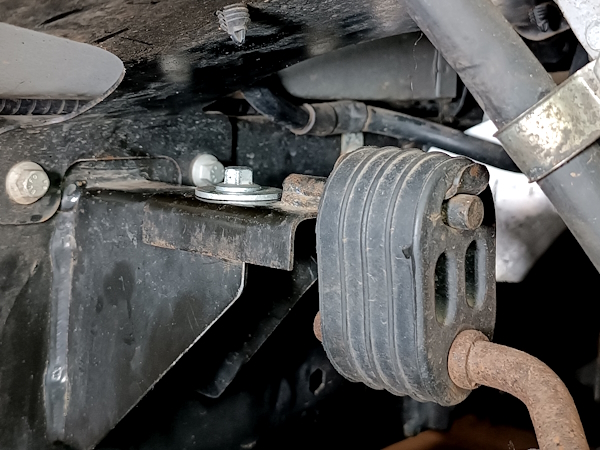
Identify the location of the front mounting rubber fixing bolt of the central silencer. View from below (1st photo) and view from above (2nd photo).
Op 06
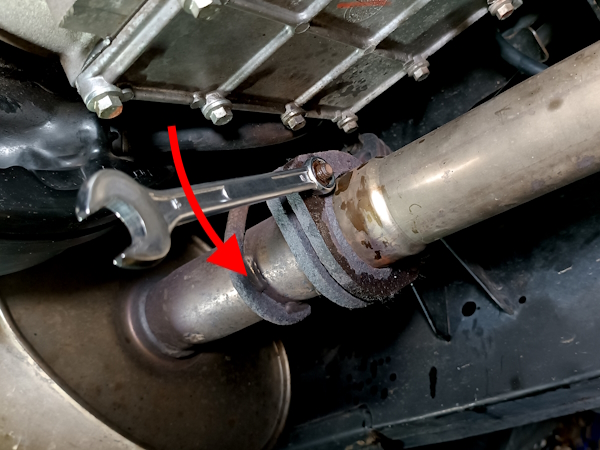
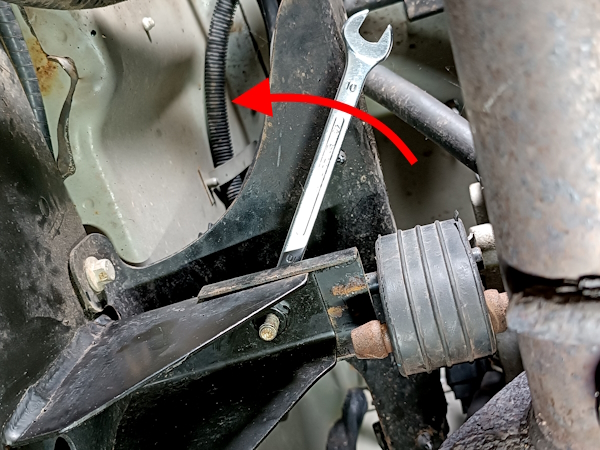
Unscrew the fixing bolt for the front mounting rubber of the central silencer. Use a 10 mm spanner.

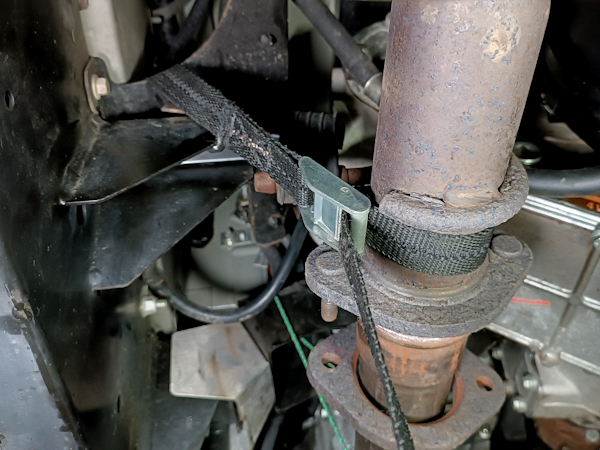
Op 07
Suspend the front of the central silencer to the chassis. Use a strap.
Rotate the mounting rubber backwards to release it from the chassis. Pull by hand.

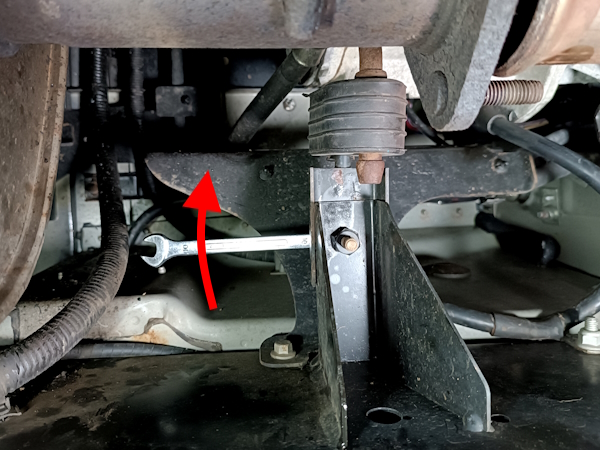
Op 08
Lower the front part of the central silencer. Release the strap.
The silencer must be positioned low enough to free the passage of the brake drum (2nd photo).
Remove the handbrake drum
Op 09
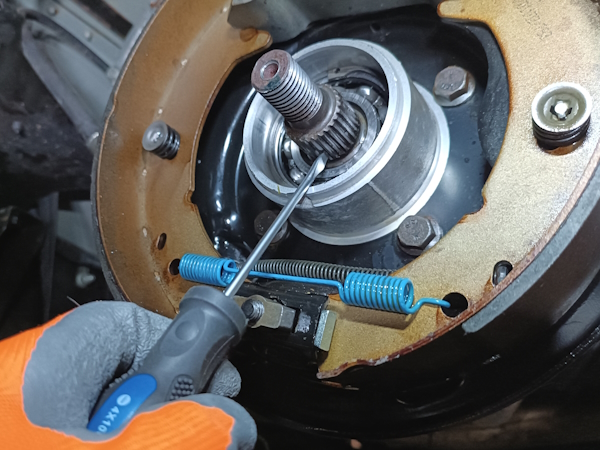
Loosen the handbrake shoes adjustment mechanism. Use a 17 mm socket.
Op 10
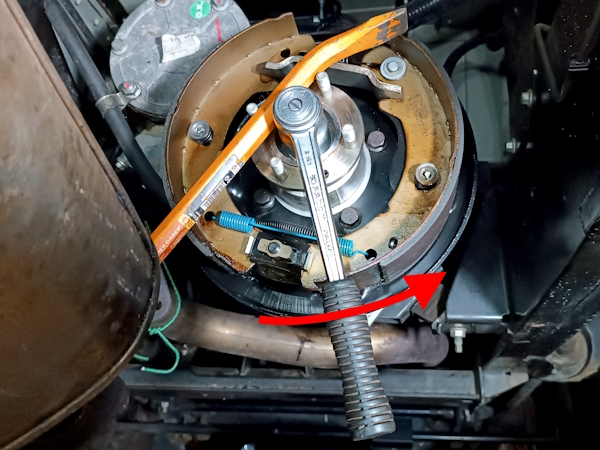
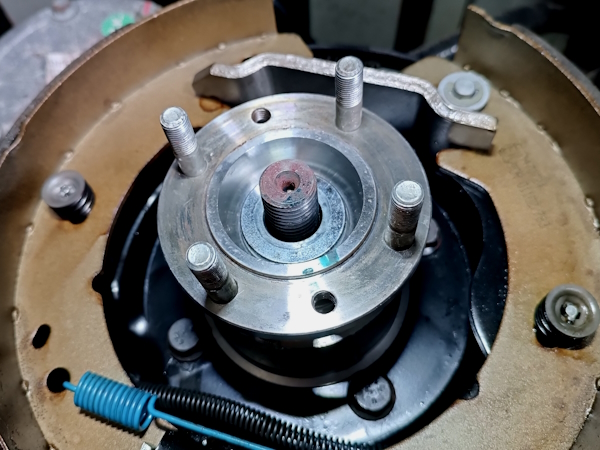
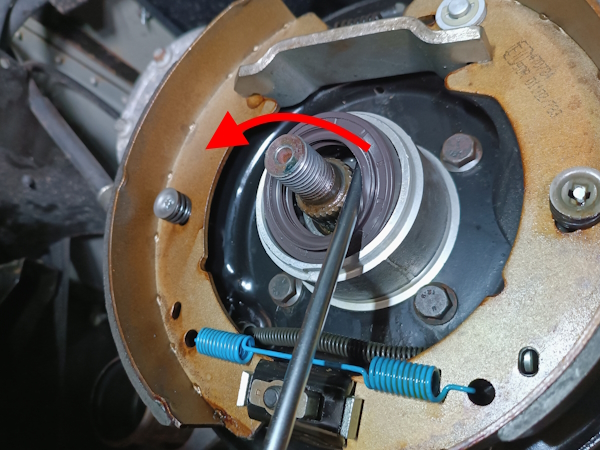
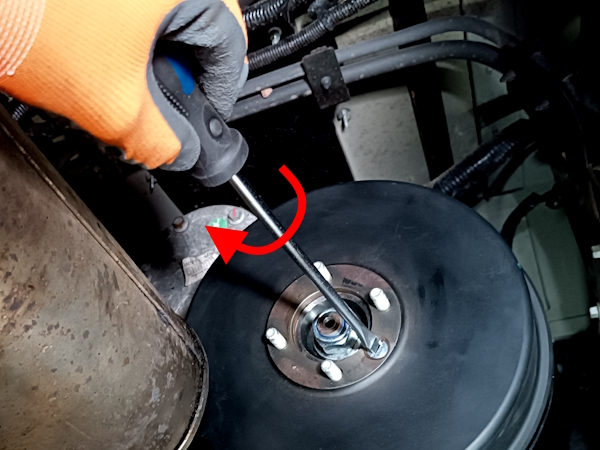
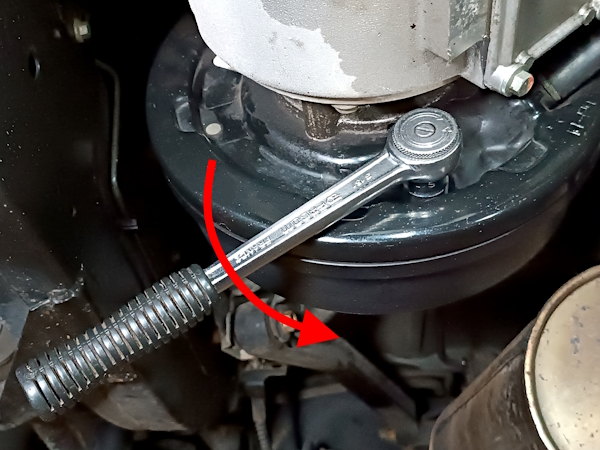
Immobilize the brake drum in rotation. Use a crowbar or metal bar.
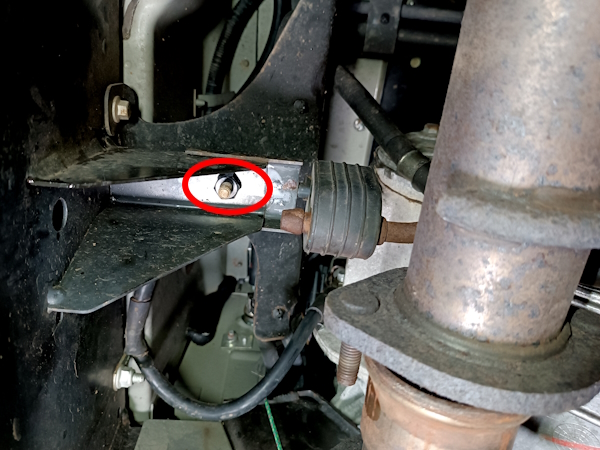
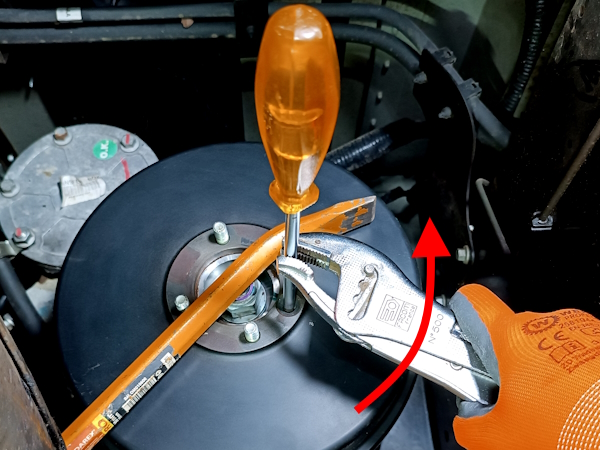
Op 11
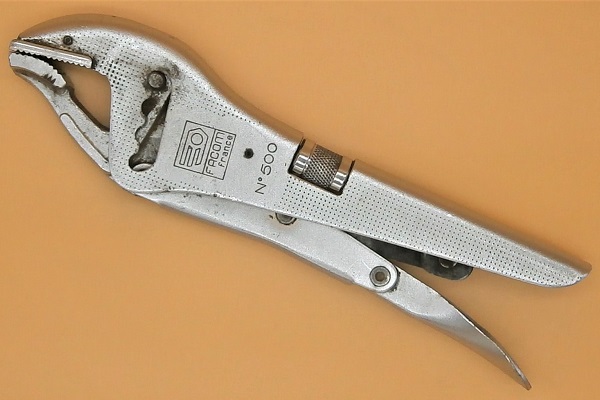
Unscrew the brake drum fixing screw. Use a Phillips or flathead screwdriver depending on the screw head and a locking pliers.
The drum fixing screw is frequently oxidized. Take a thousand precautions to unscrew it without damaging its head. If unfortunately the screw head is damaged, you only have to use the drill to decapitate the screw and remove the drum.
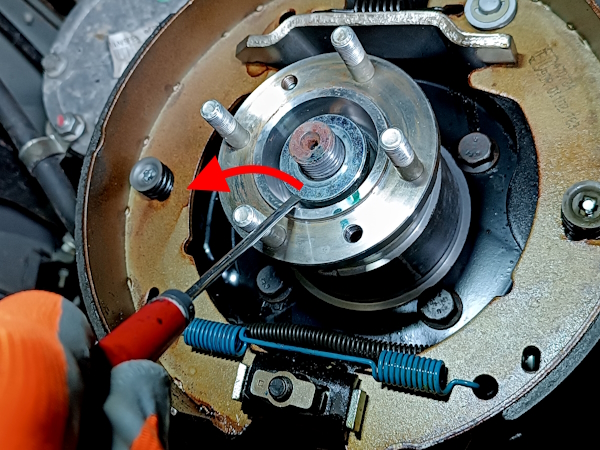
Use a Phillips screwdriver with an imprint perfectly adapted to the screw.
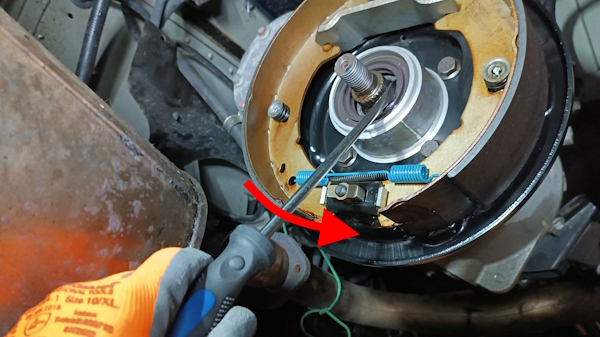
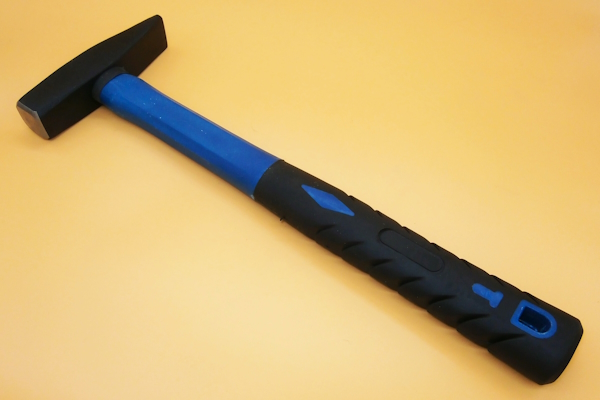
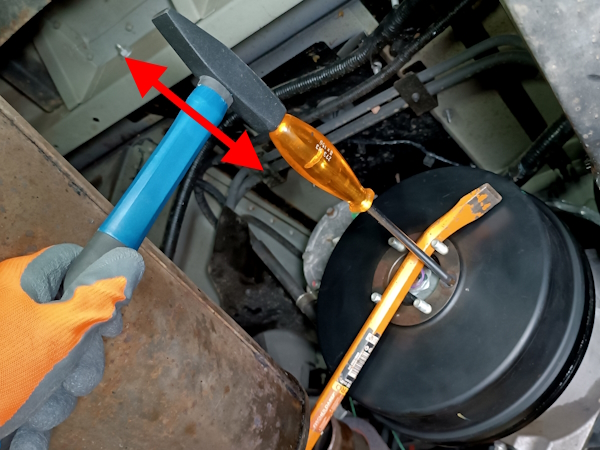
If the screw is blocked, tap the screwdriver handle a few times with a hammer (1st photo). This should loosen the threads.
Op 12
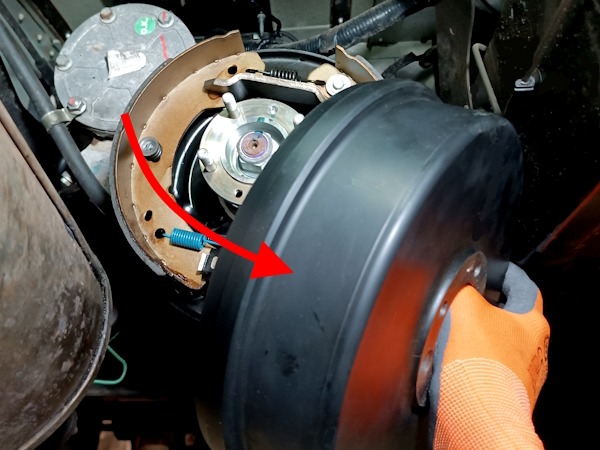
Remove the brake drum. Pull by hand.
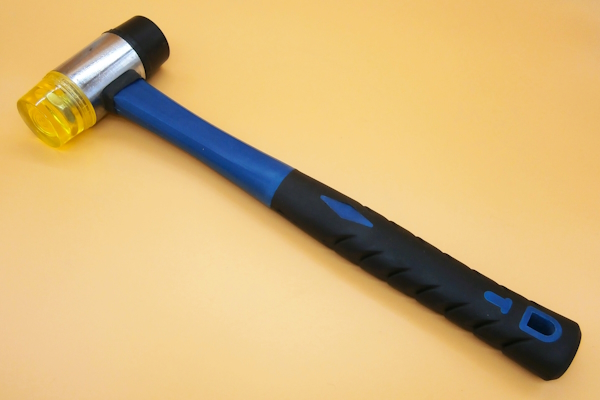
If the drum does not come off, tap the perimeter of the drum with a mallet (1st photo).
Remove the rear transfer box flange
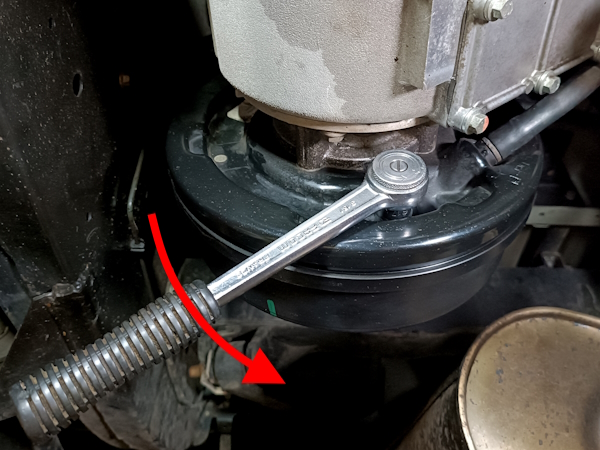
Op 13
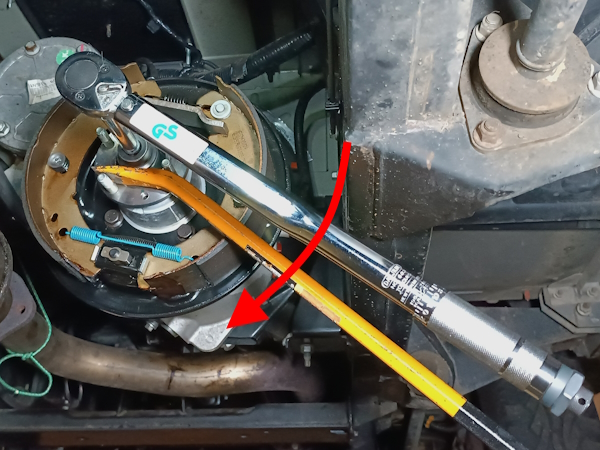
Immobilize the flange in rotation. Use a crowbar or metal bar.
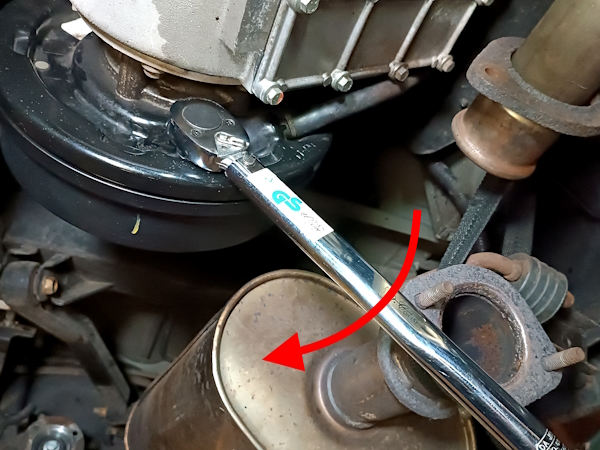
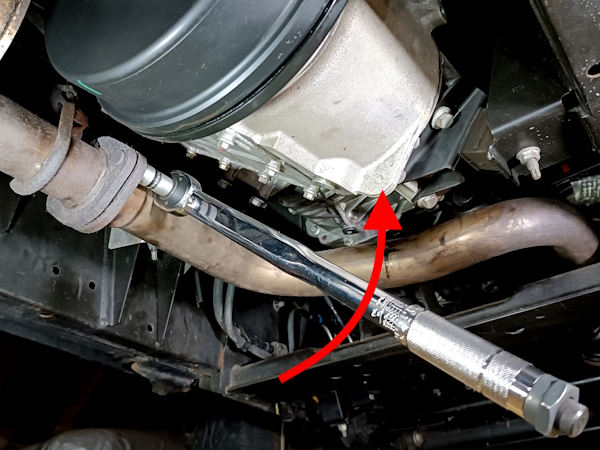
Unscrew the flange fixing nut. Use the 30 mm socket.
The tightening torque of the nut is very high. If necessary, use a significant leverage arm.
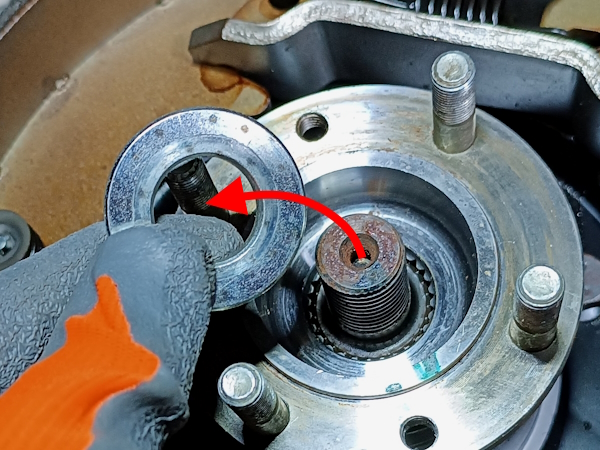
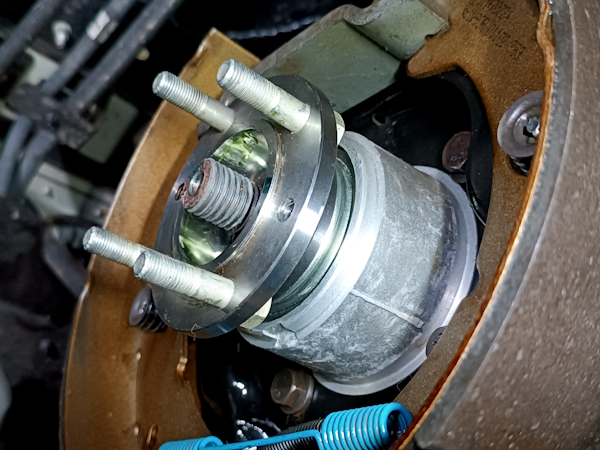
Op 14
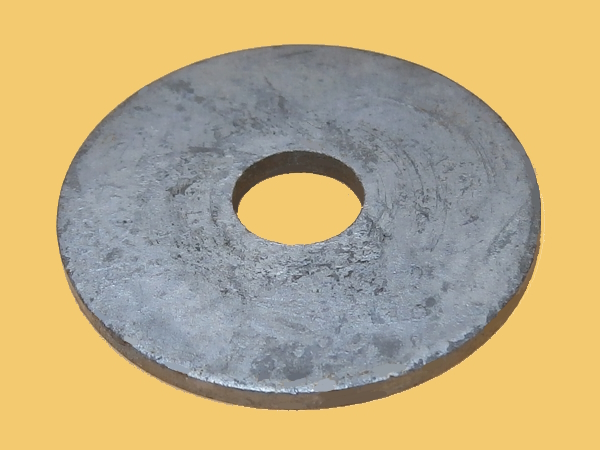
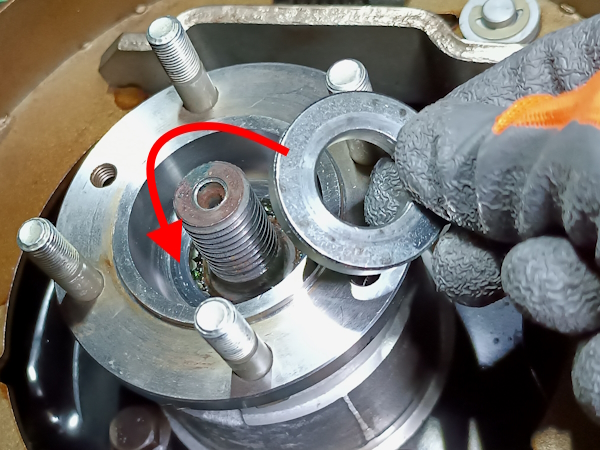
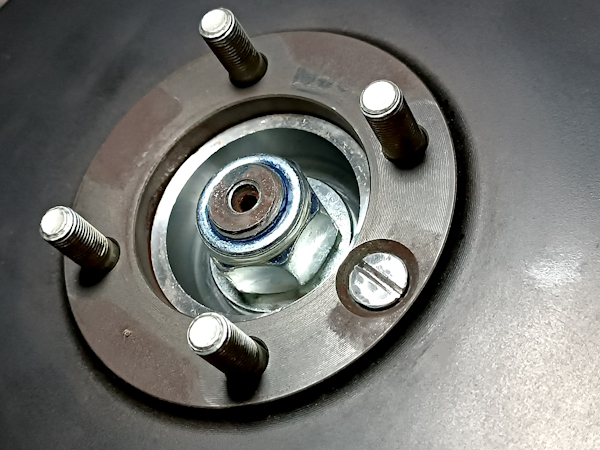
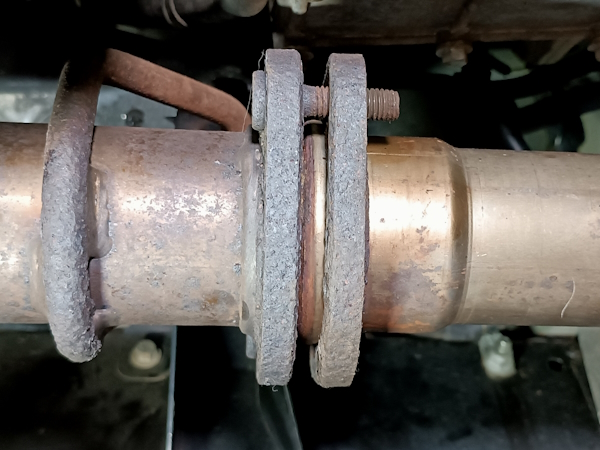
Remove the flange washer. Use a small flathead screwdriver.
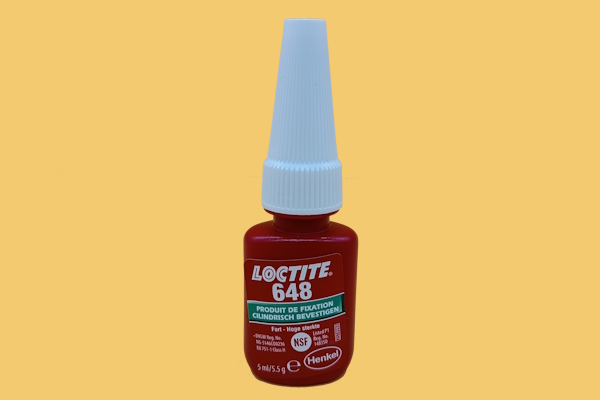
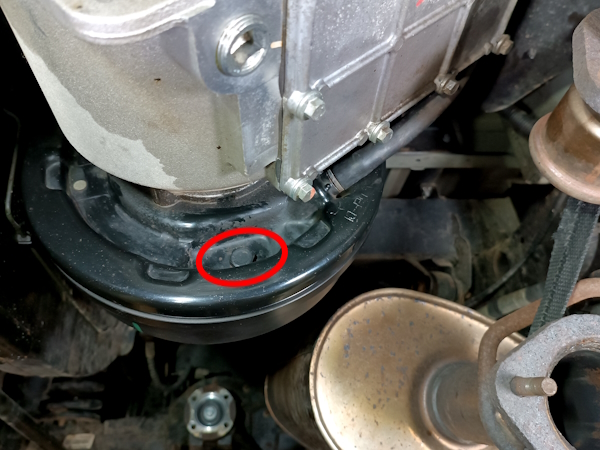
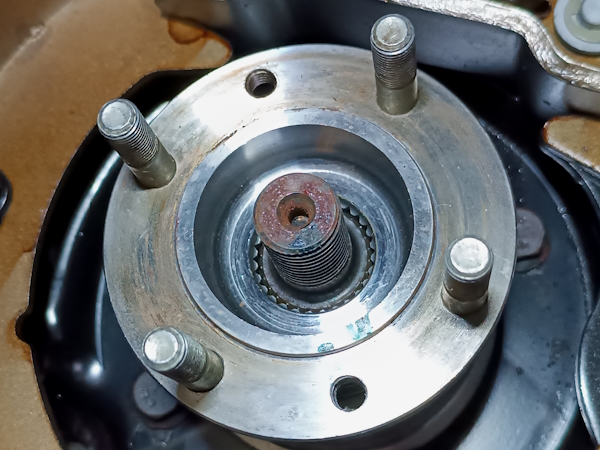
Unlike previous models, we can see that on this Defender (a 2013 90 Td4), there is no felt washer on the rear transfer box flange (4th photo). The sealing between the output shaft and the flange is ensured by the application of Loctite 648 on the flange splines during assembly.
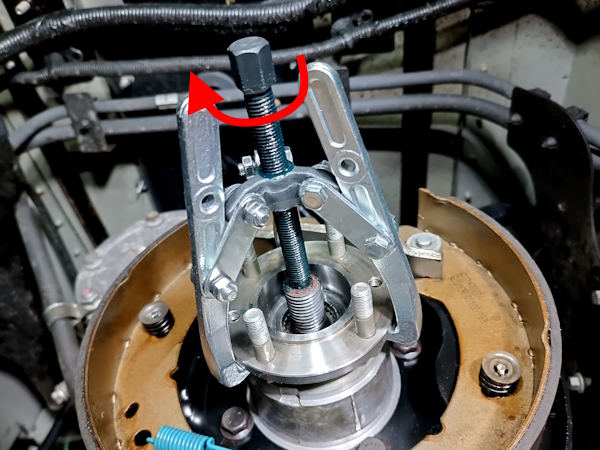
Op 15
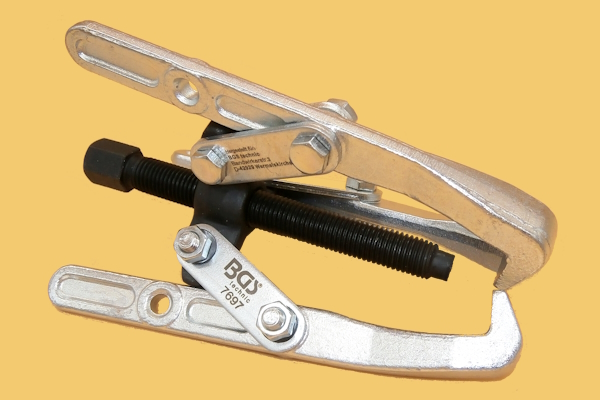
Remove the flange. Use a hub puller.
Change the rear transfer box oil seal
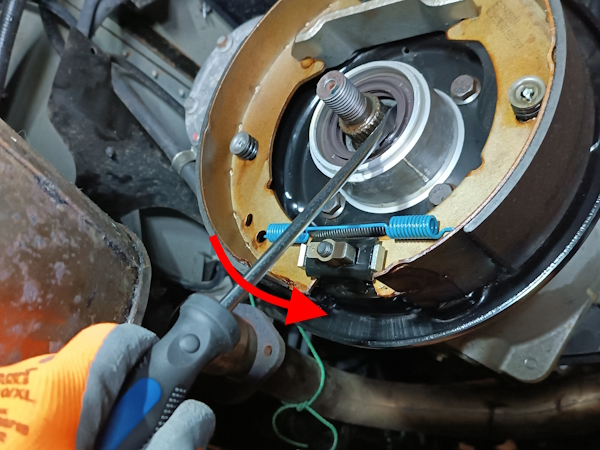
Op 16
Remove the oil seal. Lever with a flathead screwdriver.
Be careful not to mark the transfer box aluminum housing with the screwdriver.
Op 17
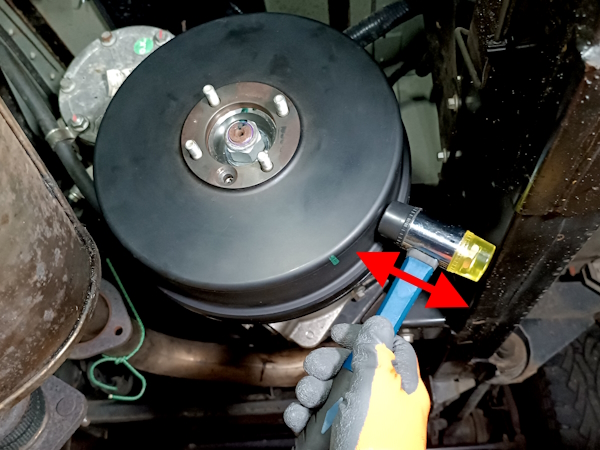
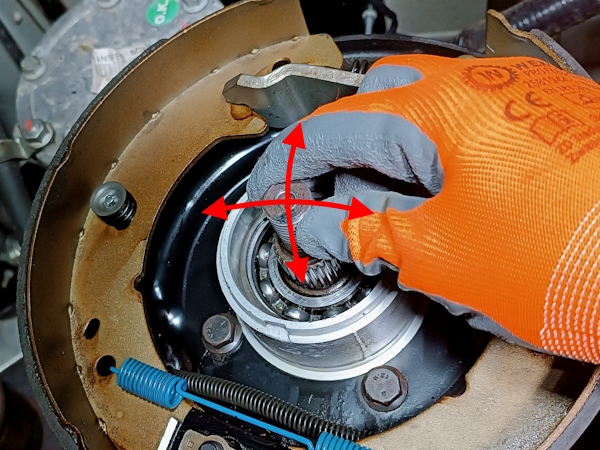
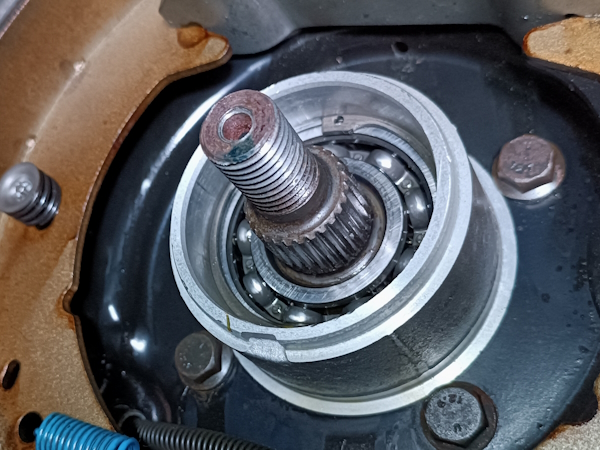
Check the play of the rear output shaft of the transfer box. Pull and push by hand.
If the output shaft has excessive play, the new oil seal may be damaged very quickly. In this case, it would be better to consider changing the output shaft bearing or renovating the transfer box.
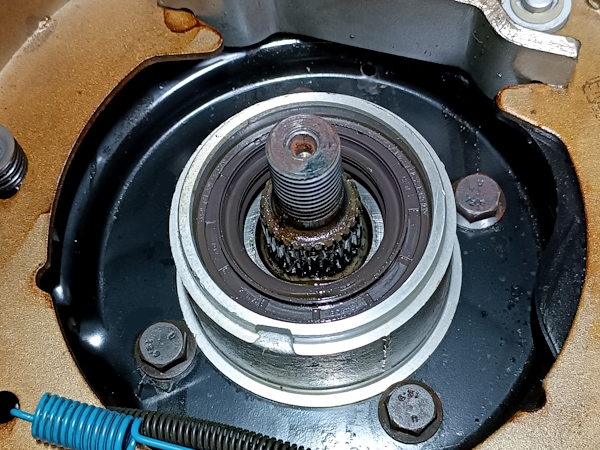
Op 18
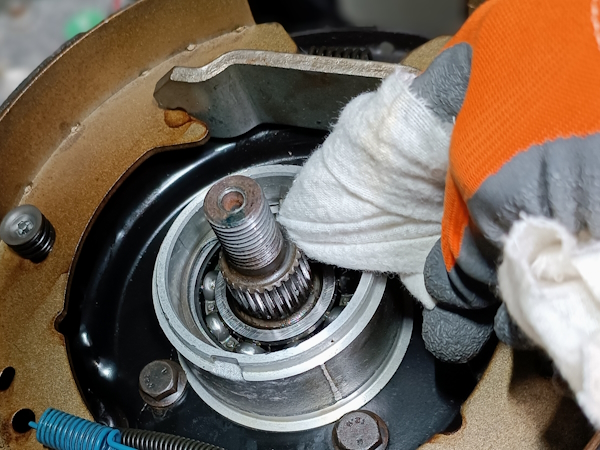
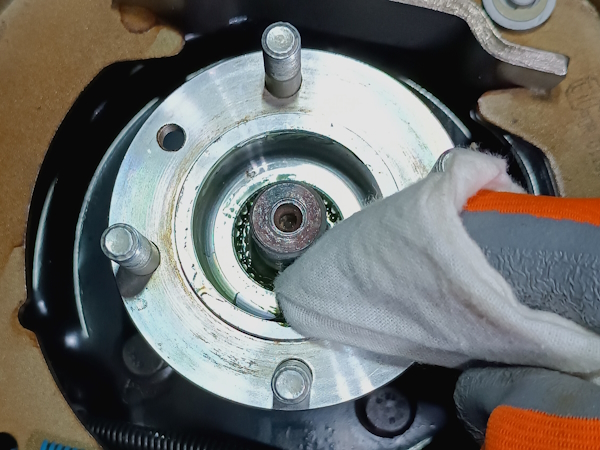
Remove Loctite residue and thoroughly degrease the transfer box output shaft splines. Use a flathead screwdriver and degreaser.
Clean the oil seal housing.
The output shaft splines must be degreased because we will use Loctite 648 to ensure sealing between the output shaft and the flange.
Op 19
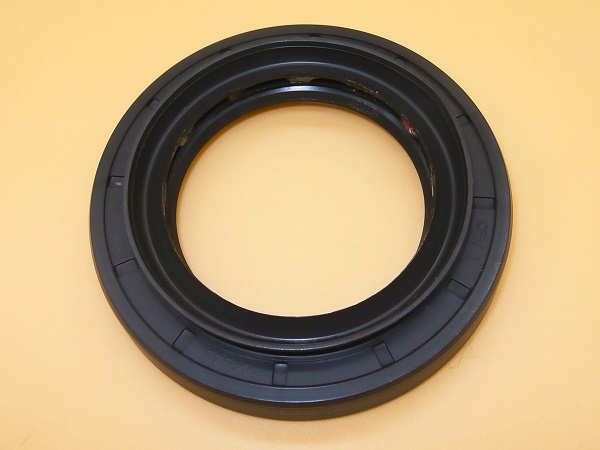
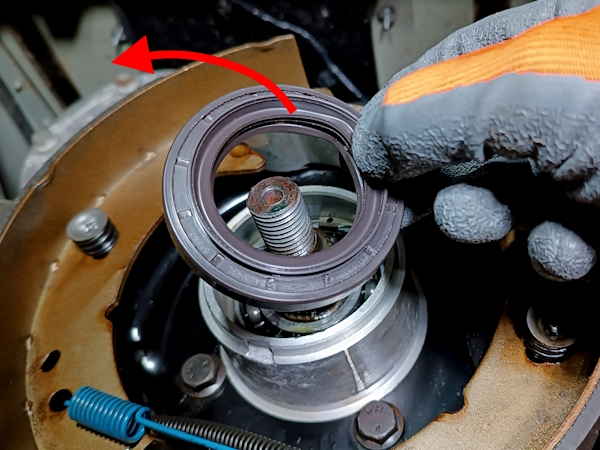
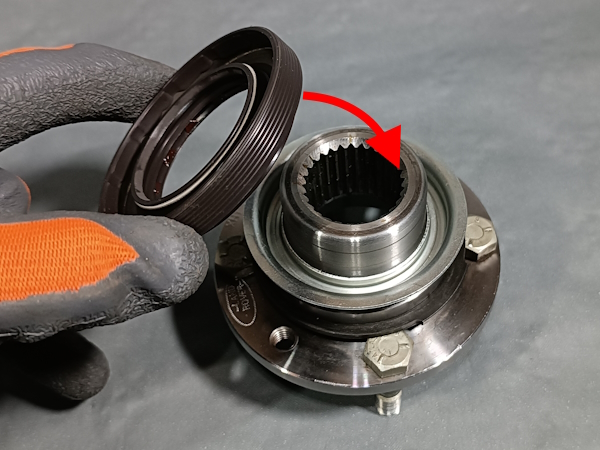
As a precaution, check that the new oil seal (FTC4939) engages perfectly on the flange.
When installing, check that the oil seal is properly guided by the flange chamfer and that it mounts onto its surface without having to force it excessively.
This dry run can save you a lot of disappointment during final assembly.
Op 20
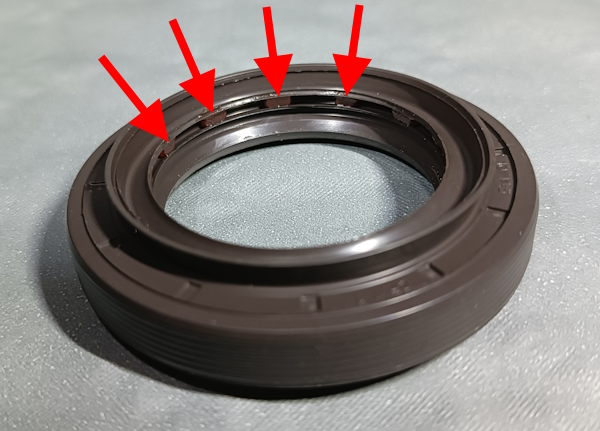
Drive the oil seal into its housing. Use a Ø70 mm bushing and a mallet.
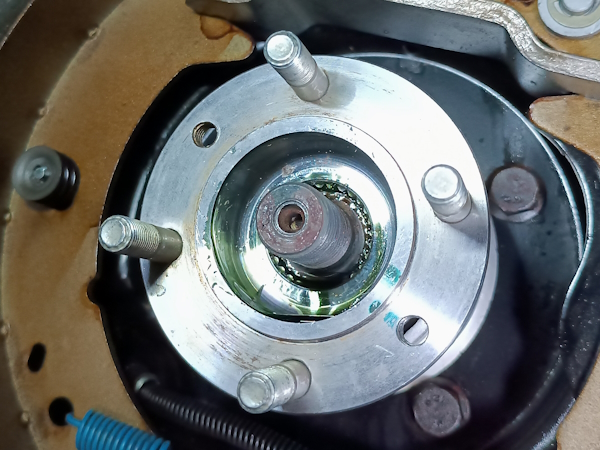
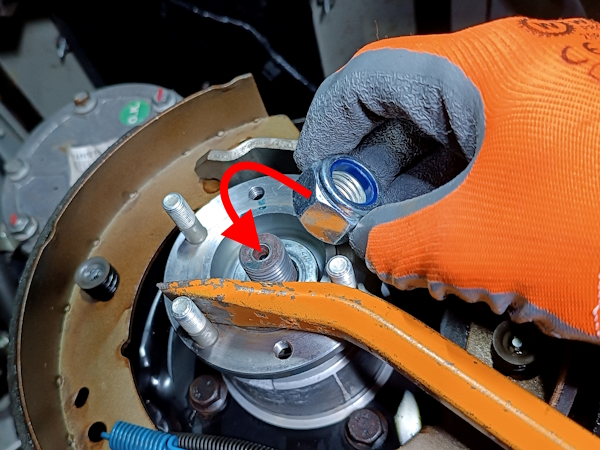
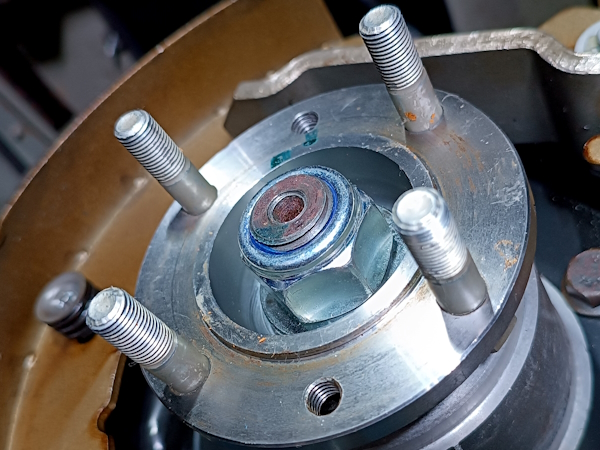
The workshop manual specifies that the oil seal should not be lubricated before assembly. Moreover, we can see that the new seal is already very slightly greased (1st photo).
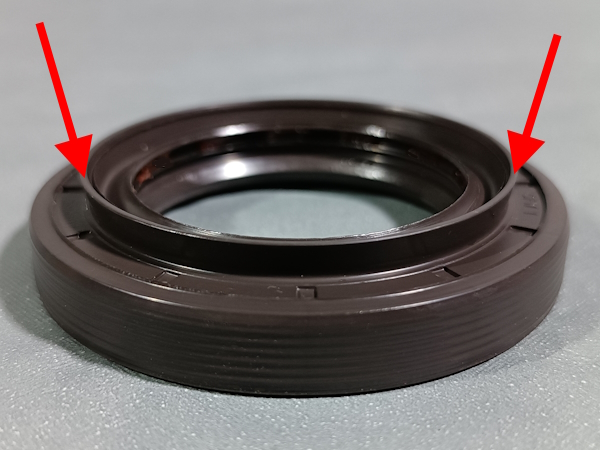
The lip located on the side of the oil seal (2nd photo) must be oriented towards the outside of the transfer box.
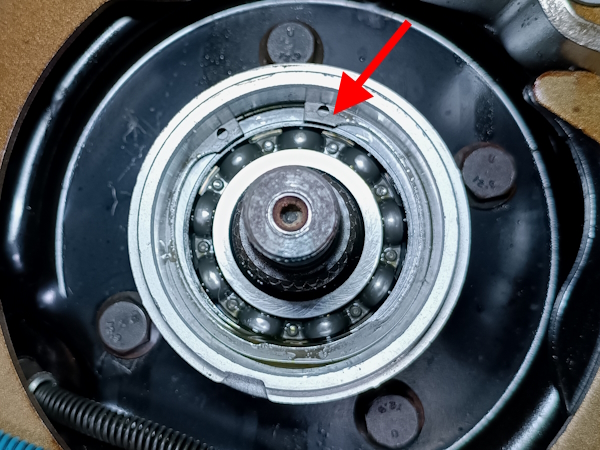
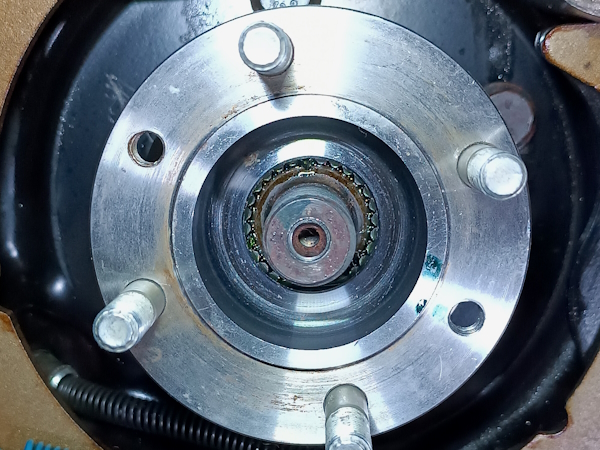
Drive the oil seal in until it comes into contact with the bearing circlip (3rd photo).
Advertisement
Fit the rear transfer box flange
Op 21
Check the seal surface on the flange.
If the surface is marked, to ensure a good seal, you will need to invest in a new flange.

Op 22
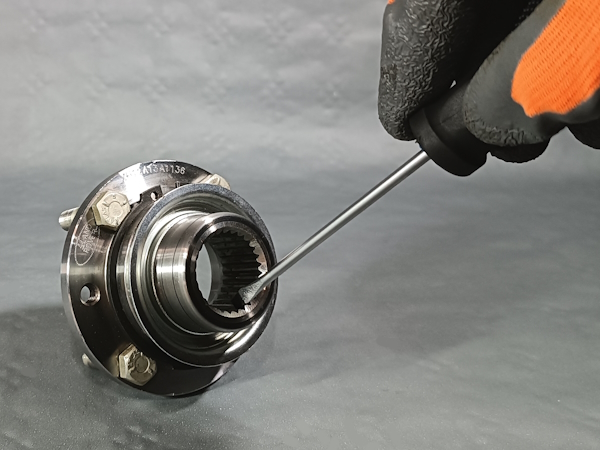
Remove Loctite residue and thoroughly degrease the flange splines. Use a flathead screwdriver and degreaser.
Clean the flange.
Op 23
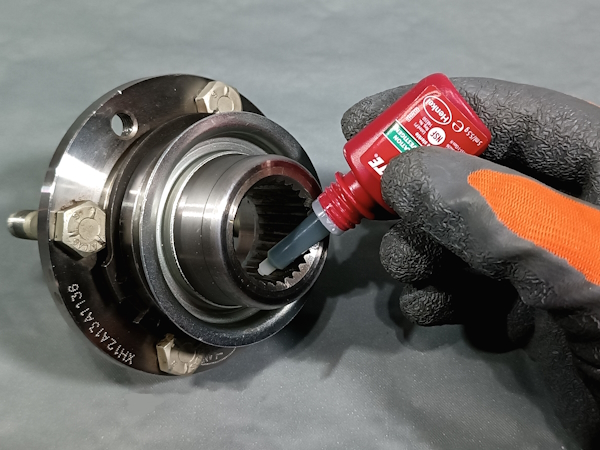
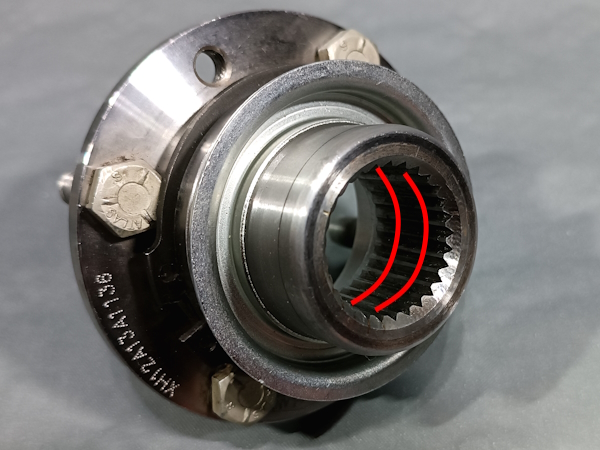
Apply 2 beads of Loctite 648 to the circumference of the flange splines.
The 2nd bead should be positioned 5 mm from the end of the flange.
After applying the Loctite, quickly position the flange on the shaft because the Loctite sets in 4 minutes.
Do not apply Loctite 648 to the output shaft splines because when installing the flange, the Loctite could be pushed towards the bearing and impair its operation.
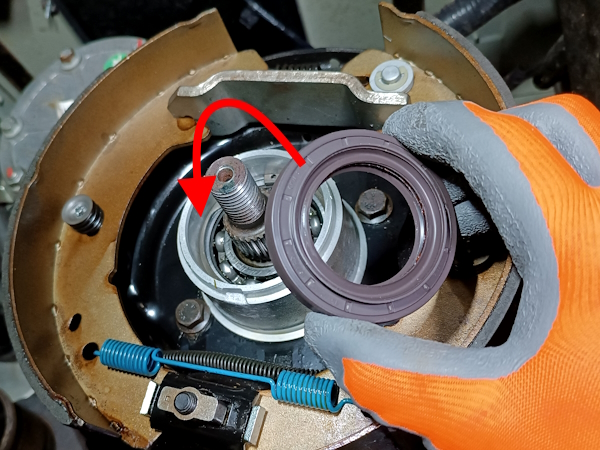
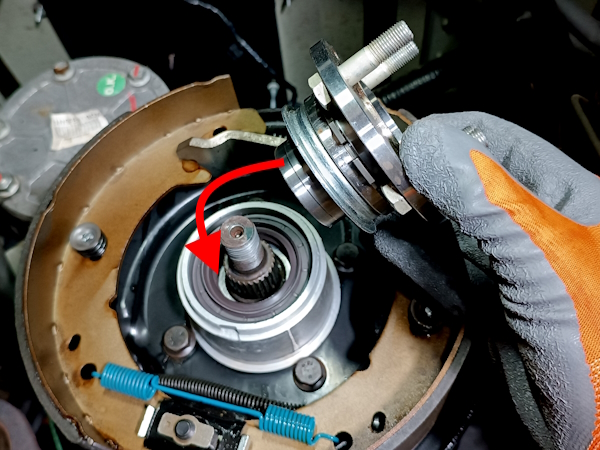
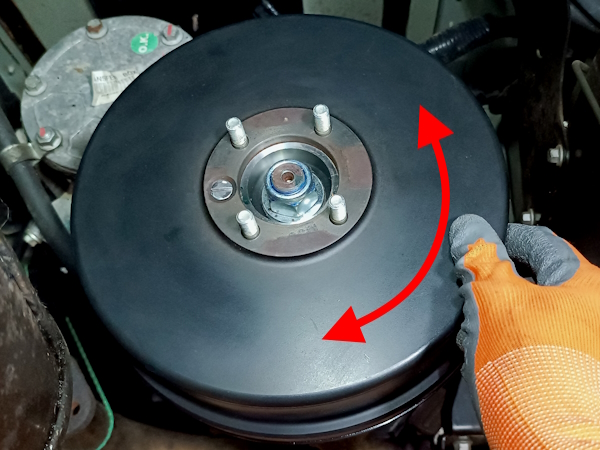
Op 24
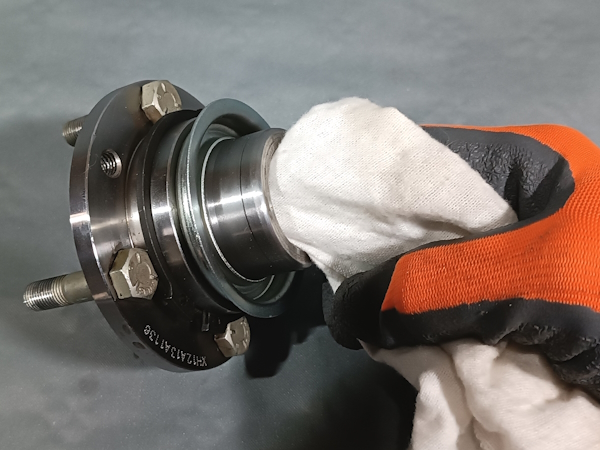
Fit the flange. Push by hand.
Slightly rock the flange during installation to help the seal lip mount onto the flange (2nd photo).

Op 25
Wipe off excess Loctite on the flange. Use a cloth.
Op 26
Fit the flange washer (PYF500010).
Op 27
Immobilize the flange in rotation. Use a crowbar or metal bar.
Screw in the flange fixing nut (NY120041L). Use the 30 mm socket.
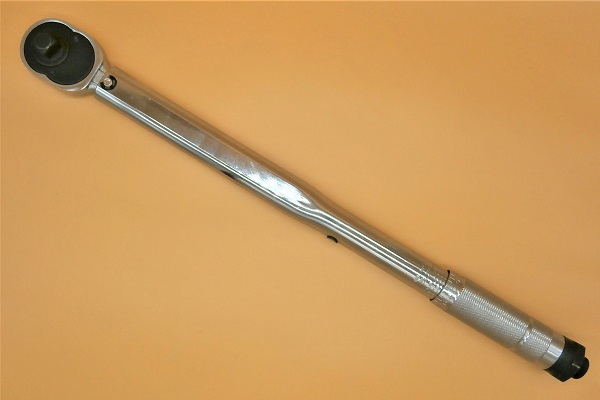
Tighten the nut to 165 Nm. Use the torque wrench.
Fit the handbrake drum.
Op 28
Fit the brake drum.
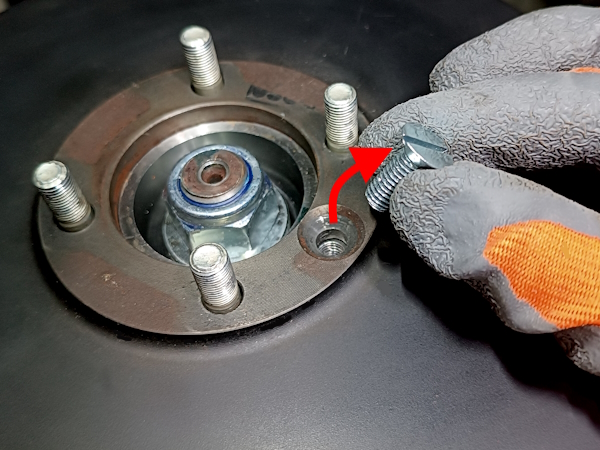
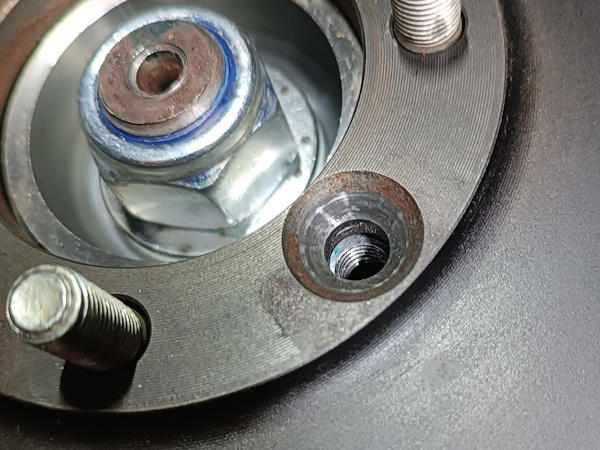
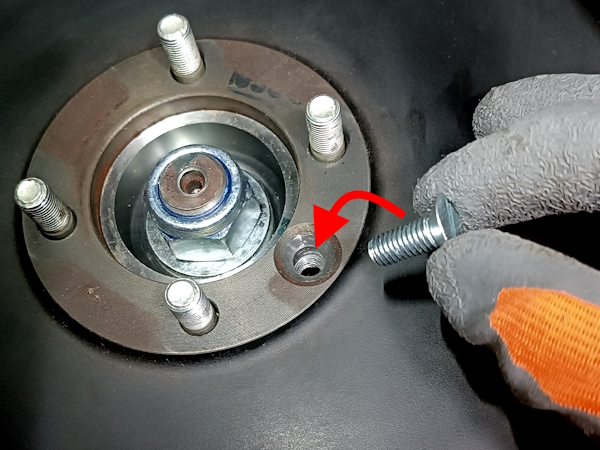
The arrangement of the 4 drum fixing bolts is such that the fixing screw hole will always fall opposite one of the flange threads (3rd photo).
Op 29
Screw in the drum fixing screw (SA108201L). Use a Phillips or flathead screwdriver depending on the screw head.
Op 30
Tighten the handbrake shoes adjustment mechanism screw to 25 Nm. Use a 17 mm socket and a torque wrench.
Op 31
Loosen this same screw by 1.5 turns. Use a 17 mm socket.
Check that the drum rotates freely. Rotate it by hand.
Fit the exhaust silencer
Op 32
Raise the front part of the exhaust silencer. Lift by hand.
Before refitting the silencer, thoroughly clean the surfaces of the downpipe and silencer that will come into contact.
Op 33
Fit the mounting rubber in its position. Rotate it by hand.
Op 34
Screw in the bolt (FS108257L) for fixing the front mounting rubber of the central silencer with its washer (WJ600056). Use a 10 mm spanner.
Op 35
Fit the flange of the downpipe against the silencer. Push by hand.
Op 36
Screw in the 2 nuts (LR025680) fixing the central silencer to the downpipe. Use a 15 mm spanner.
Tighten the 2 nuts to 25 Nm. Use a 15 mm socket and a torque wrench.
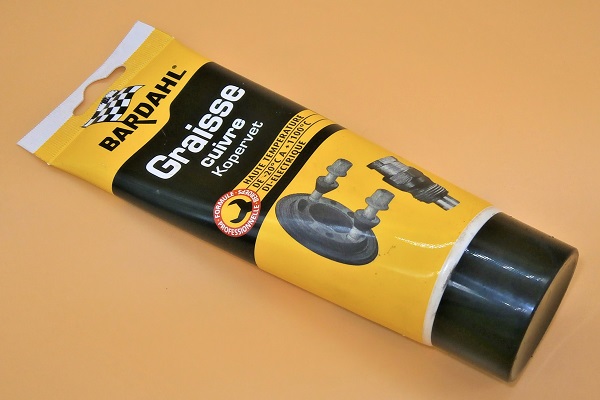
Apply a little copper grease on the thread of the fixing bolts. This will limit oxidation and make it easier to unscrew during the next disassembly.
Advertisement
Fit the rear propshaft
Op 37
Fit the rear propshaft (➔ see the tutorial ''Rear propshaft removal on Defender 90 Td4'' Op 09 to 13).
Put oil back into the transfer box
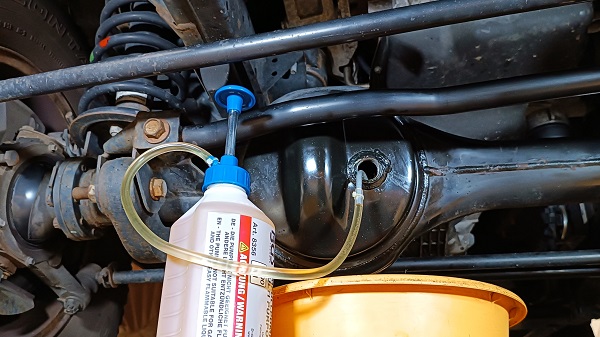
Op 38
Put oil back into the transfer box (➔ see the tutorial ''Transfer box oil change on Defender Td4'' Op 05 to 15).
The End