This tutorial is also available in French
➔

Check for oil in the ECU connector on Defender Td5
Vehicle ➔ Defender 110 Td5 2002
Difficulty ➔ Easy

Time ➔ 20 minutes
Summary
Advertisement
Advertisement

Recommendations

One of the most well-known engine problems on our Defender Td5 is the migration of engine oil from the cylinder head to the ECU (Engine Control Unit) via the injectors harness and the engine harness. The first symptoms are difficulties in revving up and then the Defender simply refuses to start. To avoid these inconveniences, you simply have to check from time to time the absence of oil at the red connector of the ECU.
If you detect the presence of oil at the ECU, you must first change the injectors harness and then clean any trace of oil at the ECU. But that's not all, because unfortunately, the oil contained in the engine harness will continue to flow to the ECU. It will therefore be necessary to continue a regular cleaning of oil leaks at the ECU for several days.
Required Tools
Sponsored links by

Advertisement
Disconnect the negative terminal from the battery
Op 01
Remove the LH seat cushion and disconnect the negative terminal from the battery (➔ see the tutorial ''Battery change on Defender Td5'' Op 01 to 09).
Access the ECU
Op 02
Remove the RH seat cushion :
•
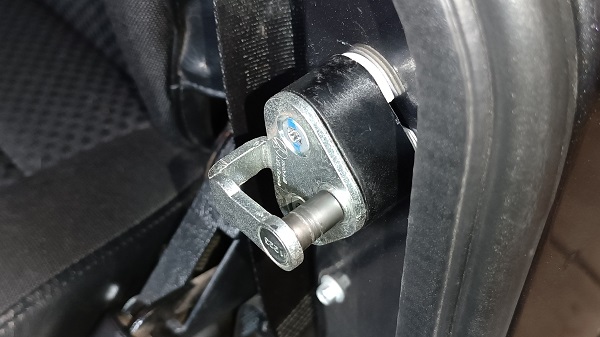
Lift the front of the seat to unclip the 2 locking lugs. Pull by hand.
•
Slide the seat forward.


Op 03
Move the trim aside.


Op 04
Unlock the battery compartment cover fixing clip. Pull by hand.


Op 05
Remove the cover. Lift slightly and pull forward by hand.


Op 06
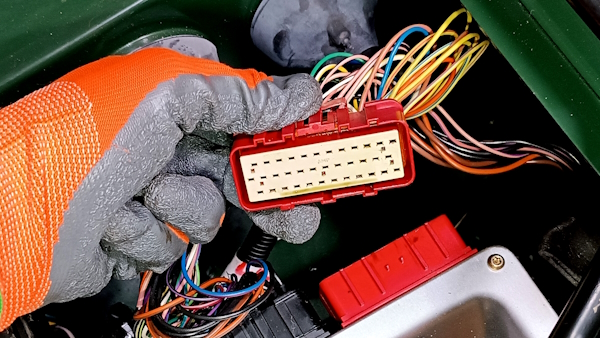
Identify where the ECU and its famous red connector are located.


Check for oil at the red connector of the ECU
Op 07
Disconnect the red connector :
•
Press the locking clip (1st photo).
•
Pull by hand (2nd photo).


Op 08
Check for oil in the red connector (1st photo) and its plug (2nd photo).

If there is no trace of oil in either the connector or in the plug, everything is fine. You can connect the connector
(➔ go to Op 22).
If you detect the presence of oil either in the connector or in the plug, it will be a little more complicated. First off all, you will have to stop the leak by changing the injectors harness (at the cylinder head) and then clean the red connector and its plug. Go to the next Op.
Why change the injectors harness in the first place ? The oil comes from the cylinder head via the injectors harness and the engine harness. Cleaning the red connector at the plug without having stopped the arrival of oil at the cylinder head is useless.


Advertisement
Change the injectors harness (only if necessary)
Op 09
Change the injectors harness (➔ see the tutorial ''Injectors harness change on Defender Td5'').
Clean the red connector and its plug (only if necessary)
Op 10
Disconnect the black connector :
•
Press the locking clip (1st photo).
•
Pull by hand (2nd photo).


Op 11
Move the connectors apart to provide access to the ECU.


Op 12
Identify where the 3 ECU fixing bolts are located (1st and 2nd photos). There are 2 at the rear and 1 at the front.


Op 13
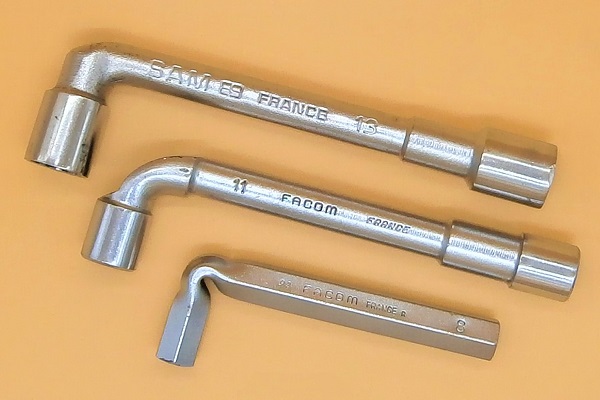
Unscrew the 3 ECU fixing bolts. Use an 8 mm socket spanner.


Op 14
Remove the ECU from its housing.
It is best to remove the ECU from its housing before starting to clean the red plug. This will allow us to position the plug upside down and thus avoid any risk of contamination of the ECU during cleaning.

Op 15
Clean the red plug of the ECU :
•
Tilt the ECU with the red plug downwards.
•
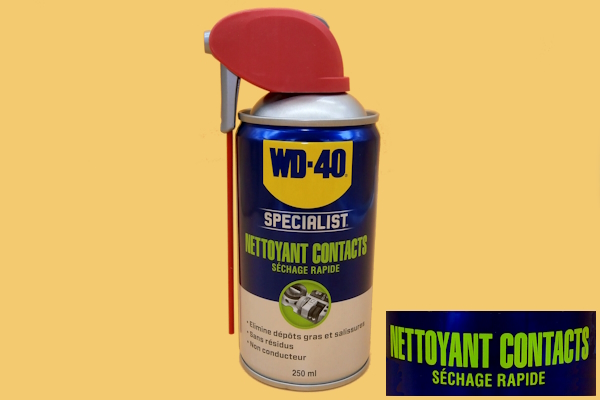
Spray WD40 contact cleaner into the plug.
•
Let it dry.
Position a tray under the ECU because it will flow during cleaning.
WD40 contact cleaner is specially designed for cleaning electrical and electronic equipment. It is non-conductive and therefore safe for electrical equipment. It dries very quickly.
No need to clean the black plug. It is not connected to the injectors harness and therefore cannot be polluted by oil coming from the cylinder head.


Op 16
Remove the white cover from the red connector. Lever with a small flathead screwdriver.


Op 17
Clean the red connector :
•
Tilt the connector downwards.
•
Spray WD40 contact cleaner into the connector.
•
Let it dry.
Position a tray under the connector because it will flow during spraying.


Op 18
Fit the white cover on the red connector. Press by hand.


Op 19
Fit the ECU in its housing.


Op 20
Screw in the 3 ECU fixing bolts. Use the 8 mm socket spanner.


Op 21
Connect the black connector to the ECU. Push by hand.
There is a key on the connector. It is impossible to connect it backwards.


Connect the red connector to the ECU
Op 22
Connect the red connector to the ECU. Push by hand.
There is a key on the connector. It is impossible to connect it backwards.


Fit the RH seat cushion
Op 23
Fit the cover on the battery compartment :
•
Slide the cover as far back as possible. Push by hand.
•
Lower the front part of the cover.
•
Lock the fixing clip.


Op 24
Fit the trim.


Op 25
Fit the seat cushion :
•
Slide the 2 rear lugs of the cushion (1st photo) into the punchings of the seat frame (2nd photo).
•
Engage the 2 front lugs of the cushion in the locking clips (4th photo).


Advertisement
Connect the negative terminal to the battery
Op 26
Connect the negative terminal to the battery and fit the LH seat cushion. (➔ see the tutorial ''Battery change on Defender Td5'' Op 20 to 23).
The End