This tutorial is also available in French
➔

Injectors harness change on Defender Td5
Vehicle ➔ Defender 110 Td5 2002
Difficulty ➔ Easy

Time ➔ 3 hours
Summary
Advertisement
Advertisement

Recommendations

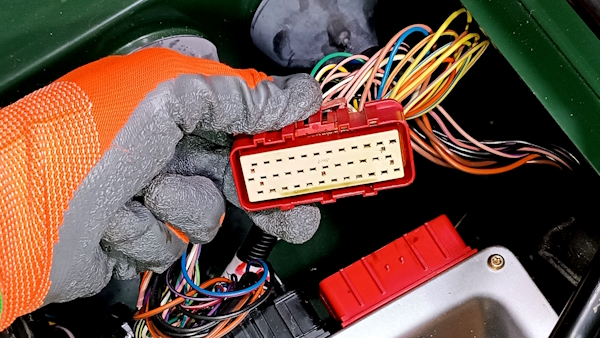
You have detected the presence of oil at the ECU red connector ! This is unfortunately a well-known defect of our Defender Td5. The oil comes from the cylinder head via the injectors harness and the engine harness. It will be necessary to change the injectors harness very quickly to eliminate the cause of the problem.
Once you have changed the injectors harness and cleaned any traces of oil from the ECU, your work will not stop there. Unfortunately, the oil contained in the engine harness will continue to leak towards the ECU. It will therefore be necessary to continue regular cleaning of oil leaks at the ECU for several days.
Required Tools
Sponsored links by


Spare Parts
Our Partner


Packaging :
•
All the above parts are sold individually.
• AMR6103 : The injectors harness is usually supplied with its 2 O-rings (NYX100080). These are the 2 blue seals located at the main connector.
• AMR6103 : The injectors harness is usually supplied with its 2 O-rings (NYX100080). These are the 2 blue seals located at the main connector.
Advertisement
Remove the 2 acoustic covers
Op 01
Remove the acoustic cover (➔ see the tutorial ''Engine oil change on Defender Td5'' Op 05 to 07).
Op 02
Locate the rear acoustic cover.

The bonnet must be fully open (against the windscreen and held by a strap) for better access to the rear acoustic cover.


Op 03
Unclip the EGR vent pipe from the rear acoustic cover. Pull by hand.
We must unclip this pipe to be able to remove the rear acoustic cover.


Op 04
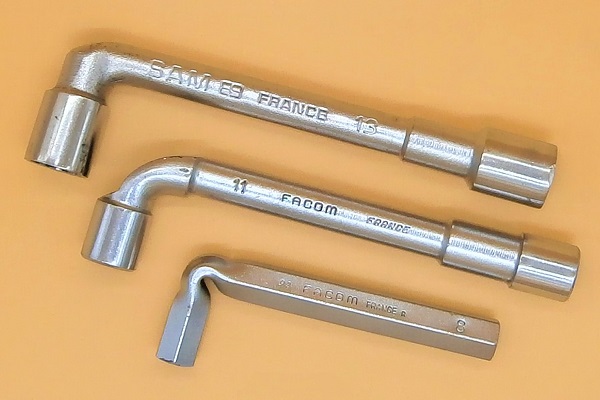
Remove the 2 rear acoustic cover fixing bolts. Use an 8 mm socket.


Op 05
Remove the rear acoustic cover. Lift by hand.


Remove the camshaft cover
Op 06
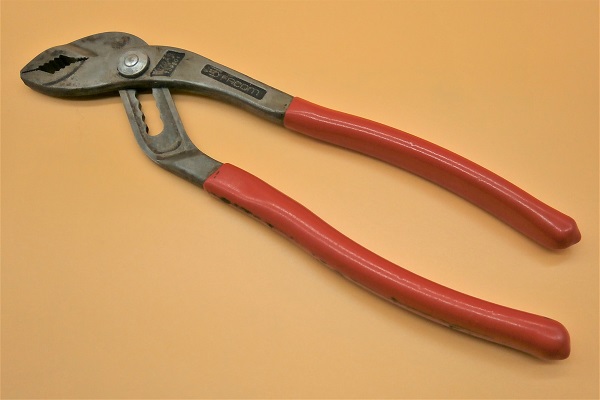
Move the breather hose clip. Use the multigrip pliers.


Op 07
Disconnect the breather hose from the camshaft cover. Pull by hand.
Move the breather hose aside to provide access to the camshaft cover.
There are sometimes some traces of oil inside this hose. Don't worry. It's a breather hose.


Op 08
Unscrew the 13 camshaft cover fixing bolts gradually. Use an 8 mm socket.
It is best to loosen the 13 bolts gradually in a spiral pattern. This prevents deformation of the camshaft cover.
During removal, loosening the bolts in a spiral pattern is done starting from the outside to the inside (2nd photo). Start with the bolt farthest from the center of the part and finish with the bolt closest to the center.


Op 09
Move the harness support bracket away from the camshaft cover. Pull by hand.


Op 10
Remove the camshaft cover. Pull by hand.
Lift the camshaft cover perfectly horizontally to avoid any risk of blockage during removal.


Op 11
Remove the camshaft cover gasket. Pull by hand.
Recover the 13 camshaft cover bolt seal (3rd photo).


Remove the injectors harness
Op 12
Disconnect the engine harness from the injectors harness :
•
Press the 2 locking tabs on the connector.
•
Disconnect the connector. Pull by hand.


Op 13
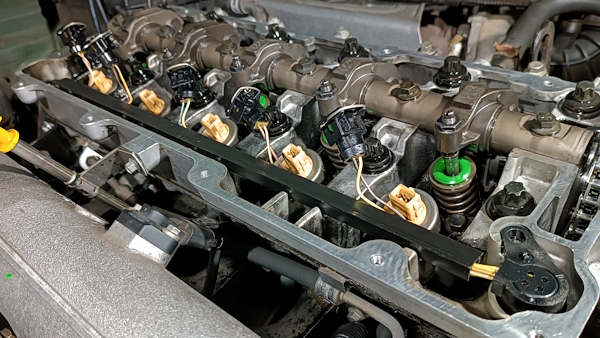
Disconnect the 5 injectors :
•
Press the metal locking clip on the connector.
•
Disconnect the connector. Pull by hand.


Op 14
Remove the injectors harness :
•
Detach the connector from the cylinder head (1st & 2nd photos). Push by hand.
•
Extract the harness.


Advertisement
Fit the new injectors harness.
Op 15
Perfectly clean the connectors of the 5 injectors. Eliminate any traces of oil. Use a compressor, air blower and a cloth.


Op 16
Engage the main connector of the new injectors harness (AMR6103) in its housing. Push by hand.
Before positioning the connector, lightly lubricate the 2 O-rings with new engine oil.


Op 17
Connect the connectors to the 5 injectors. Push by hand.
There is a key on the connector (1st photo). It is impossible to connect it backwards.


Op 18
Place the harness on its support. Press by hand.
If necessary, bend the wires slightly so that the harness stays in place.


Op 19
Connect the engine harness connector to the injectors harness.
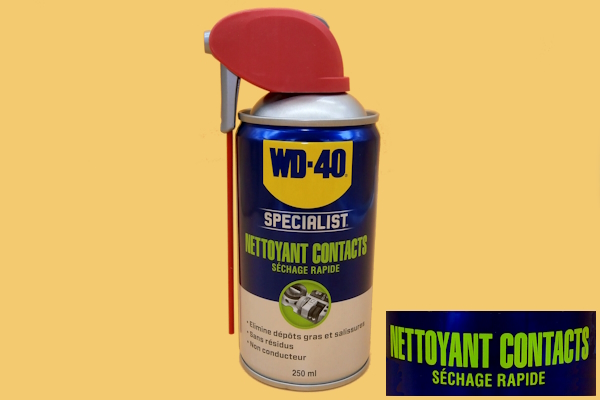
Check that there is no trace of oil in the connector before connecting it. If so, clean the connector with contact cleaner and let it dry.
There is a key on the connector (1st photo). It is impossible to connect it backwards.


Fit the camshaft cover
Op 20
Position the new gasket (LVP000020) on the camshaft cover.


Op 21
Position the 13 camshaft cover bolt seals.
Before positioning them, check that the seals are in good condition. If in doubt, fit them with new seals (ERR7266).
The metal parts of the seals will hold the camshaft cover gasket in position during the next operation.


Op 22
Fit the camshaft cover on the cylinder head.
Make a movement from left to right when you lower the camshaft cover (2nd photo). This allows you to slide the protective plate (integrated into the camshaft cover) between the injector connectors and the rocker arms.


Op 23
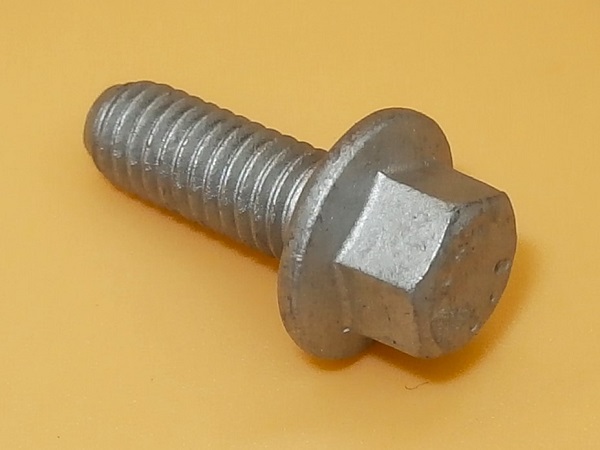
Fit the 13 camshaft cover fixing bolts (FS106307L).
Don't forget to fit the harness support bracket on the side of the camshaft cover (3rd photo).


Op 24
Tighten the 13 camshaft cover fixing bolts :
•
Start screwing the bolts by hand to avoid stripping the threads.
•
Screw the bolts lightly. Use an 8 mm socket spanner.
•
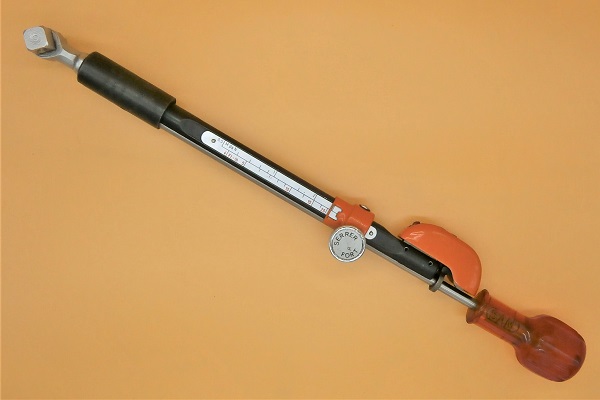
Tighten the bolts gradually to a torque of 10 Nm. Use an 8 mm socket and a torque wrench.
It is best to tighten the 13 bolts gradually in a spiral pattern. This prevents deformation of the camshaft cover.
During reassembly, tightening the bolts in a spiral pattern is done starting from the inside to the outside (2nd photo). Start with the bolt closest to the center of the part and finish with the bolt farthest away.


Op 25
Fit the breather hose :
•
Engage the breather hose onto the camshaft cover. Push by hand.
•
Fit the clip. Use the multigrip pliers.
Place the clip ears on the side of the hose so that they do not come into contact with the acoustic cover (4th photo).


Advertisement
Fit the acoustic covers
Op 26
Fit the rear acoustic cover and screw in its 2 fixing bolts (FS106167L). Use an 8 mm socket.


Op 27
Clip the EGR vent pipe onto the rear acoustic cover. Push by hand.


Op 28
Check that the EGR vent pipe is still properly connected to the air filter. If not (1st photo), connect the pipe. Push by hand.
Sometimes the pipe is torn from the air filter when handling the rear acoustic cover.


Op 29
Fit the acoustic cover (➔ see the tutorial ''Engine oil change on Defender Td5'' Op 44 to 46).
The End