This tutorial is also available in French
➔

Front brake discs change on Austin Mini
Vehicle ➔ Mini 1000 year 1988
Difficulty ➔ Medium

Time ➔ 2 hours
Summary
Advertisement
Advertisement

Recommendations

Always change the discs in pairs (RH wheel + LH wheel).

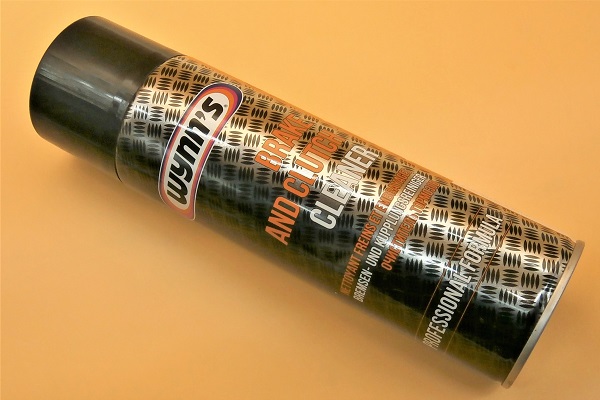
After manufacturing, new brake discs are often protected from oxidation by a film of paraffin. Before installing them, degrease the discs with brake cleaner.
Each time a drive shaft pin is removed, always install a new pin.
Always fit new brake pads when you change the discs.
Required Tools
Sponsored links by


Spare Parts
Our Partners


Packaging :
•
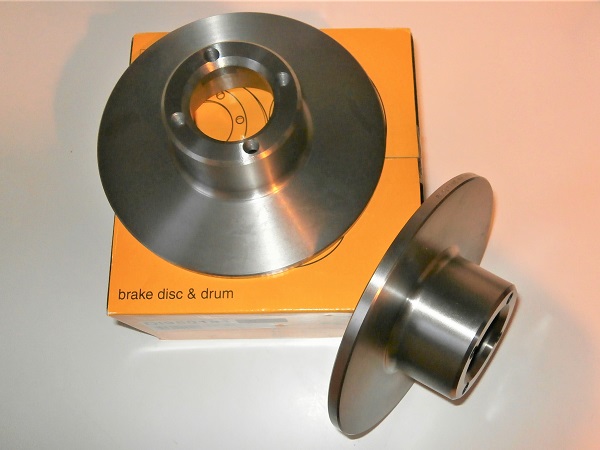
21A2612MS : Brake discs are either sold individually or in pairs. Double-check before ordering.
• The other parts above are sold individually.
• The other parts above are sold individually.
Advertisement
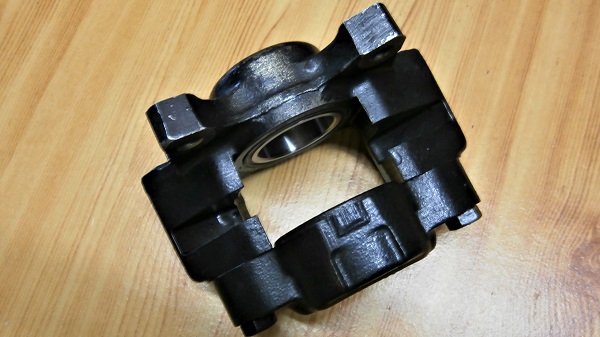
Remove the caliper
Op 01
Remove the wheel and the brake pads (➔ see the tutorial ''Front brake pads change'' Op 01 to 06).
Op 02
Remove the 2 brake caliper fixing bolts. Use the 14 mm socket.
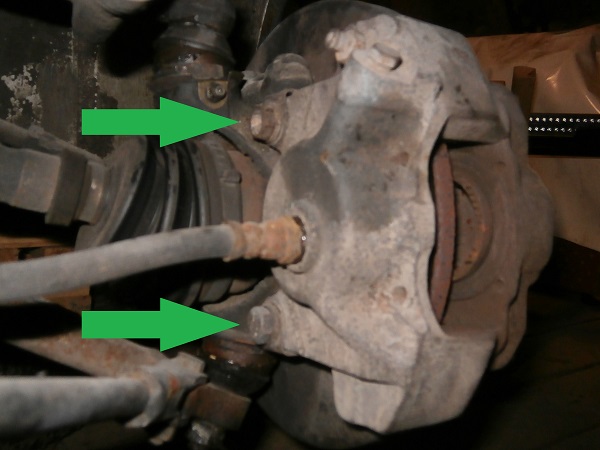
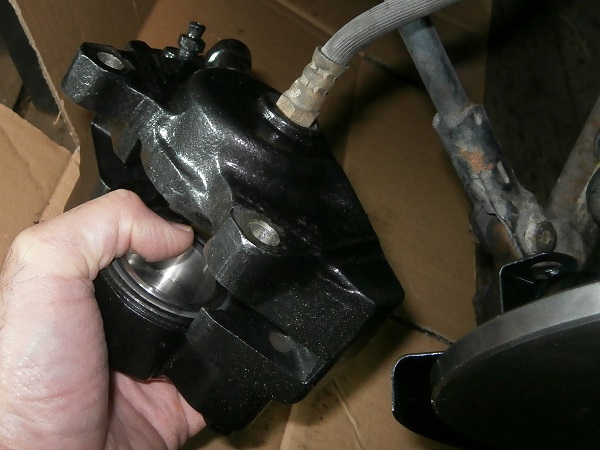
Op 03
Move the caliper away from the work area. Suspend it with a piece of string.
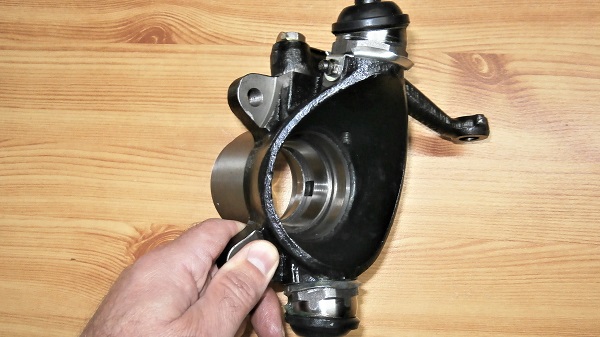
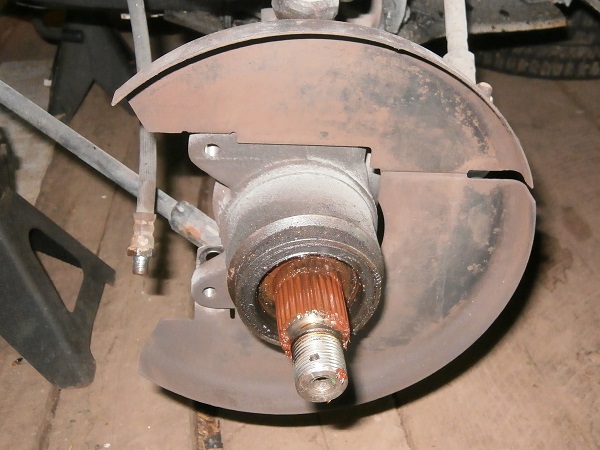
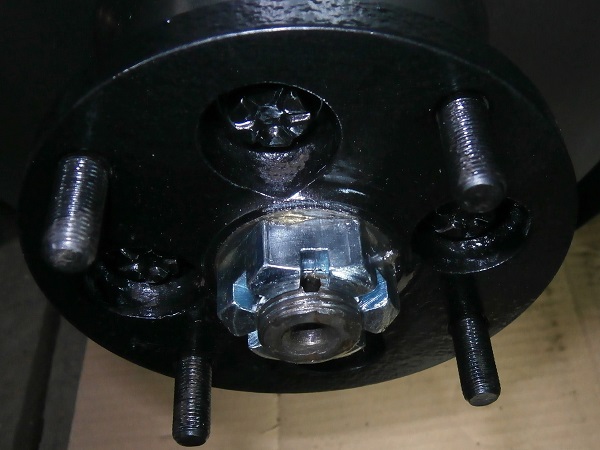
Remove the drive flange
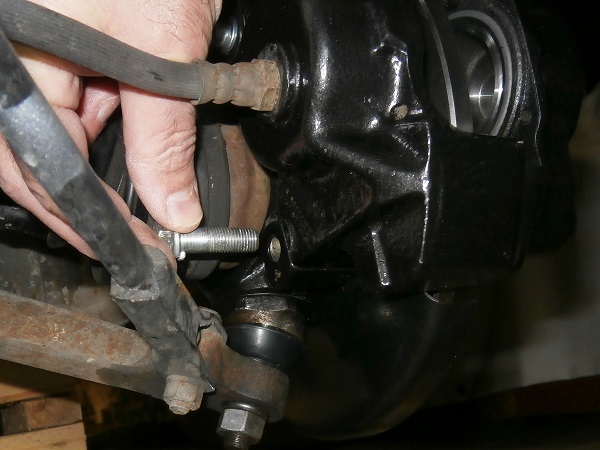
Op 04
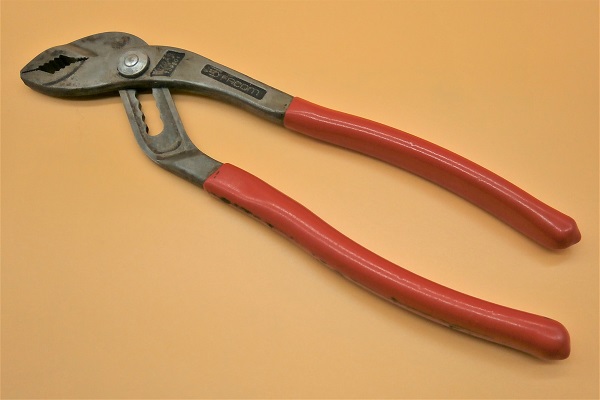
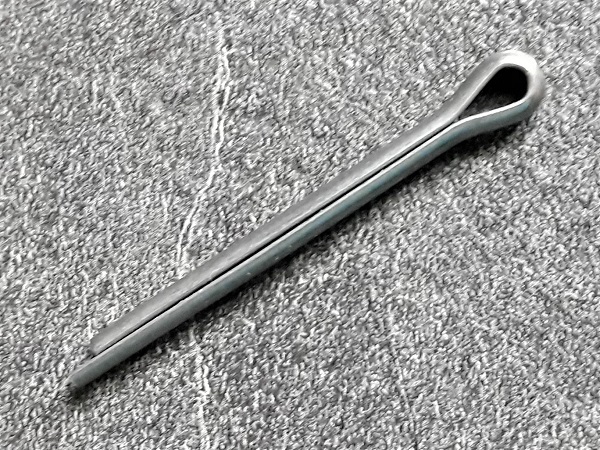
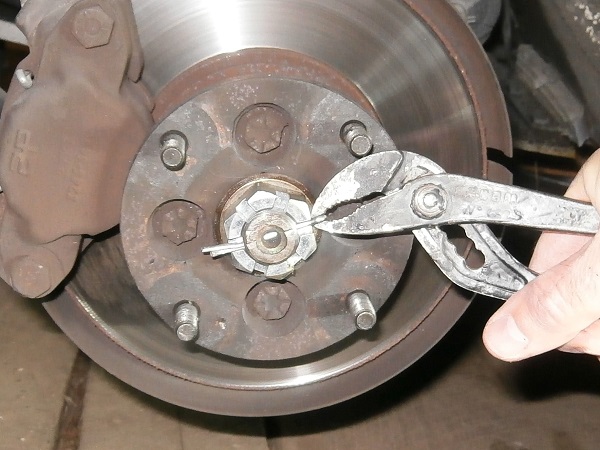
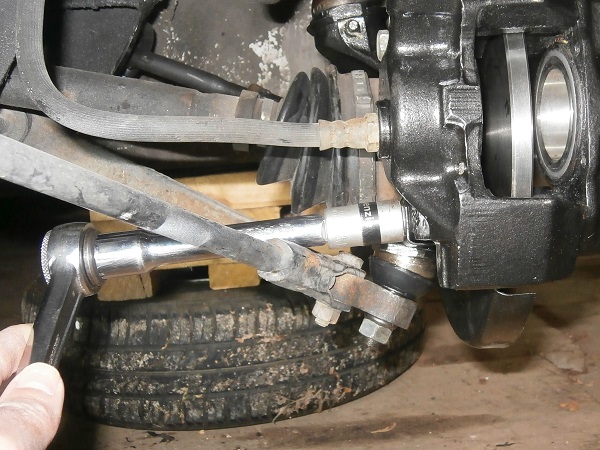
Remove the CV joint split pin. Use the multigrip pliers.
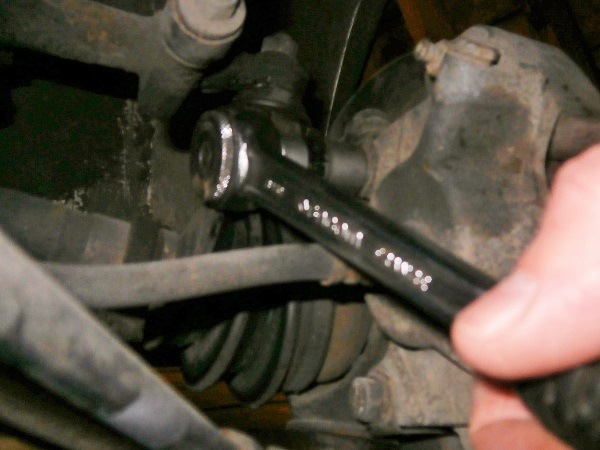
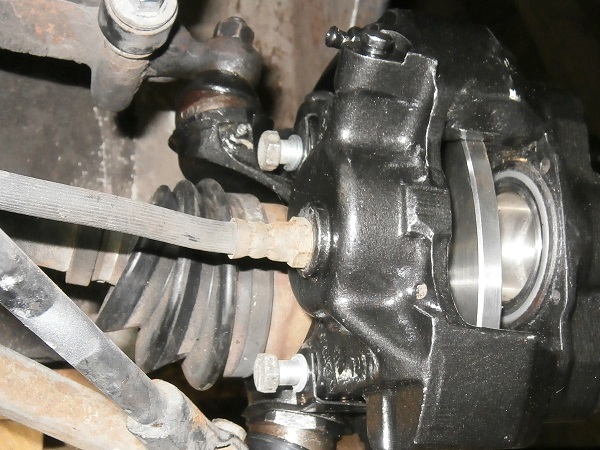
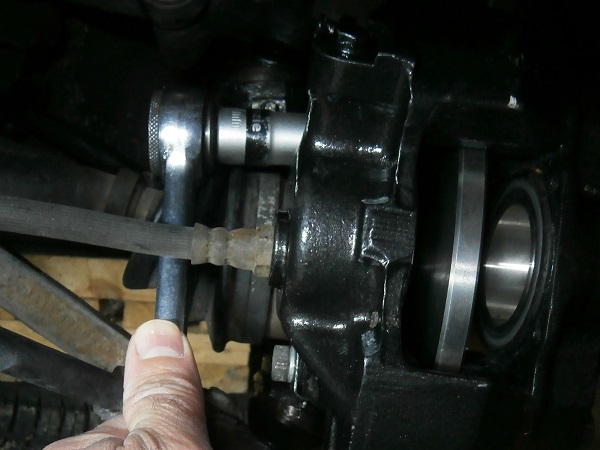
Op 05
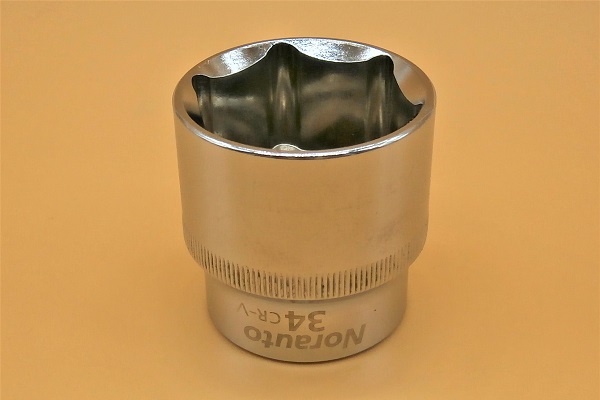
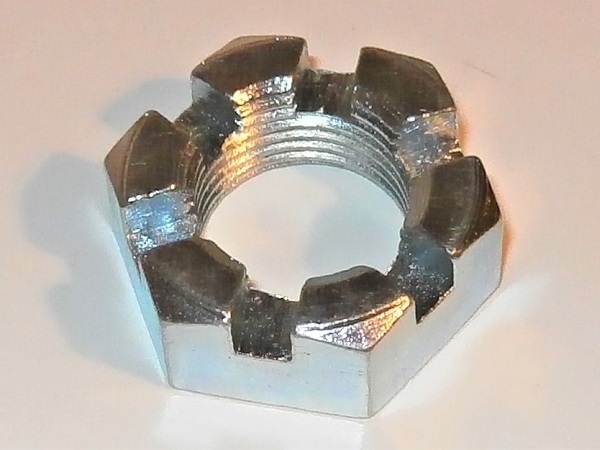
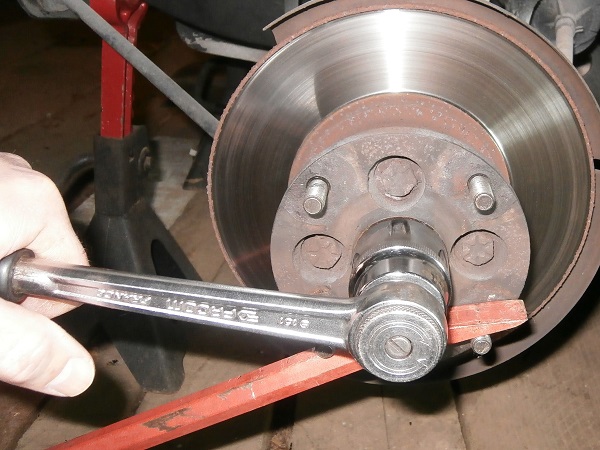
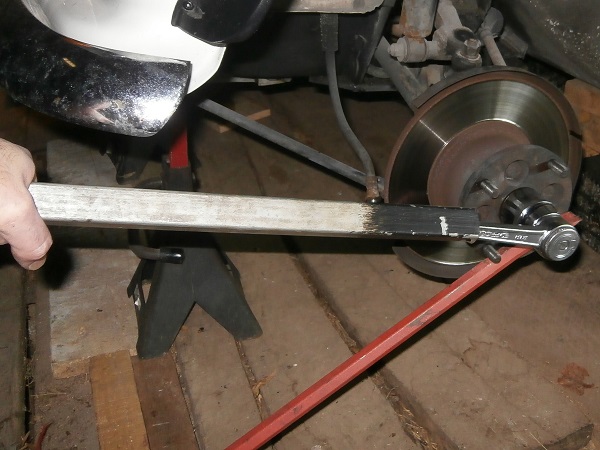
Immobilize the drive flange in rotation and unscrew the nut. Use the 34 mm socket.
The tightening torque of the nut is very high. Use a very large lever arm.
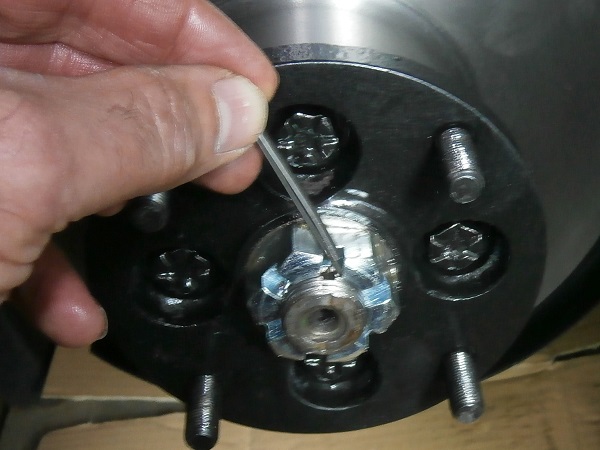
Op 06
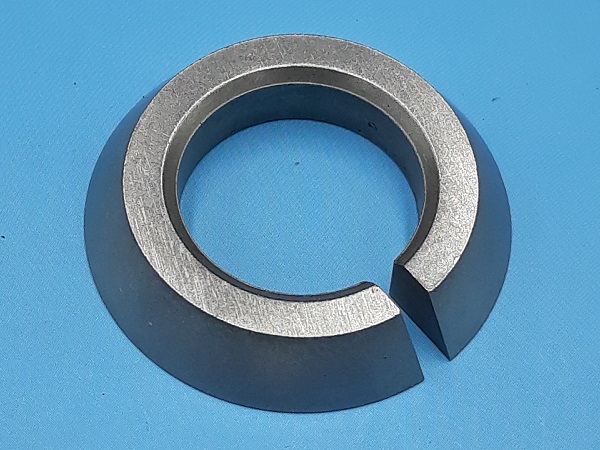
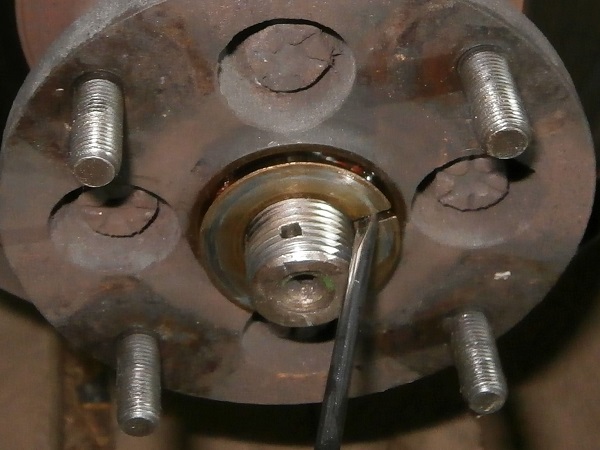
Remove the split washer. Use a small flathead screwdriver.

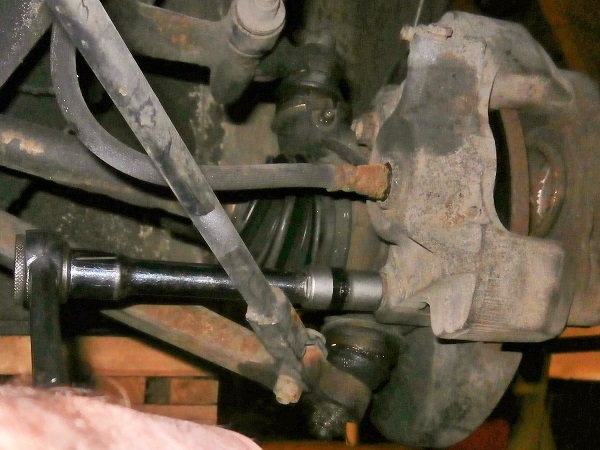
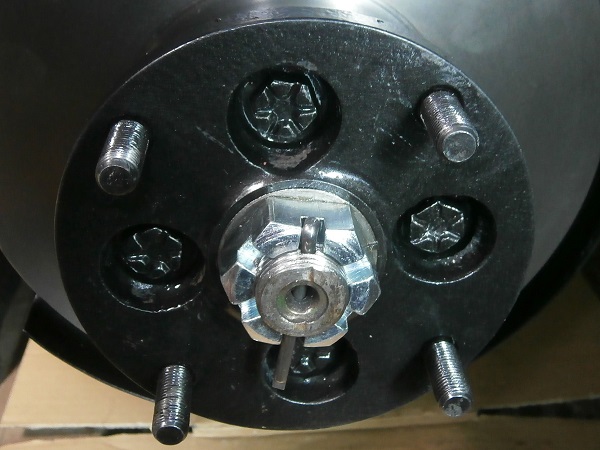
Op 07
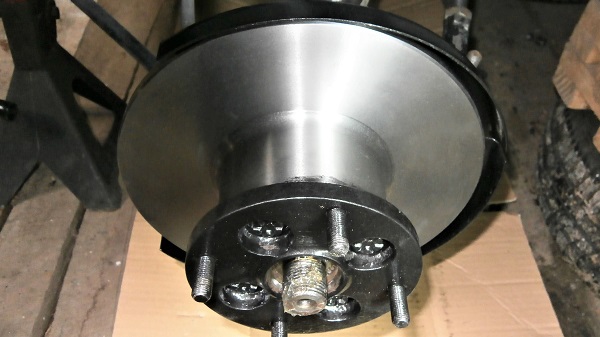
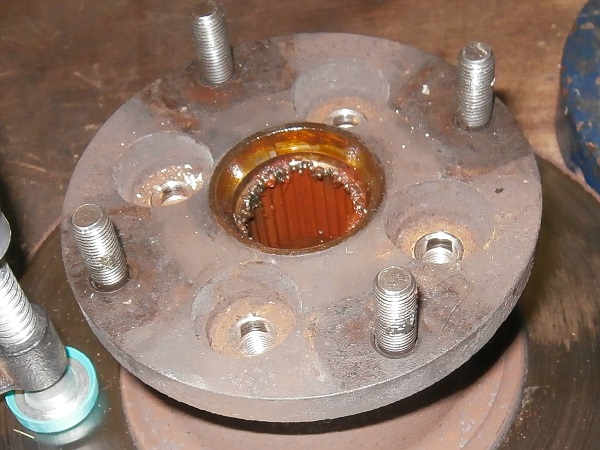
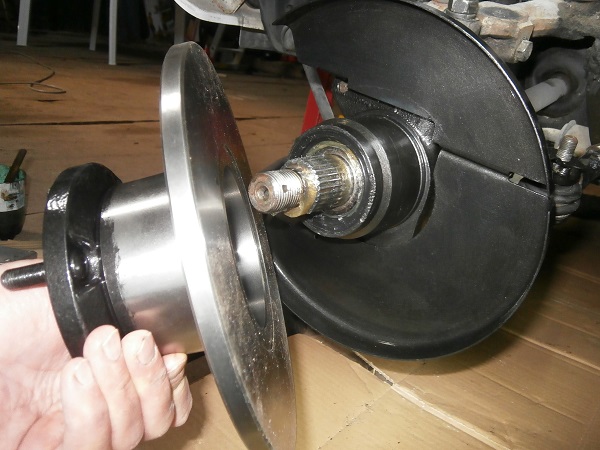
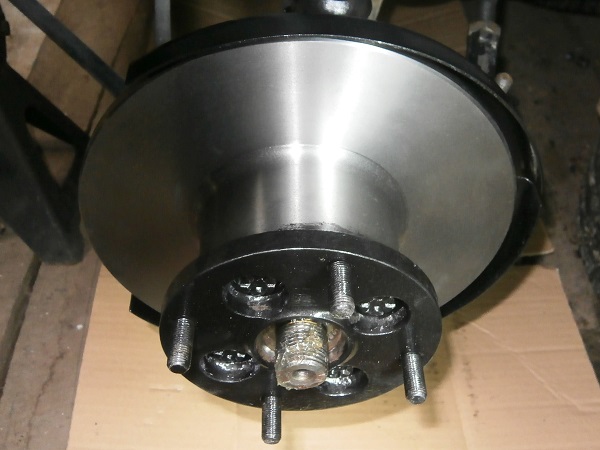
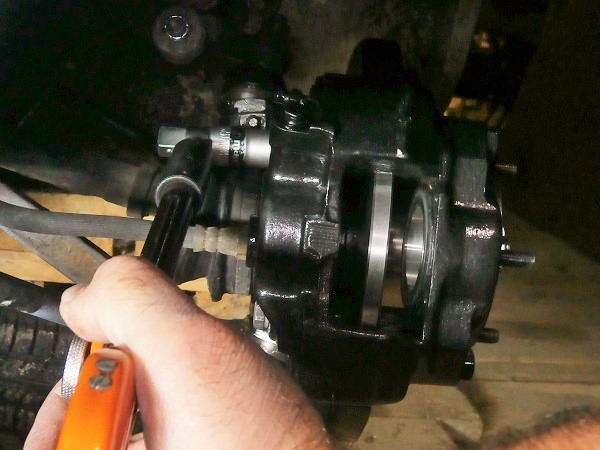
Remove the drive flange and disc assembly. Pull firmly by hand.
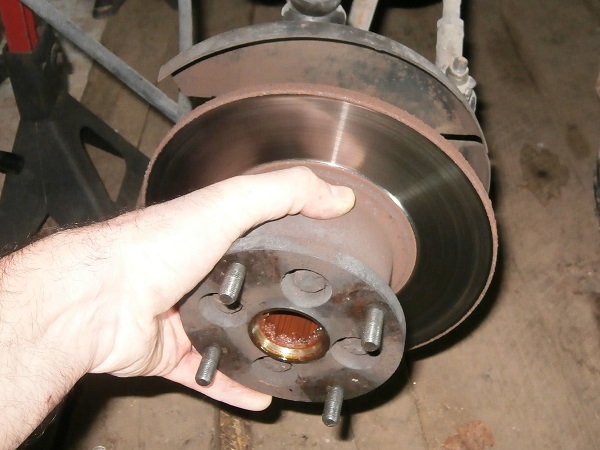
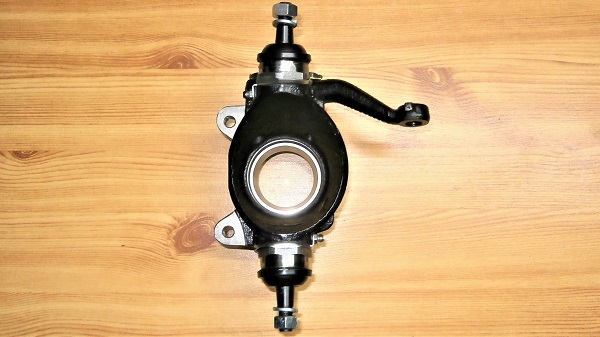
Remove the disc
Op 08
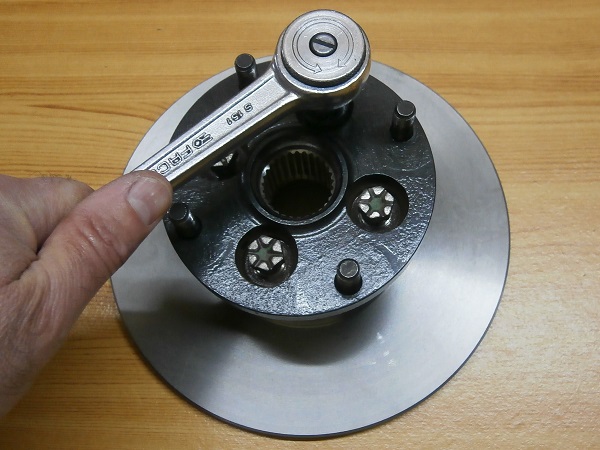
Remove the 4 bolts fixing the disc to the drive flange. Use the 14 mm socket.
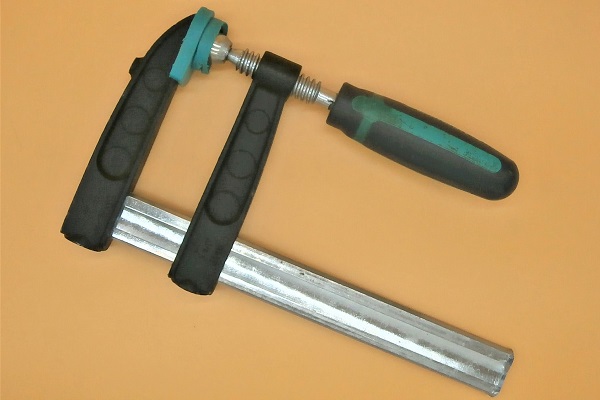
Clamp the disc on a support beforehand.
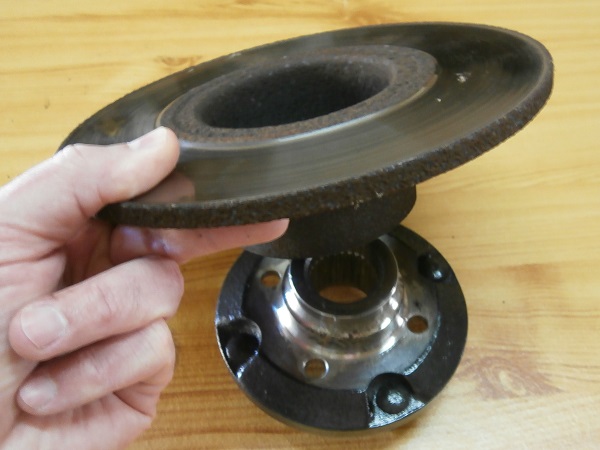
Op 09
Separate the drive flange from the disc. Pull firmly by hand and if necessary tap lightly with a mallet.
Advertisement
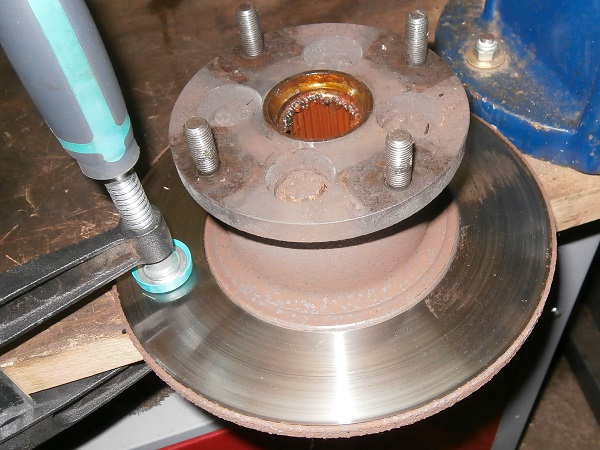
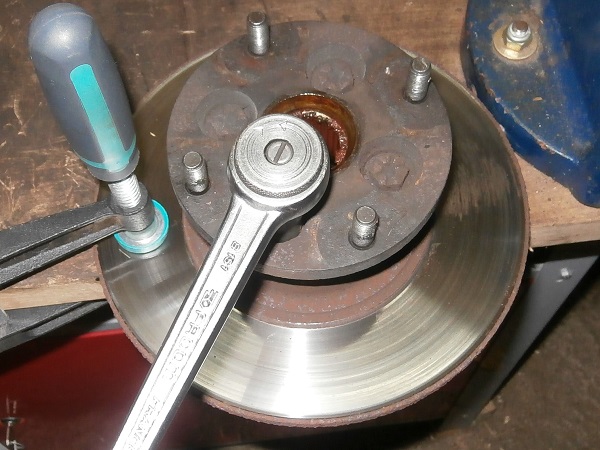
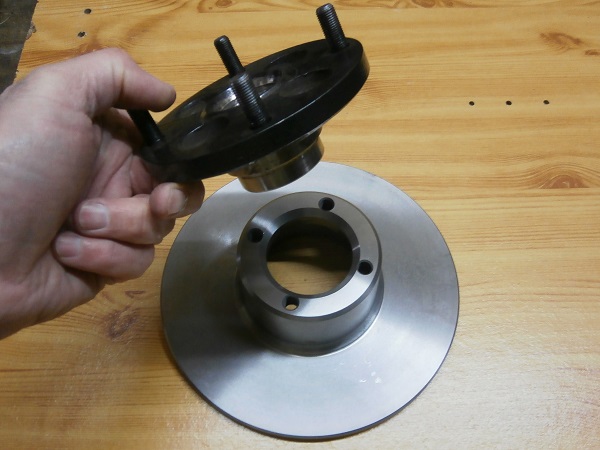
Fit the disc
Op 10
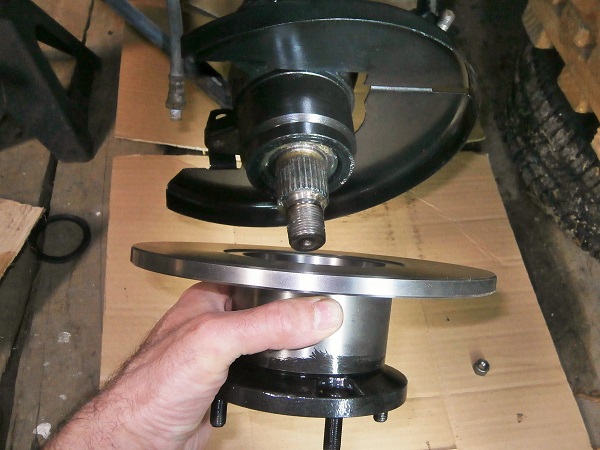
Fit the drive flange on the new disc (21A2612MS).
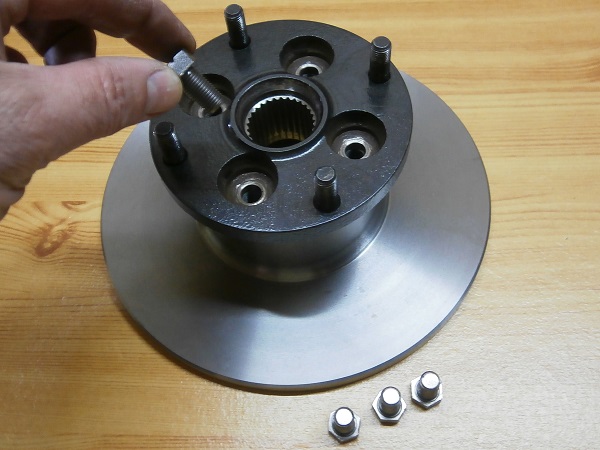
Op 11
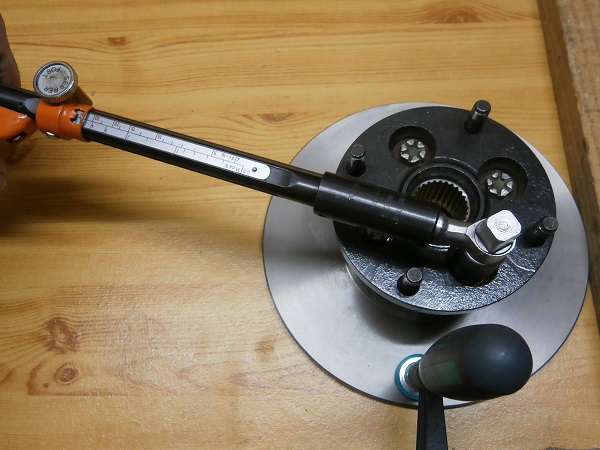
Screw in the 4 fixing bolts. Use the 14 mm socket.
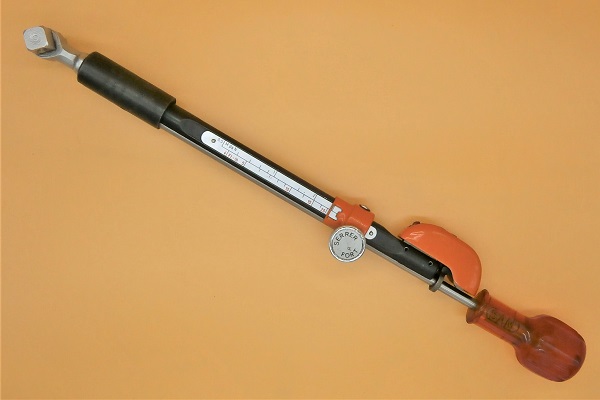
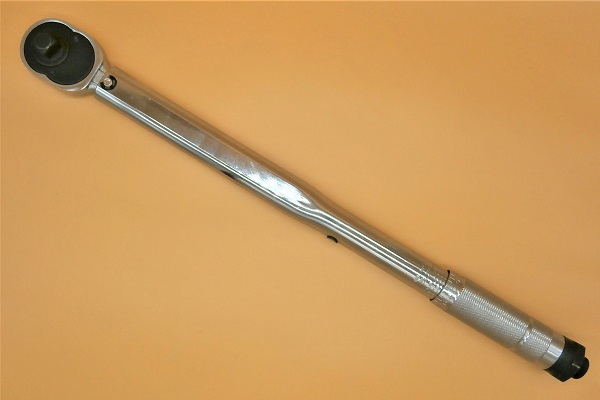
Tighten the 4 bolts to a torque of 57 mN. Use the torque wrench.
Clamp the disc on a support beforehand.
Fit the drive flange
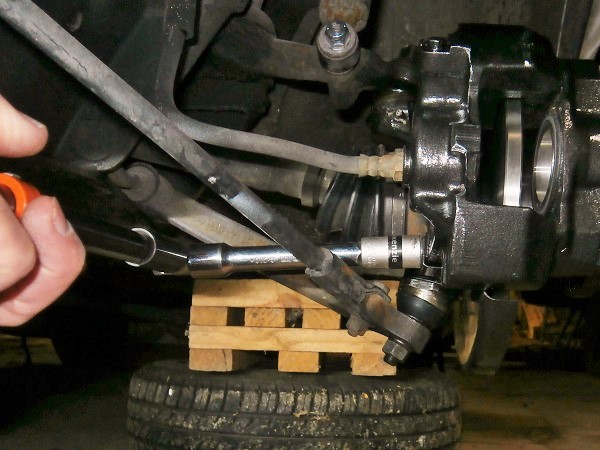
Op 12
Fit the drive flange and disc assembly on the CV joint shaft.
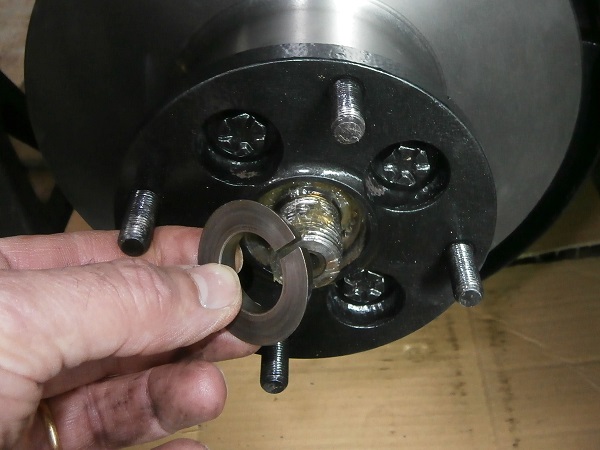
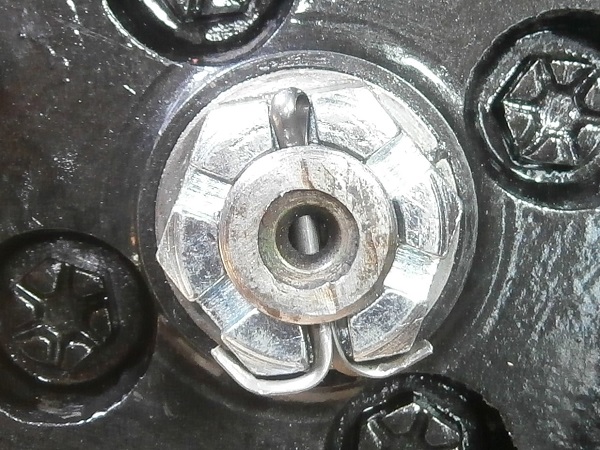
Op 13
Fit the split washer (FAM9270A).
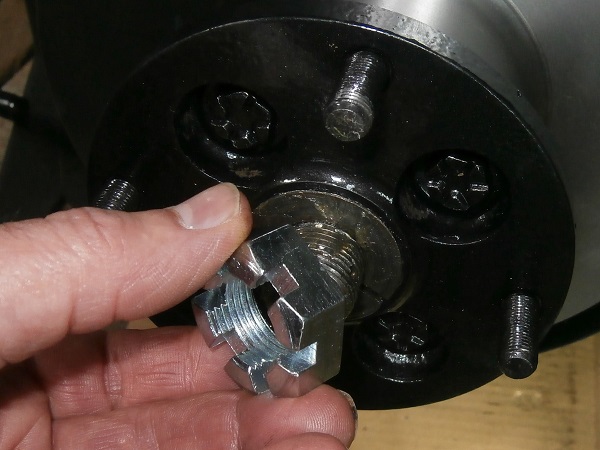
Op 14
Immobilize the drive flange in rotation and screw in the nut (BTA249MS). Use the 34 mm socket.
Tighten the nut to the torque corresponding to the type of CV joint shaft. Use the torque wrench.
The tightening torque of the nut is :
• 203 mN for a CV joint shaft with 2 pin holes.
• 262 mN for a CV joint shaft with 1 pin hole.
• 203 mN for a CV joint shaft with 2 pin holes.
• 262 mN for a CV joint shaft with 1 pin hole.
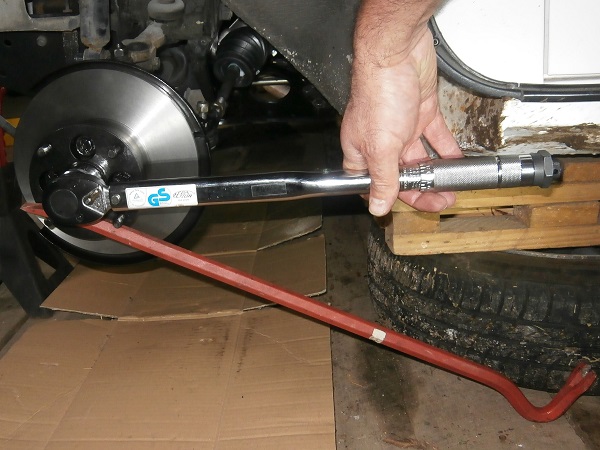
Op 15
Continue tightening the nut to align a notch with a pin hole.
Op 16
Fit the split pin (GHF510) and spread the legs (of the pin). Use the multigrip pliers.
Advertisement
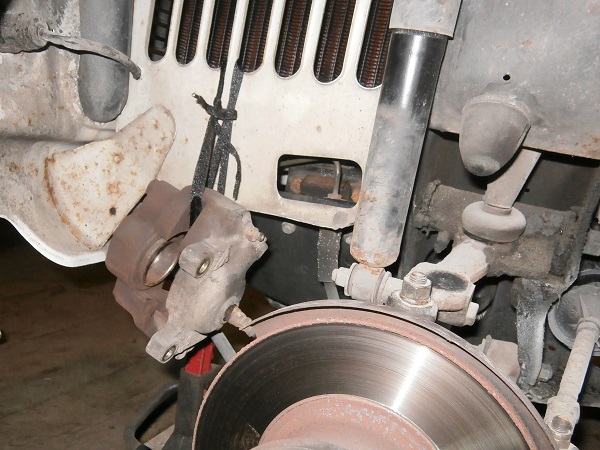
Fit the caliper
Op 17
Fit the caliper on the swivel hub.
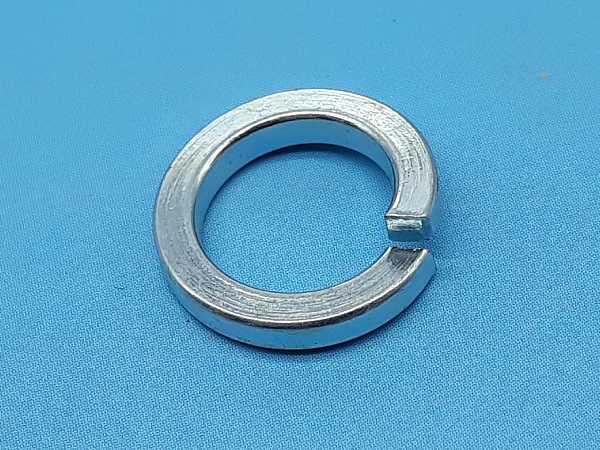
Screw in the 2 caliper fixing bolts with their spring washers (GFK1126). Use the 14 mm socket.
Op 18
Tighten the 2 caliper fixing bolts to a torque of 52 mN. Use the torque wrench + 14 mm socket.
Op 19
Fit the brake pads and the wheel (➔ see the tutorial ''Front brake pads change'' Op 10 to 16).
Always fit new pads after changing brake discs.
The End