This tutorial is also available in French
➔

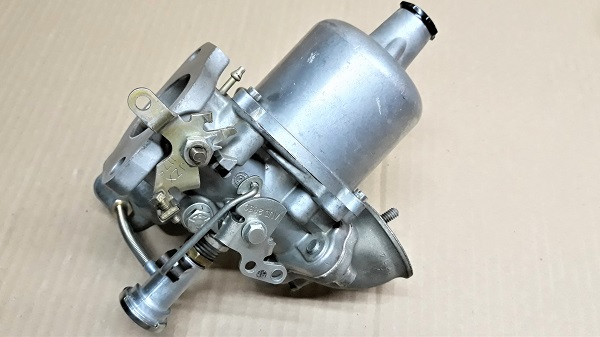
HS4 carburetor removal on Austin Mini
Vehicle ➔ Mini 1000 year 1991 automatic gearbox
Difficulty ➔ Easy

Time ➔ 2 hours
Summary
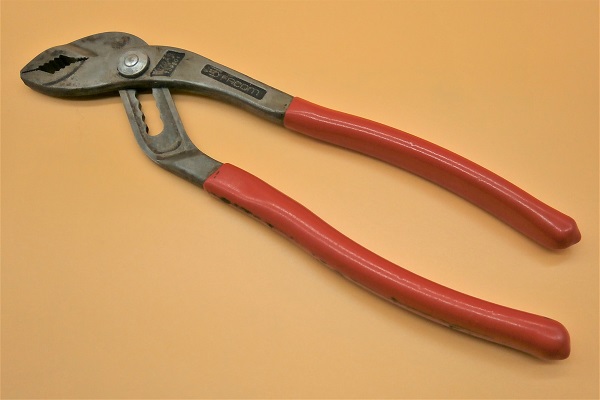
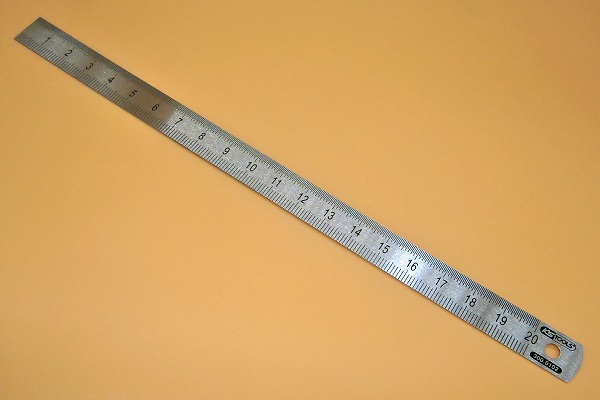
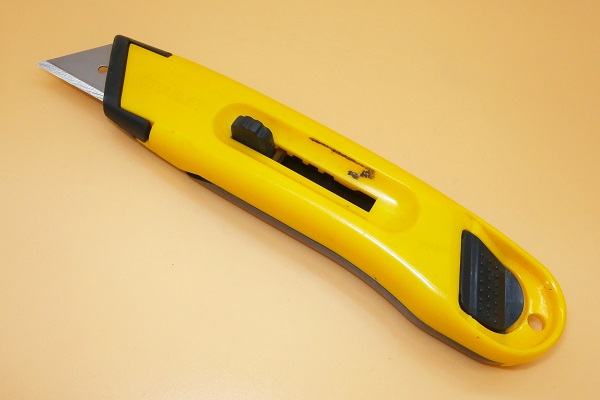
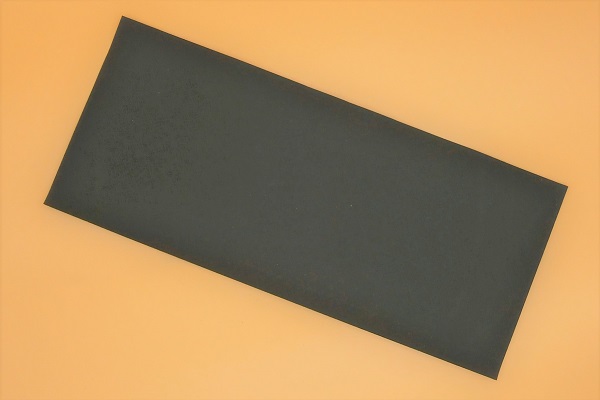
Required Tools
Sponsored links by


Spare Parts
Our Partners


Packaging :
•
All the above parts are sold individually.
Advertisement
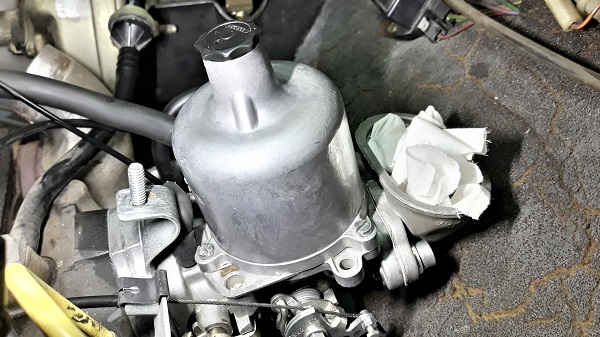
Remove the carburetor
Op 01
Remove the air filter box (➔ see the tutorial ''HS4 air filter change'' Op 01 to 02).
Op 02
Disconnect the accelerator cable from the carburetor (➔ see the tutorial ''Accelerator cable change'' Op 02 to 04).
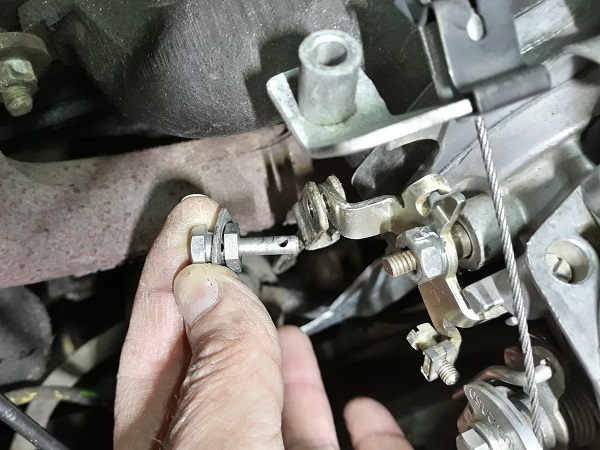
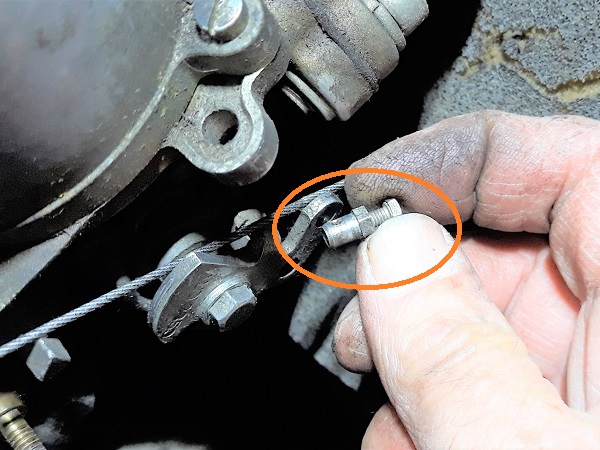
Op 03
Remove the accelerator cable trunnion :
•
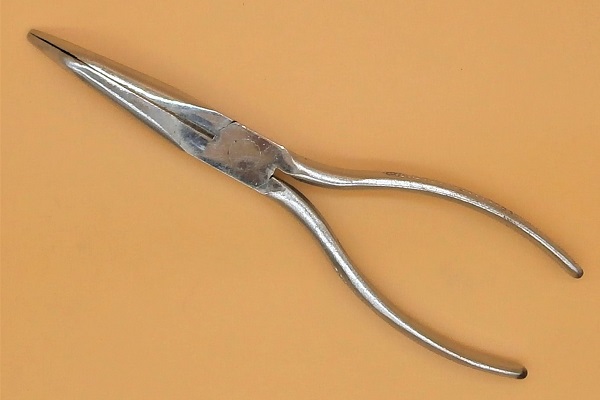
Remove the split pin. Use the needle-nose pliers.
•
Retrieve the washer located on the pin side.
•
Remove the trunnion. Pull by hand.
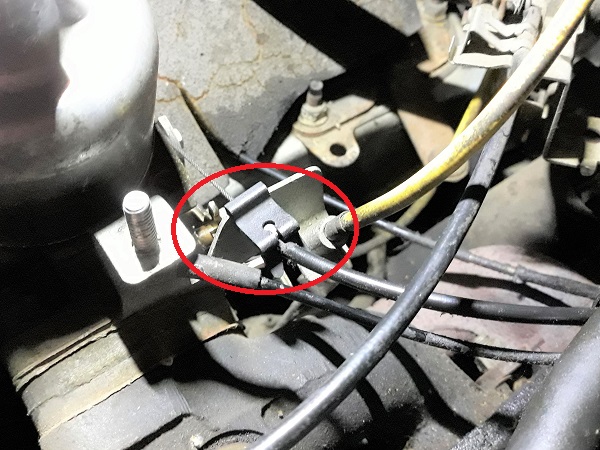
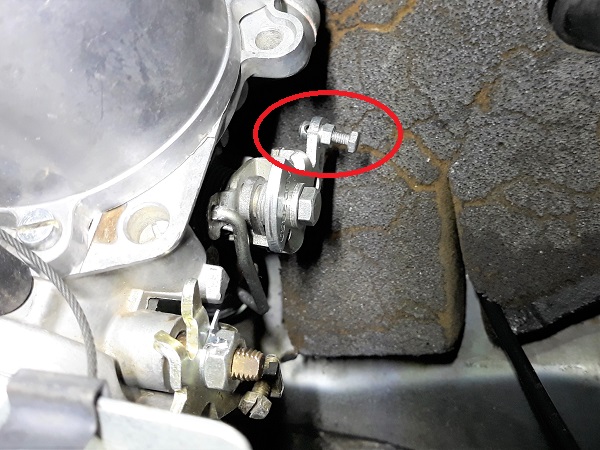
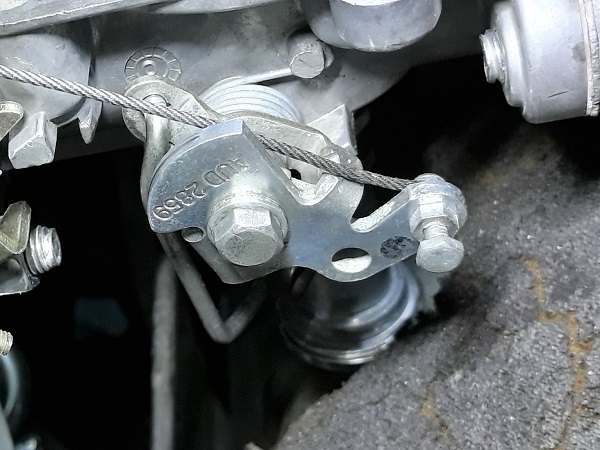
Op 04
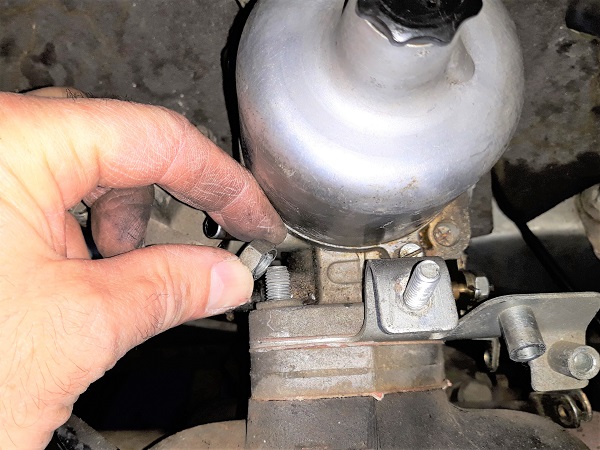
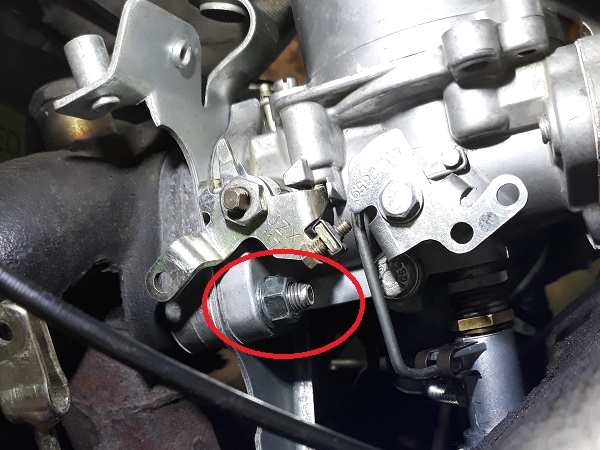
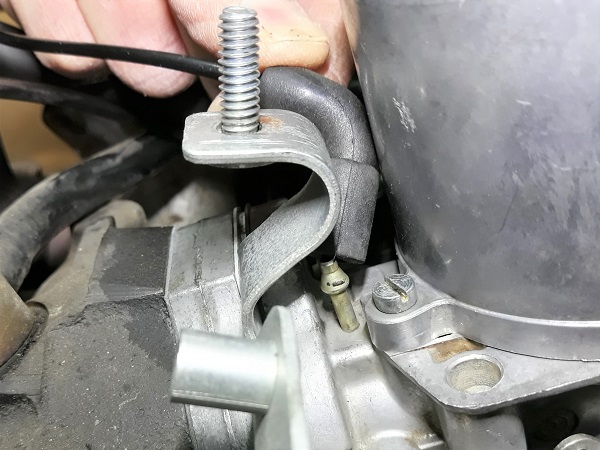
Unlock the choke cable :
•
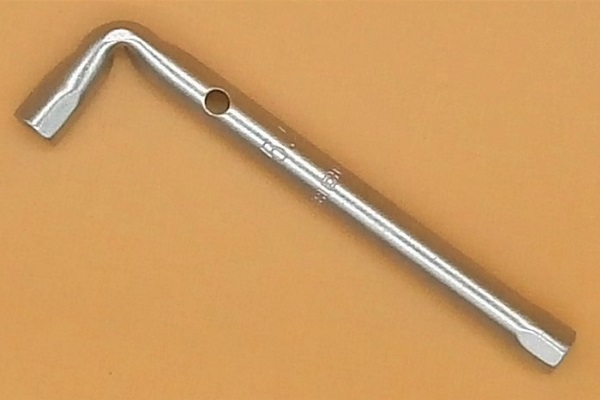
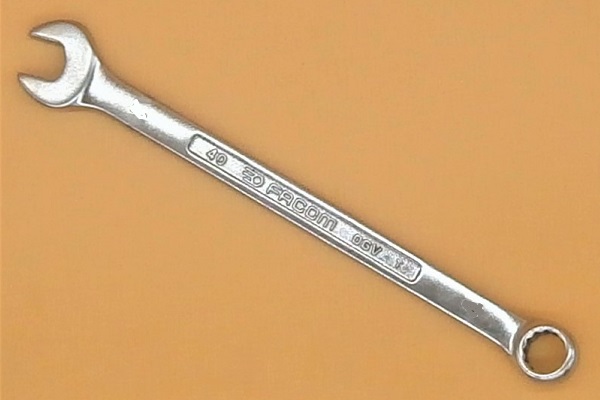
Unscrew the choke cable fixing bolt. Use the 5 mm socket spanner and the 6 mm spanner.
•
Release the cable.
•
Retrieve the choke cable trunnion.
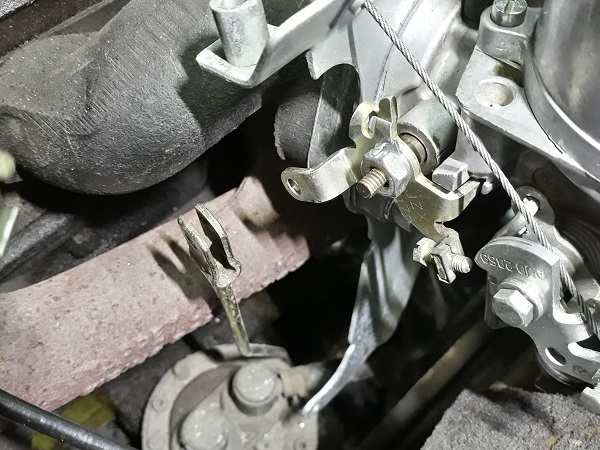
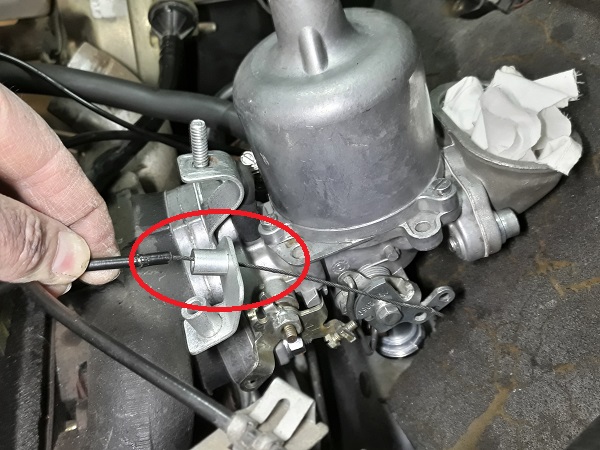
Op 05
Release the choke cable from the carburetor :
•
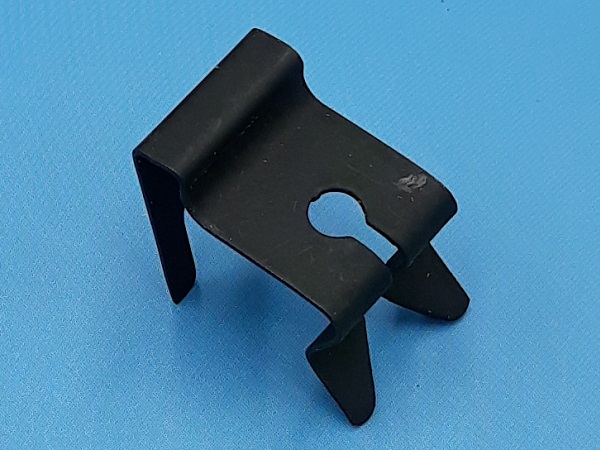
Remove the choke cable fixing clip. Pull firmly by hand or use a flathead screwdriver.
•
Remove the choke cable from its support bracket. Pull by hand.
Op 06
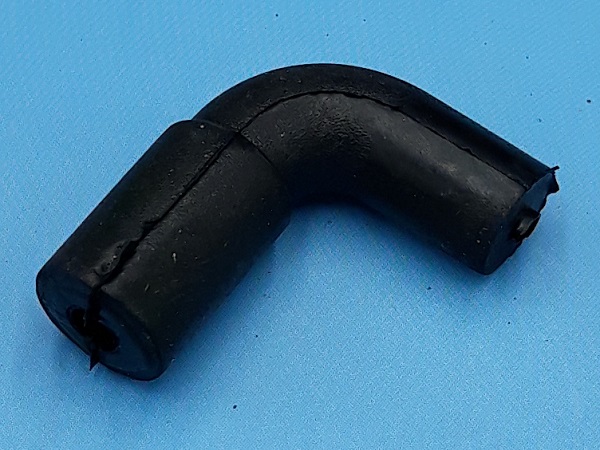
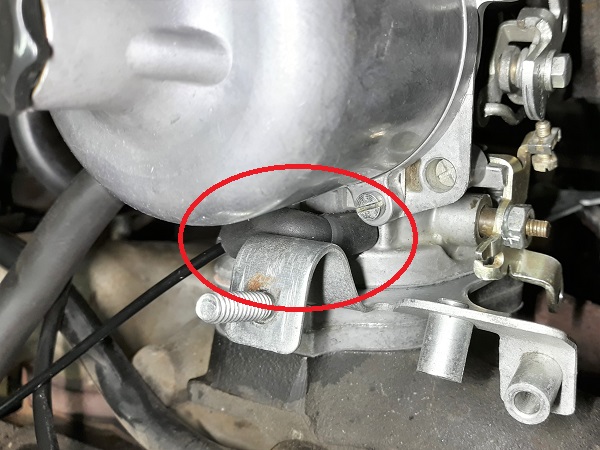
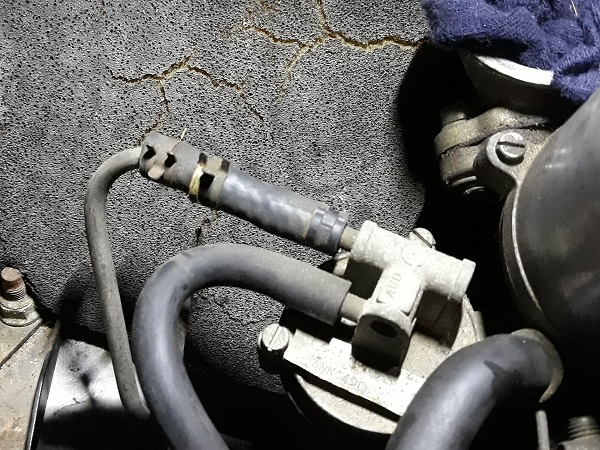
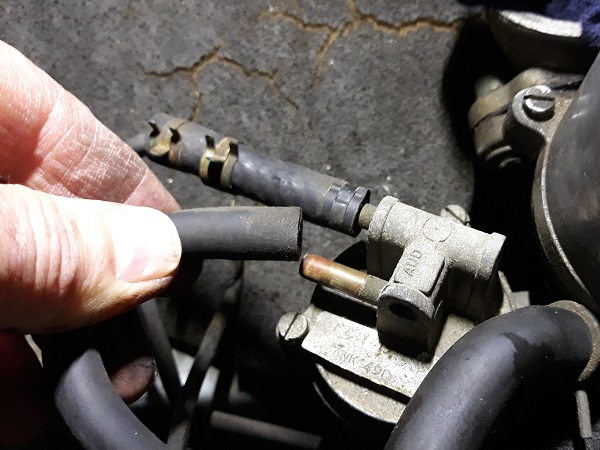
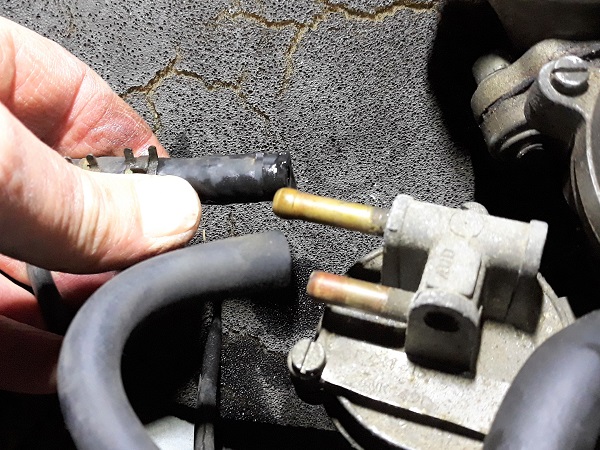
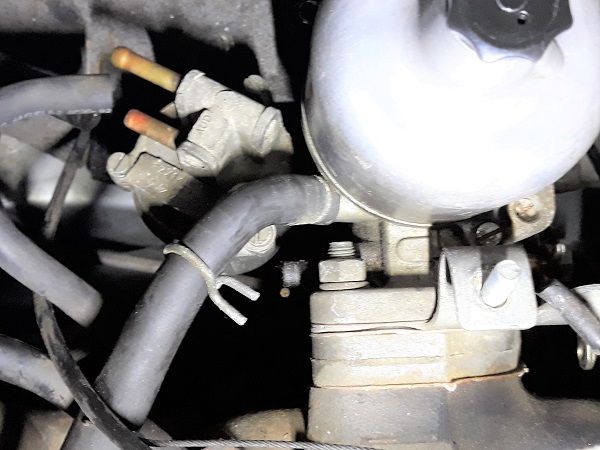
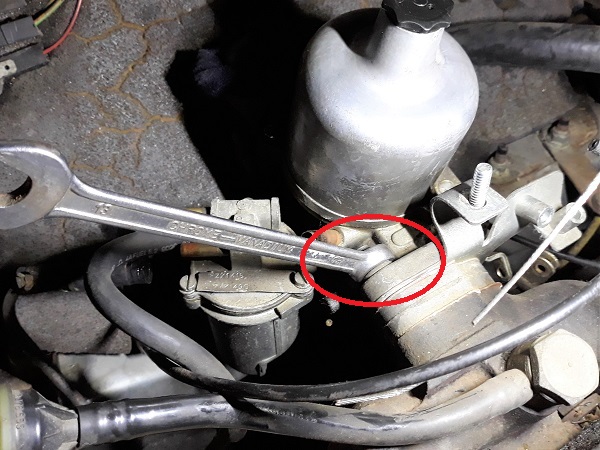
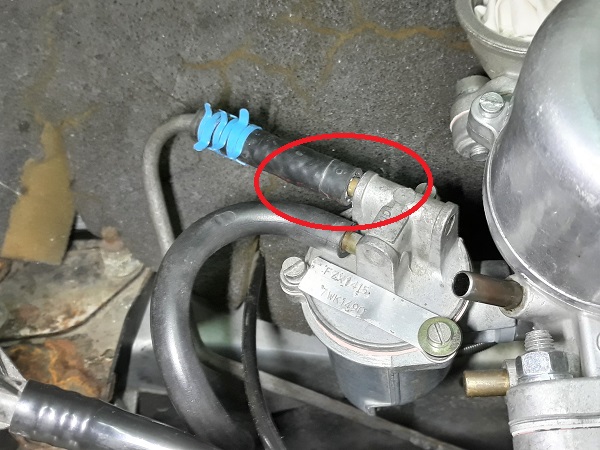
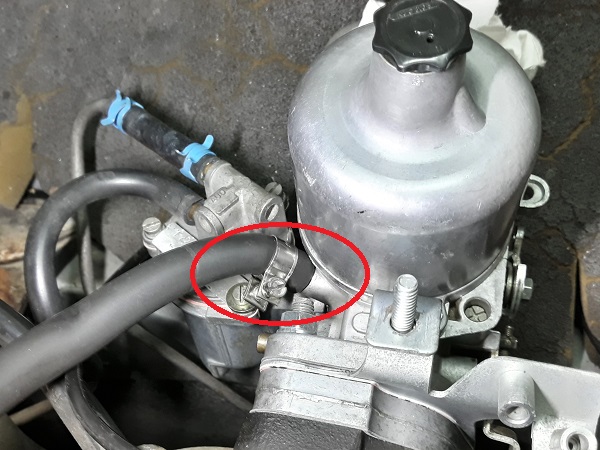
Disconnect the vacuum pipe elbow. Pull by hand.

Op 07
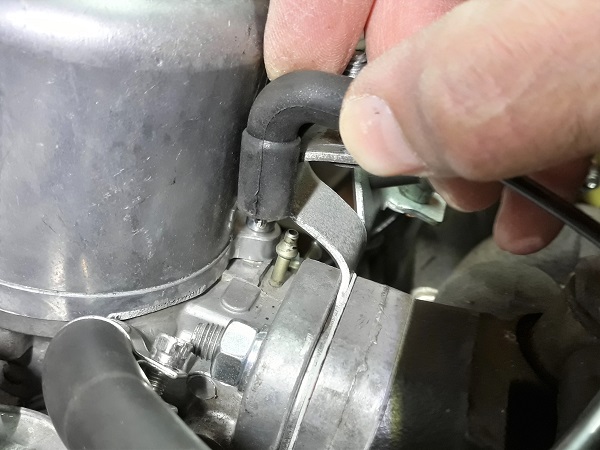
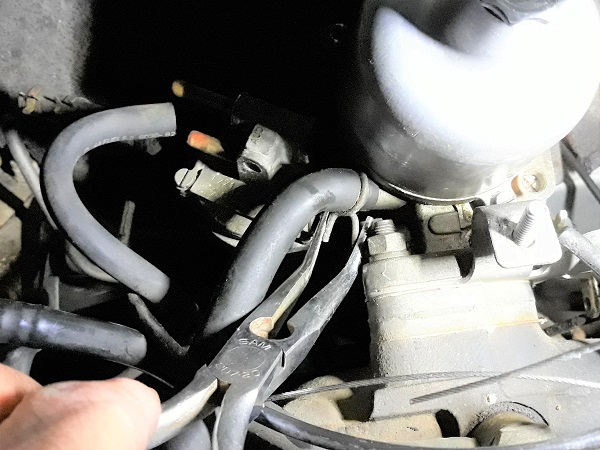
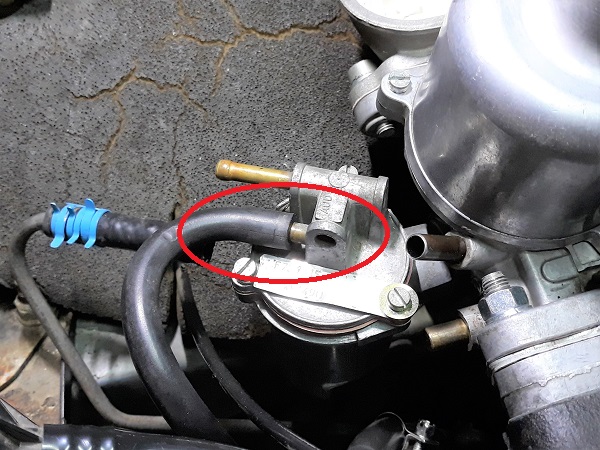
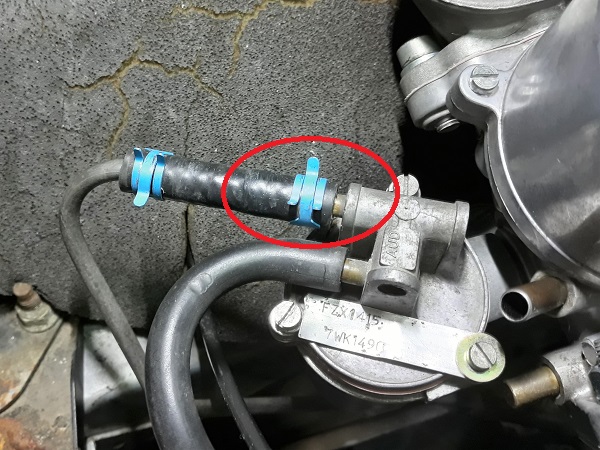
Move the petrol inlet hose clip. Use the multigrip pliers.
Op 08
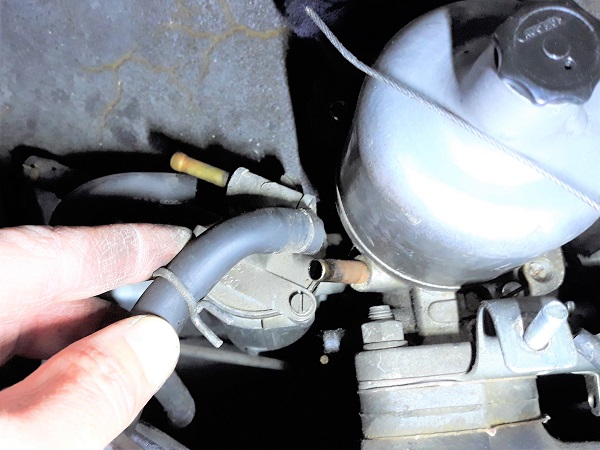
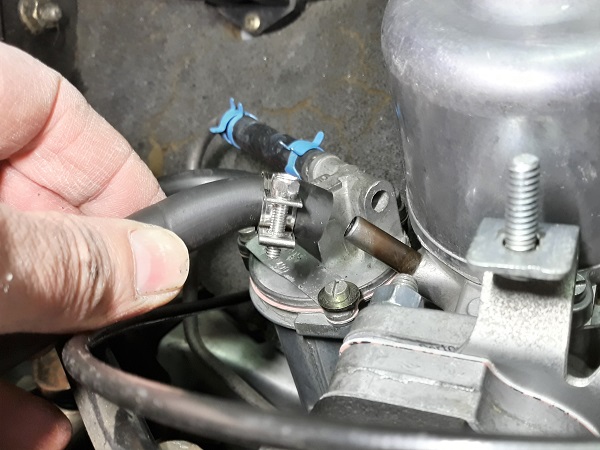
Disconnect the overflow hose (1st photo) and the petrol inlet hose (2nd photo). Pull firmly by hand.
Op 09
Move the breather hose clip. Use the needle-nose pliers.
Op 10
Disconnect the breather hose. Pull firmly by hand.
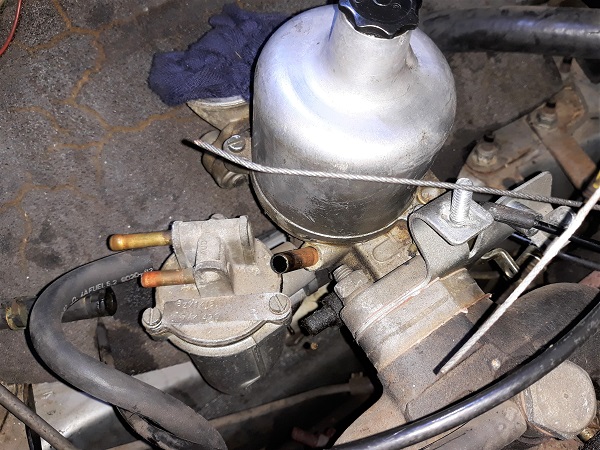
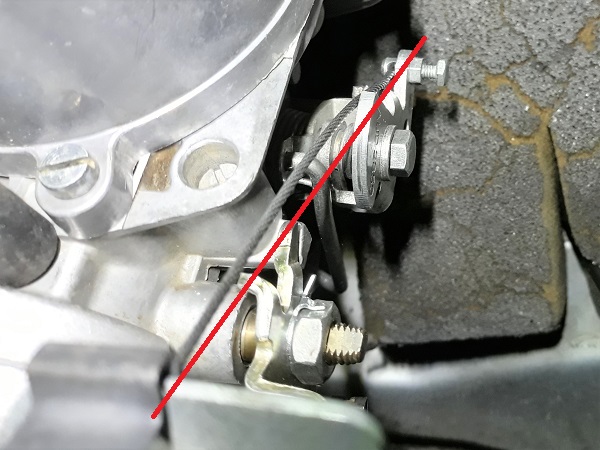
Op 11
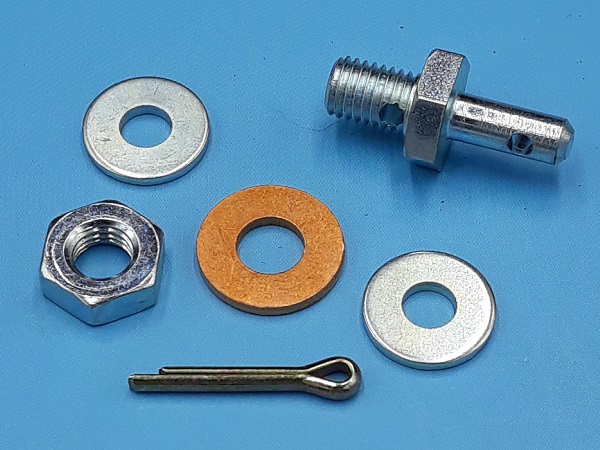
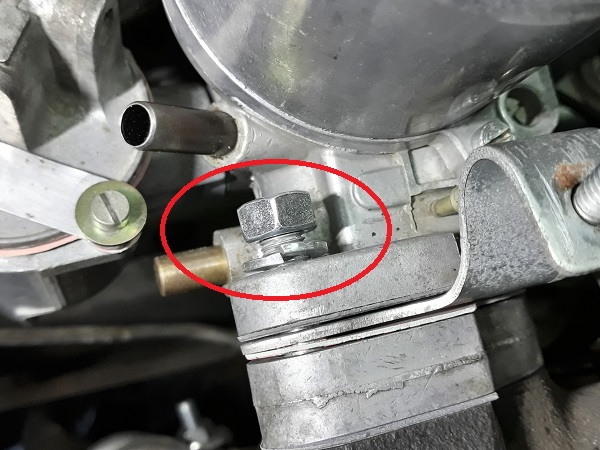
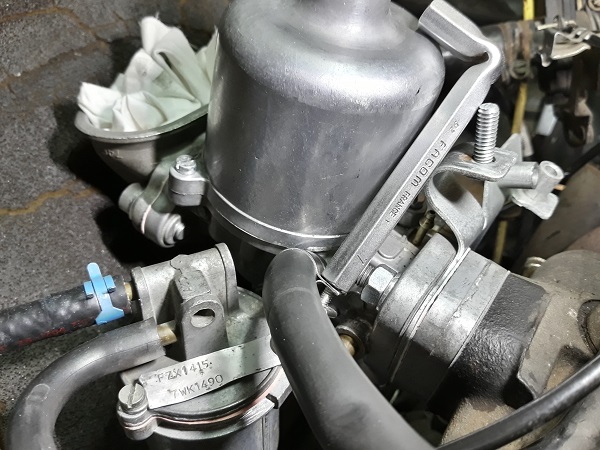
Remove the 2 nuts and the 2 washers fixing the carburetor. Use the 13 mm spanner.
Op 12
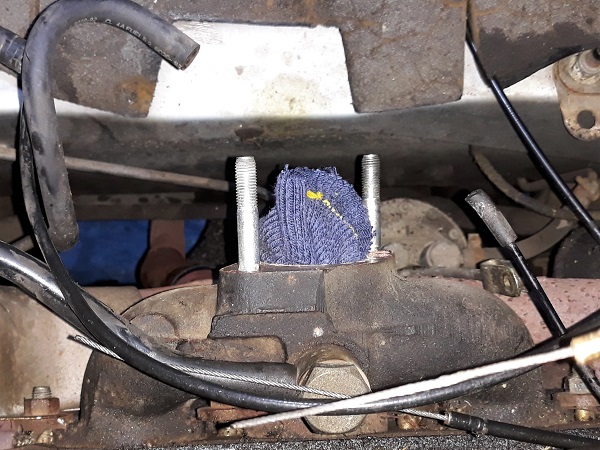
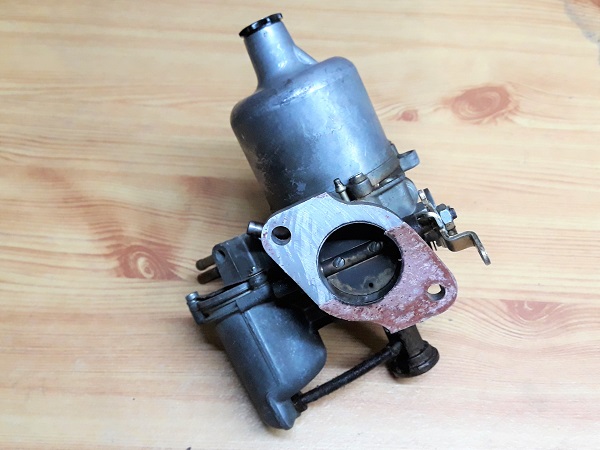
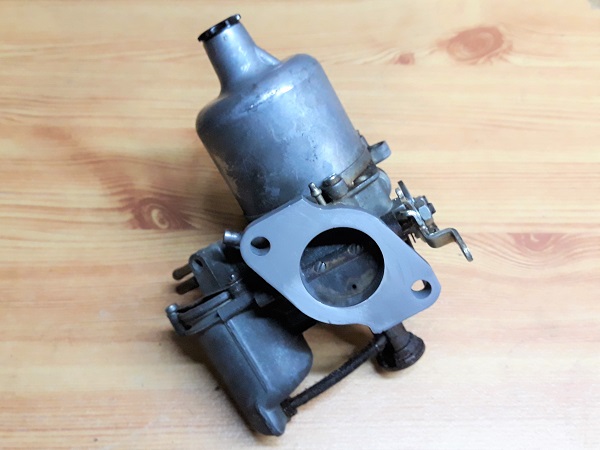
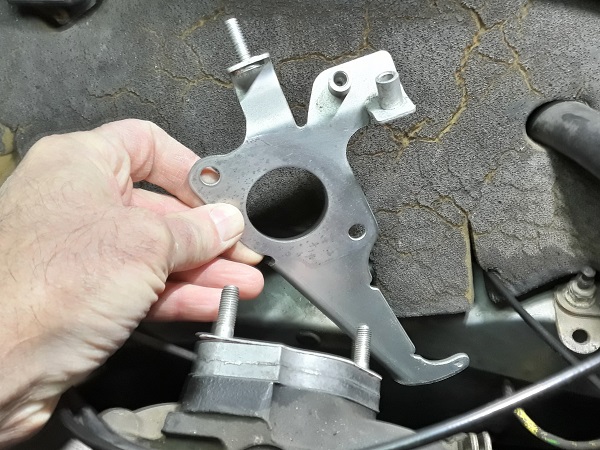
Remove the carburetor, the bracket and the spacer. Pull by hand.

Position a cloth on the inlet of the manifold to prevent any impurities from entering.

Advertisement
Fit the carburetor
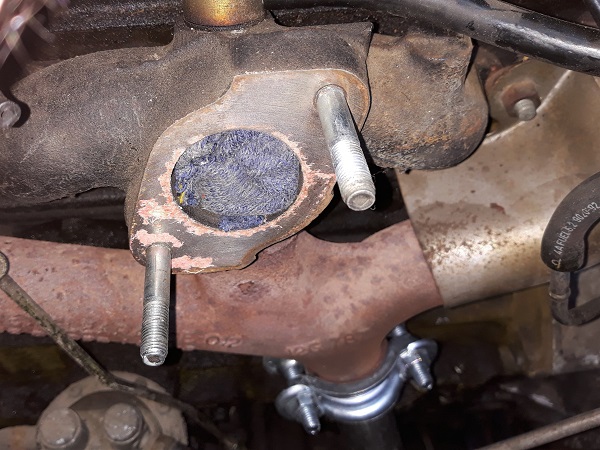
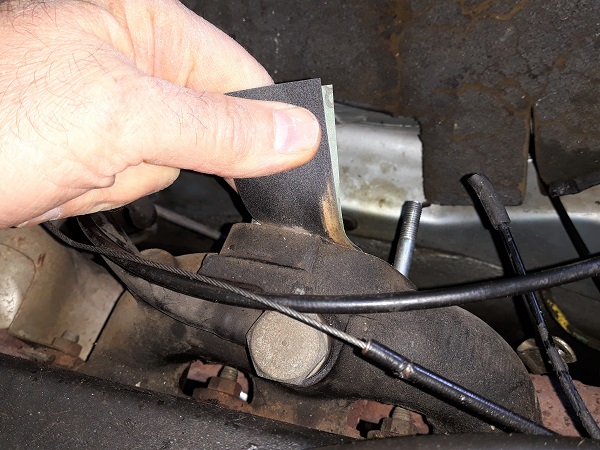
Op 13
Thoroughly clean the support face of the manifold. Use sandpaper.
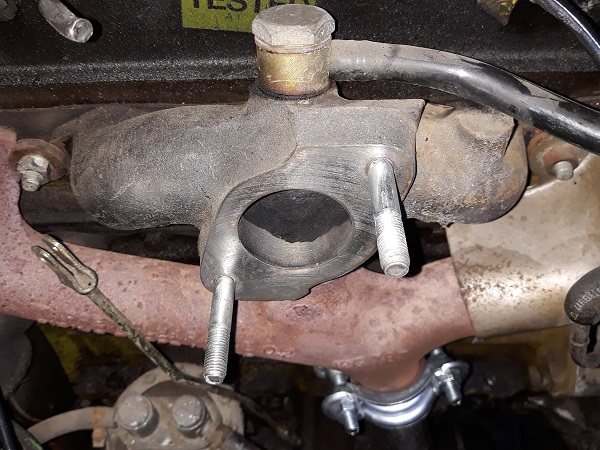
Op 14
Thoroughly clean the 2 support faces of the spacer. Use the cutter and sandpaper.
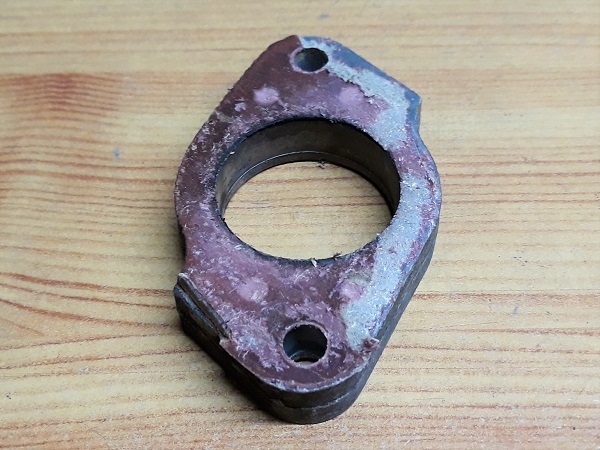
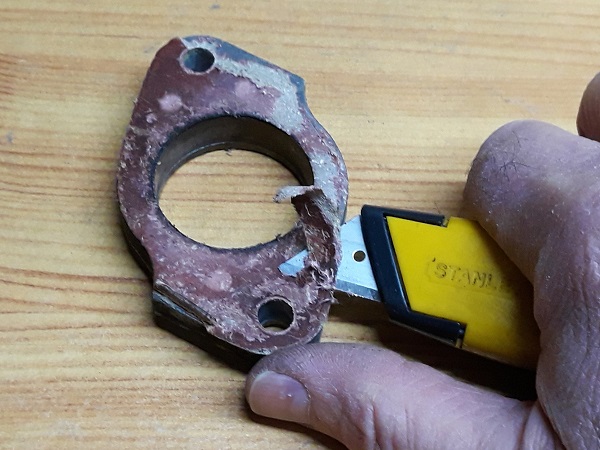
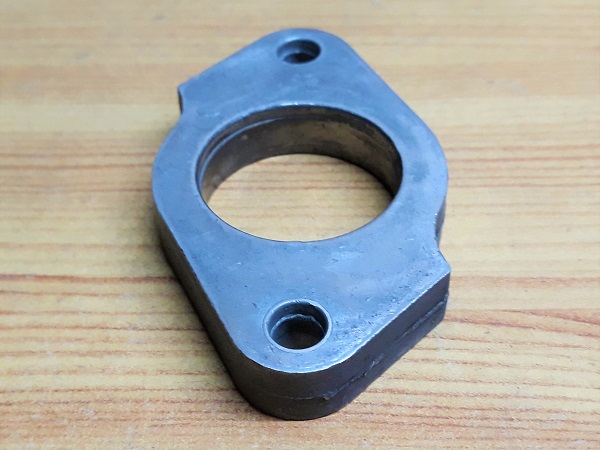
Op 15
Thoroughly clean the 2 support faces of the bracket. Use the cutter and sandpaper.
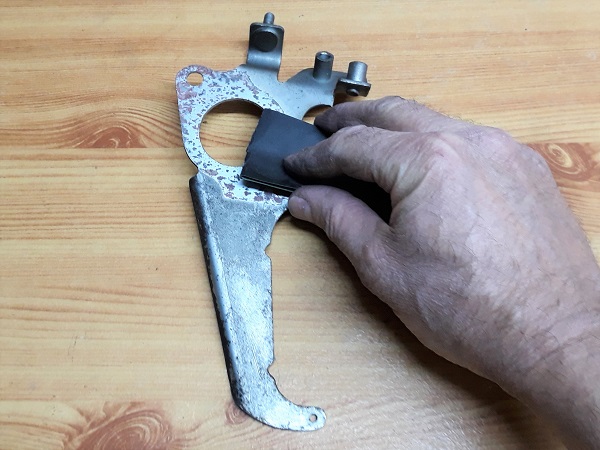
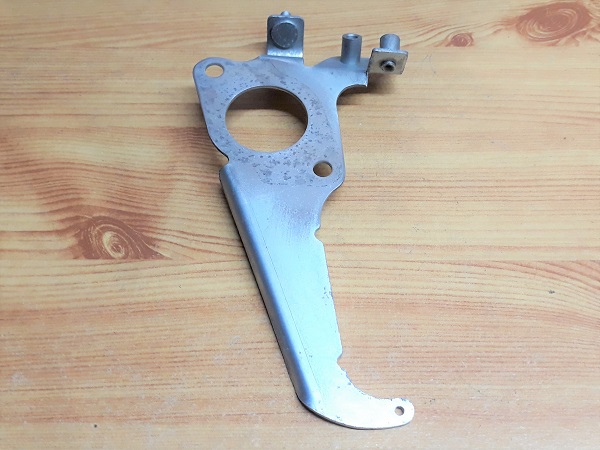
Op 16
Thoroughly clean the support face of the carburetor. Use the cutter and sandpaper.
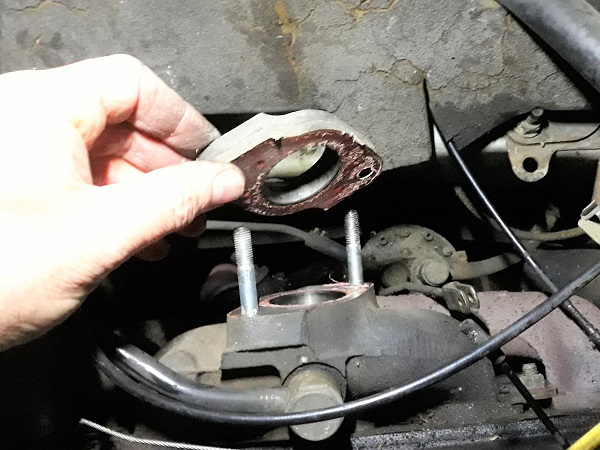
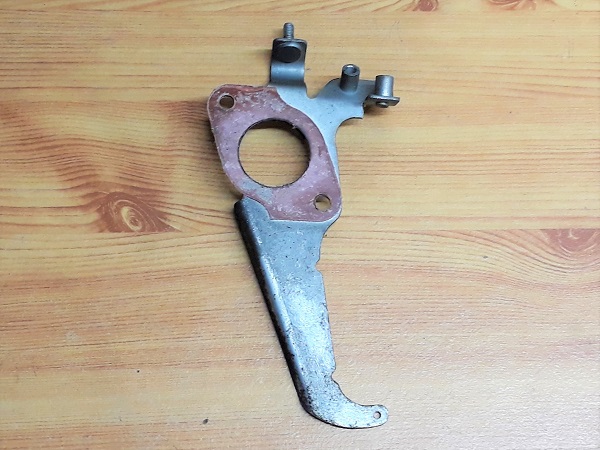
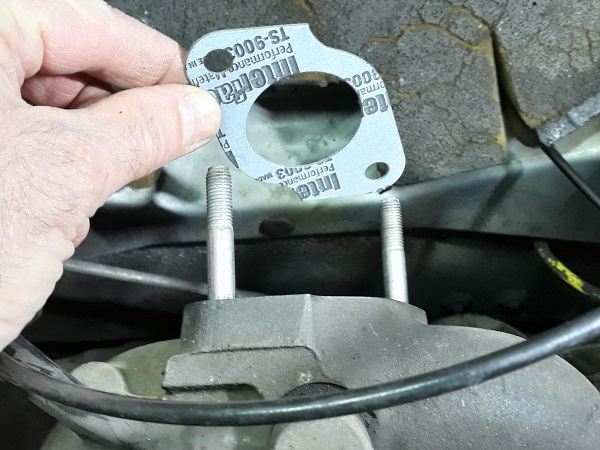
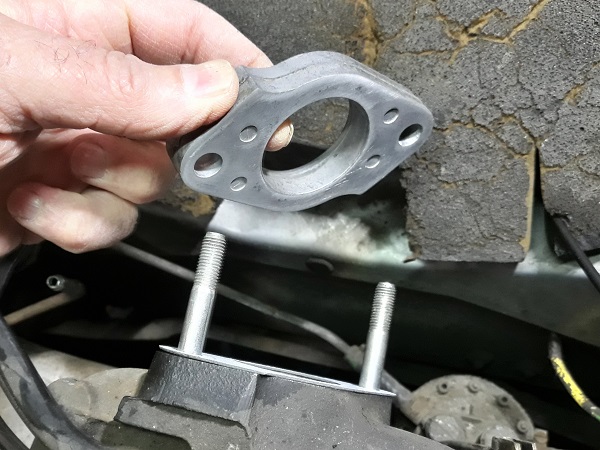
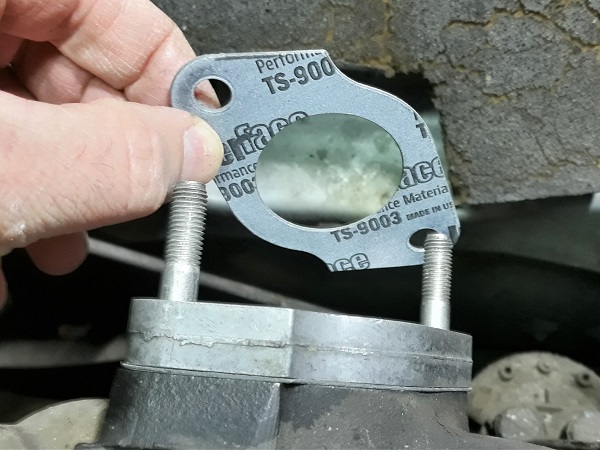
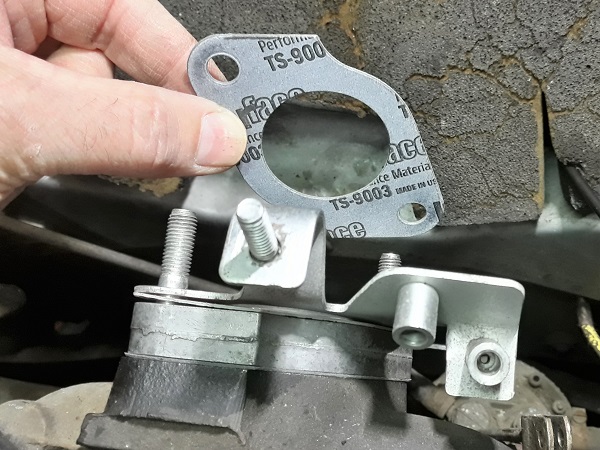
Op 17
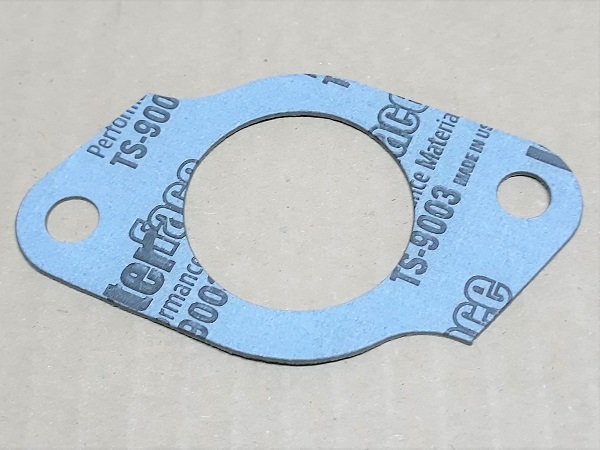
Fit the 1st gasket (AEC2083), the spacer, the 2nd gasket (AEC2083), the bracket and the 3rd gasket (AEC2083) on the manifold.
The gaskets and the spacer have a mounting direction. The contour of the 1st gasket must perfectly match the contour of the manifold. The other 2 gaskets and the spacer must be positioned identically.
The bracket also has a mounting direction. The accelerator and choke cables housing stops must be on the LH side (when sitting in the driver's seat).
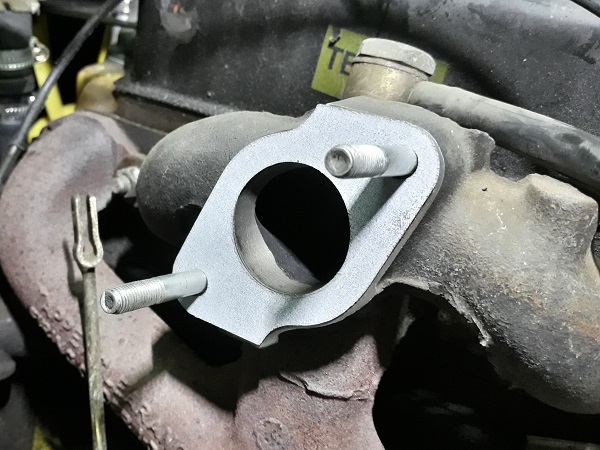
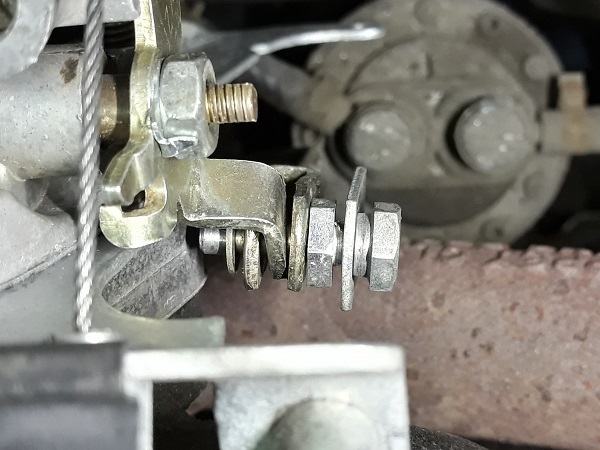
Op 18
Fit the carburetor on the manifold.

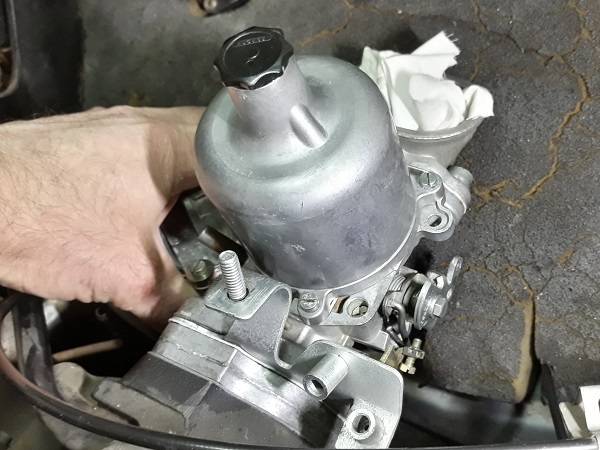
Op 19
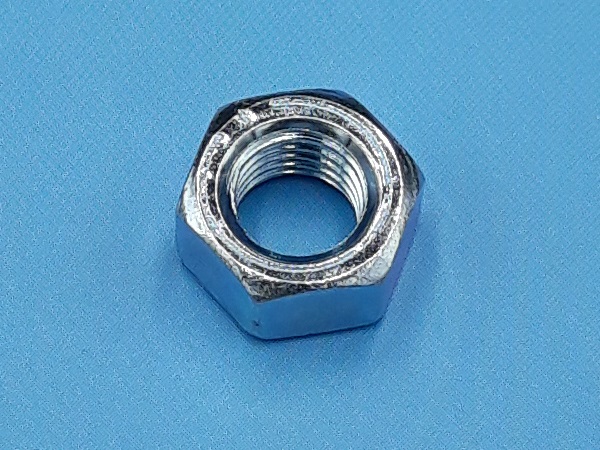
Fit the 2 spring washers (GFK1125) and the 2 nuts (GFK3212).
Screw in the 2 nuts. Use the 13 mm spanner.
Op 20
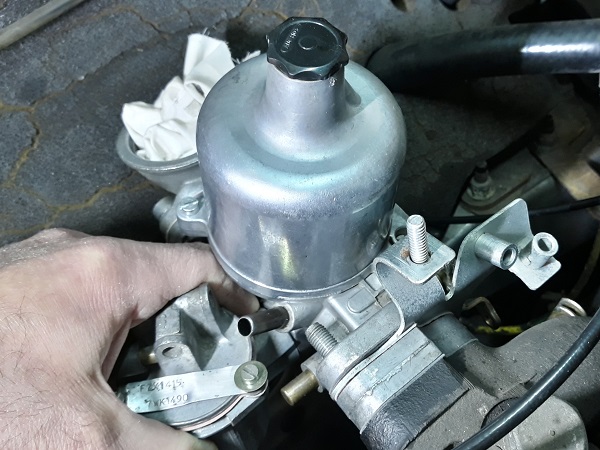
Connect the overflow hose. Push firmly by hand.

This is the hose connected to a rigid pipe that will end up under the RH front wing of the vehicle. Connect it to the pipe located in the central position of the float chamber cover.
This hose does not require a hose clip.
Op 21
Connect the petrol inlet hose. Push firmly by hand.
Fit the hose clip (UKC3803). Use the multigrip pliers.
This is the hose connected to a rigid pipe that comes from the petrol pump. Connect it to the pipe located on the side of the float chamber cover.
Op 22
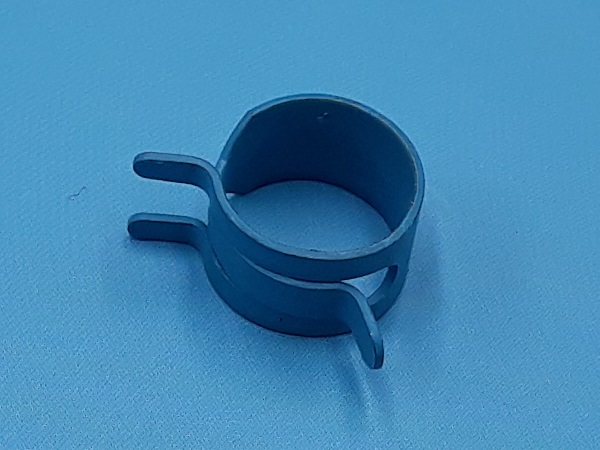
Connect the breather hose. Push by hand.
Tighten the clip (GHC405). Use the 7 mm socket spanner.
Op 23
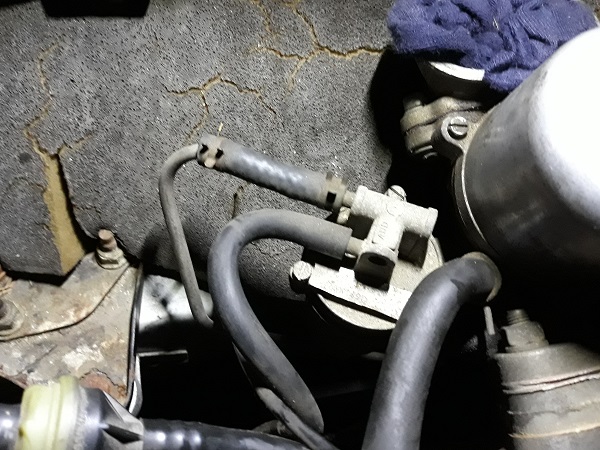
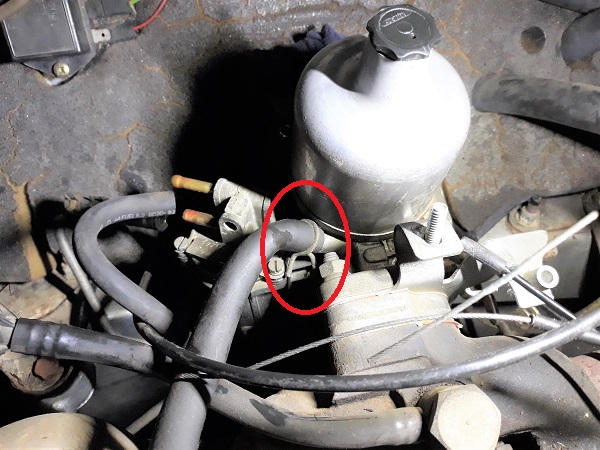
Connect the vacuum pipe elbow (12B2062) to the carburetor. Push by hand.
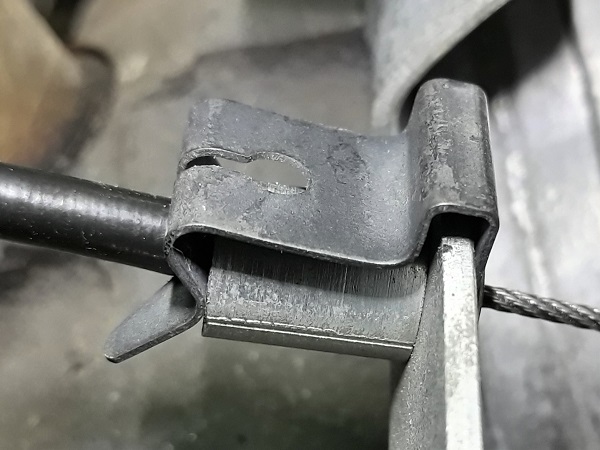
Op 24
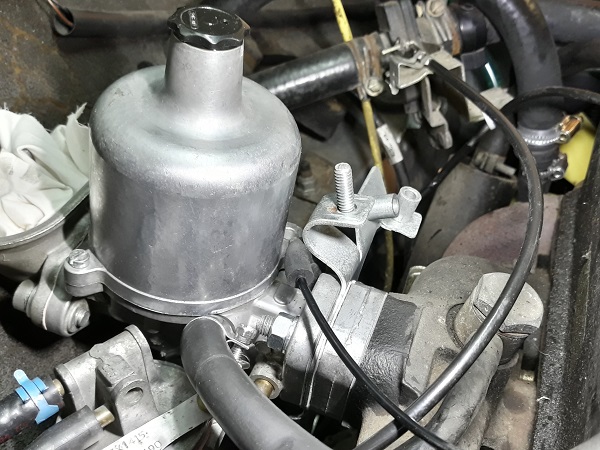
Fit the choke cable on the carburetor :
•
Engage the choke cable on its support bracket.
•
Fit the clip (13H3472). Push with your fingers.
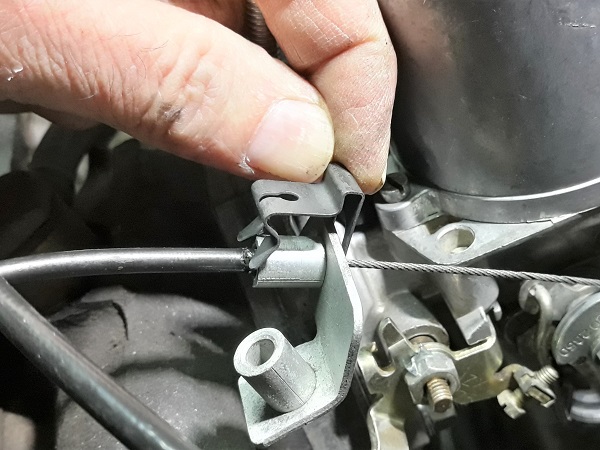
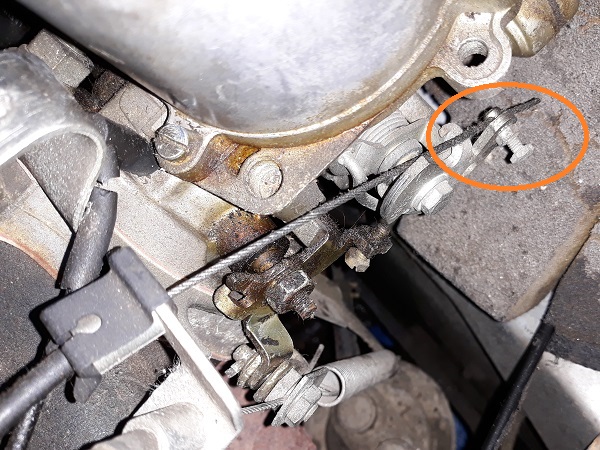
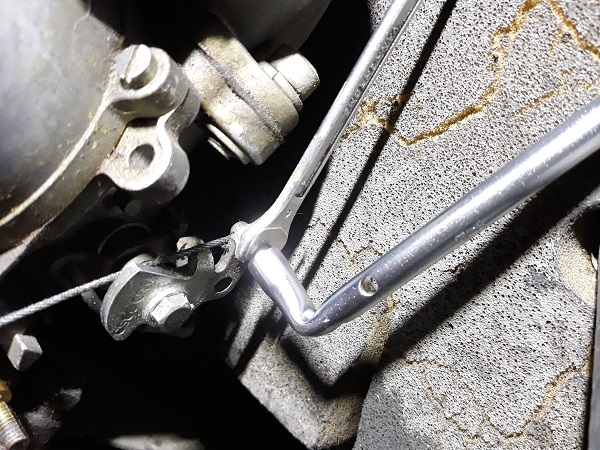
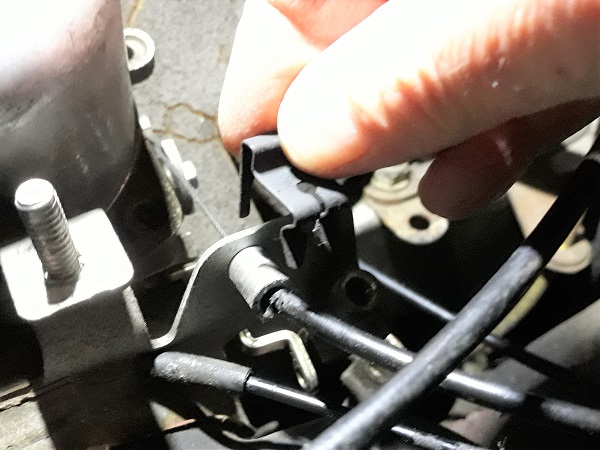
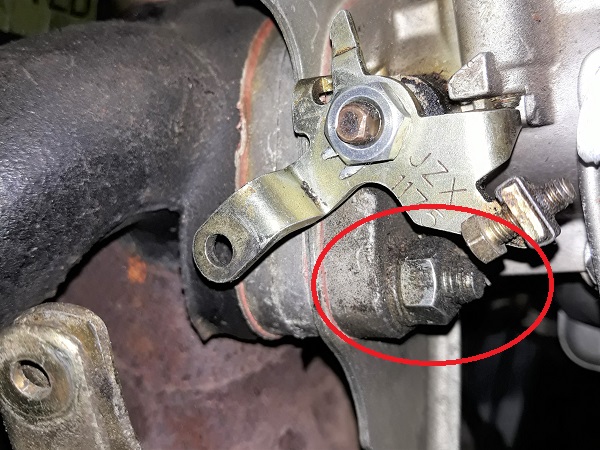
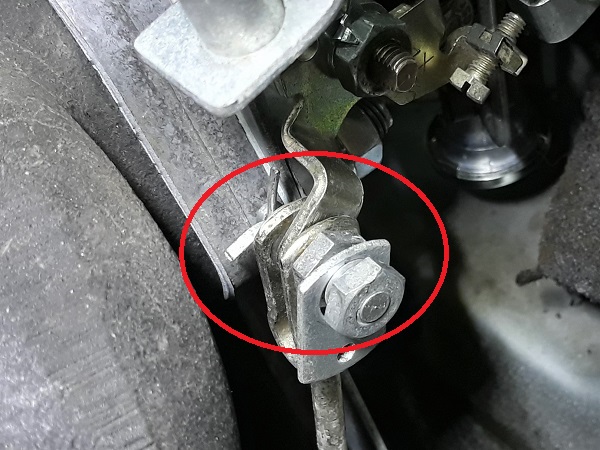
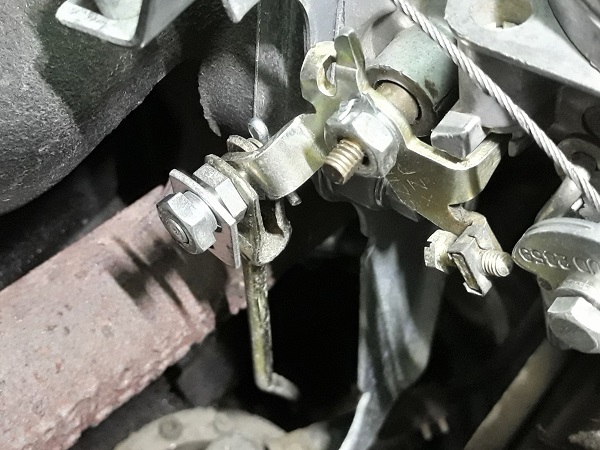
Op 25
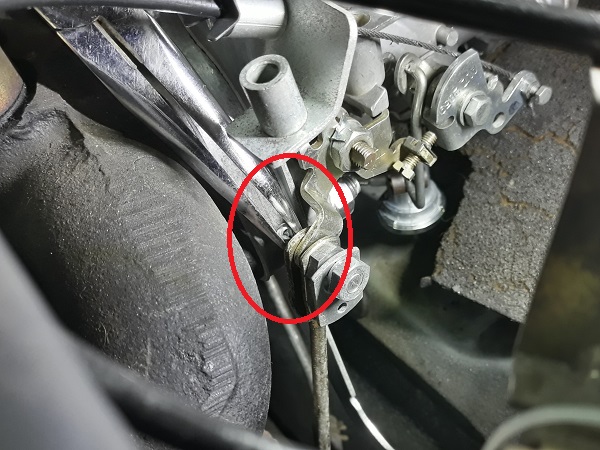
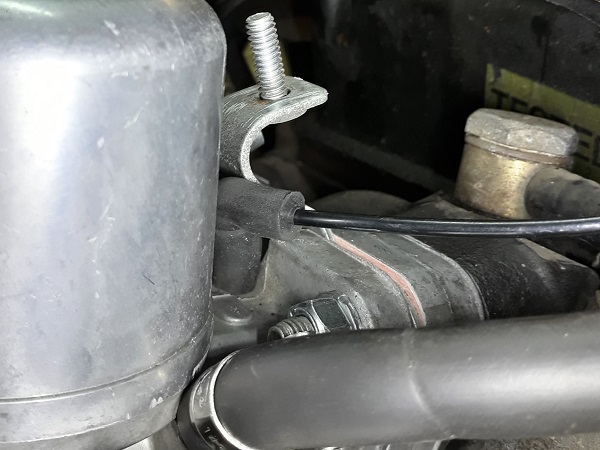
Fit the choke cable :
•
Fit the choke cable trunnion (AUE34) on the choke lever.
•
Engage the choke cable in the trunnion.
•
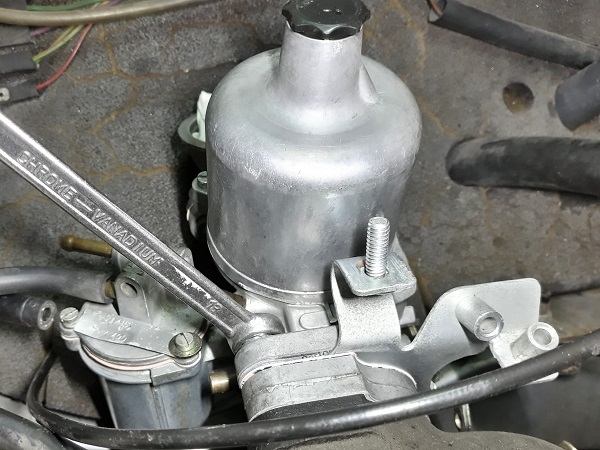
Tighten the fixing bolt. Use the 5 mm socket spanner and the 6 mm spanner.
The choke cable must have a free travel of 2 mm before starting to actuate the choke lever. See on the 3rd photo : the cable is not tensioned.
Do not overtighten the bolt. Just enough to keep the cable securely in place. Too tight, the bolt may damage the strands of the cable.
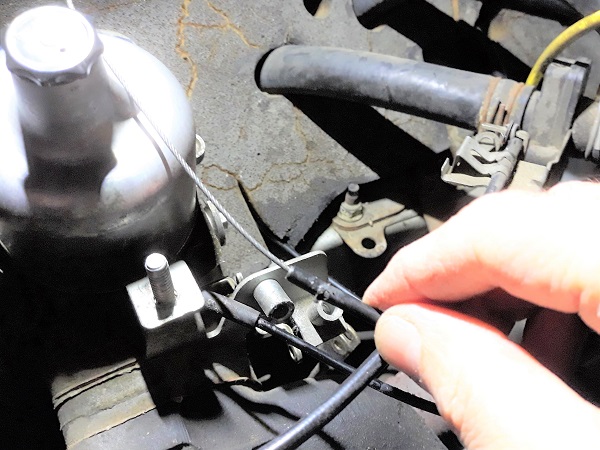
Op 26
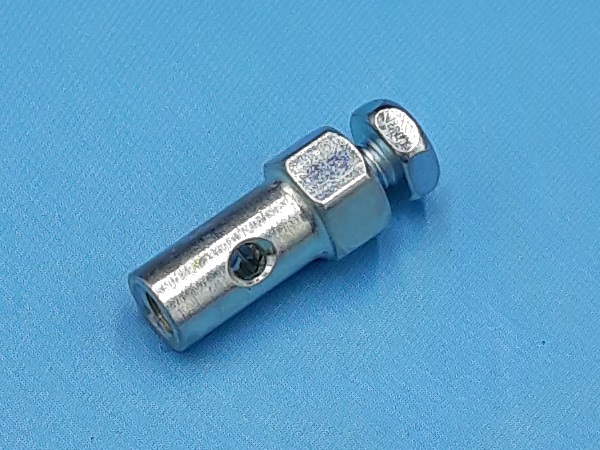
Fit the accelerator cable trunnion :
•
Engage the trunnion (ACC5062) in the accelerator lever and the kick-down rod.
•
Position the flat washer.
•
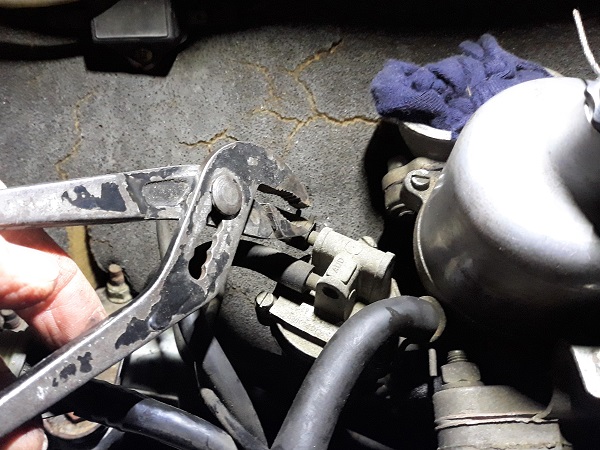
Fit the split pin on the trunnion and spread its 2 legs. Use the long nose pliers.
Op 27
Connect the accelerator cable to the carburetor (➔ see the tutorial ''Accelerator cable change'' Op 30 to 34).
Op 28
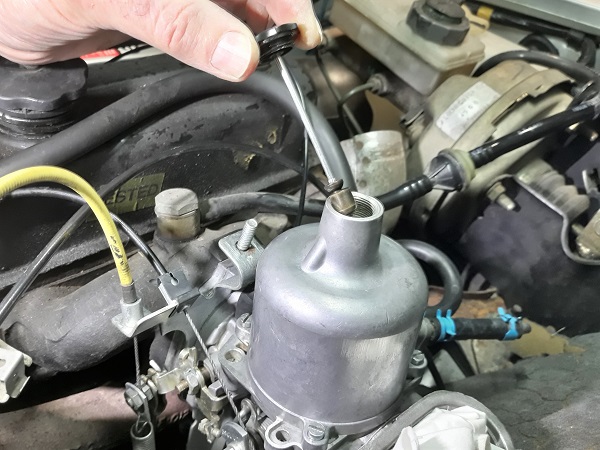
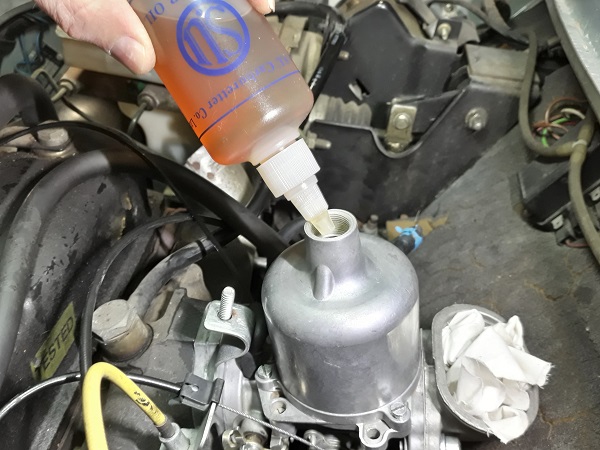
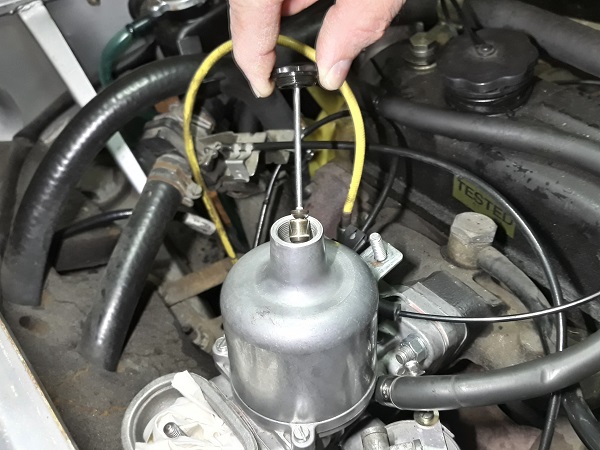
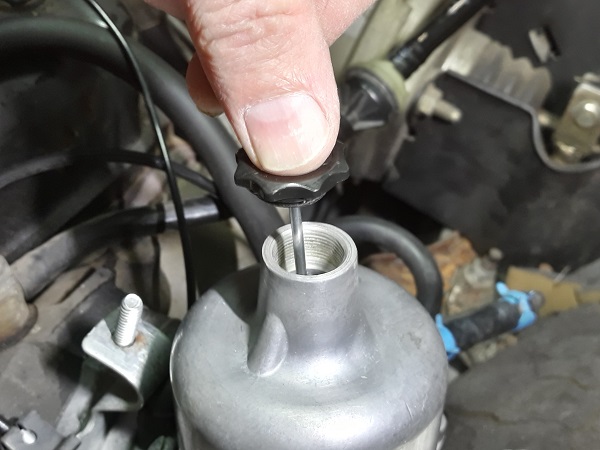
Remove the dashpot damper. Unscrew by hand.
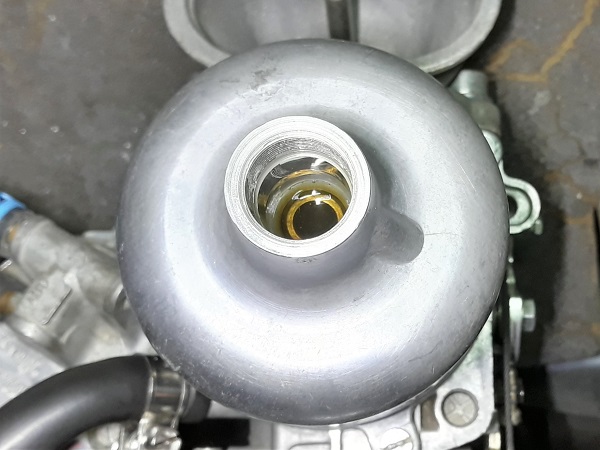
Check the carburetor oil level. Use the small oil can (BDR125).
Do not fill to the top. Stop when the oil level reaches 13 mm above the hollow piston rod.
If you do not have specific oil for the HS4 carburetor, you can put engine oil. It will always be better than nothing.
Op 29
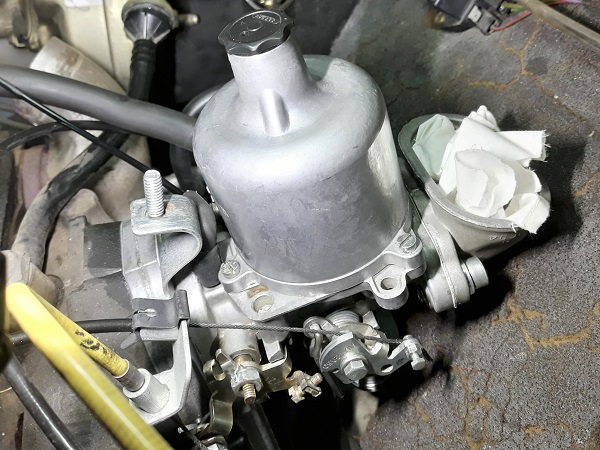
Fit the dashpot damper. Screw by hand.
The oil will slow down the installation of the damper. You have to press hard and wait a few seconds for it to enter its housing.
Op 30
Tune the carburetor (➔ see the tutorial ''HS4 carburetor tuning'').
Op 31
Fit the air filter box (➔ see the tutorial ''HS4 air filter change'' Op 10 to 13).
The End