This tutorial is also available in French
➔

Choke cable change on Austin Mini
Vehicle ➔ Mini 1000 year 1988
Difficulty ➔ Easy

Time ➔ 2 hours
Summary
Advertisement
Advertisement

Recommendations

There are 3 different choke cables :
• 21A2329 : for 998cc engine up to 1987 (pull and twist type).
• SBF10027 : for 998cc engine from 1987 to 1996 (length 81 cm).
• SBF10031 : for 1275cc engine from 1990 to 1996 (length 91 cm).
Check the model concerned before placing the order.
• 21A2329 : for 998cc engine up to 1987 (pull and twist type).
• SBF10027 : for 998cc engine from 1987 to 1996 (length 81 cm).
• SBF10031 : for 1275cc engine from 1990 to 1996 (length 91 cm).
Check the model concerned before placing the order.
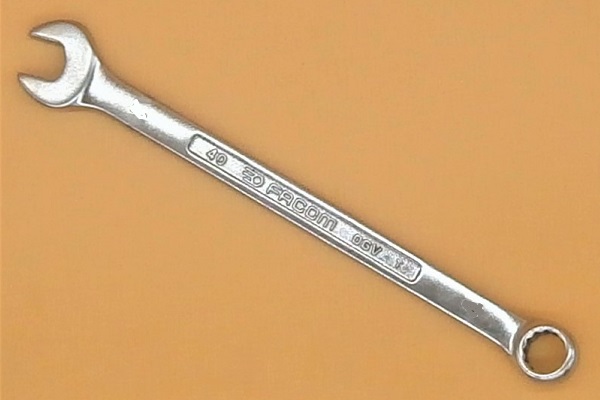
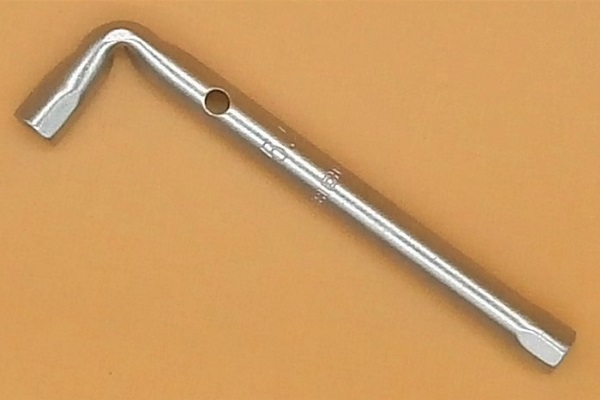
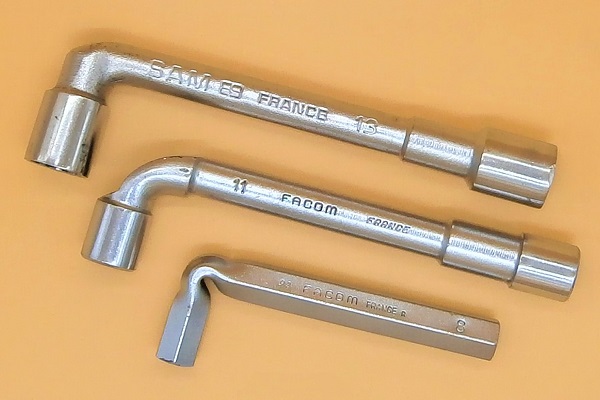
Required Tools
Sponsored links by


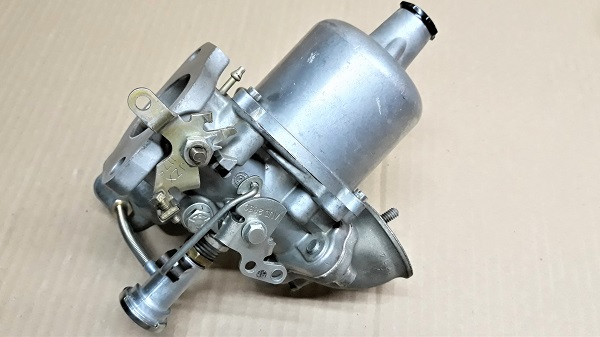
Spare Parts
Our Partners


Packaging :
•
Apart from the cable ties, all the parts above are sold individually.
Advertisement
Remove the choke cable
Op 01
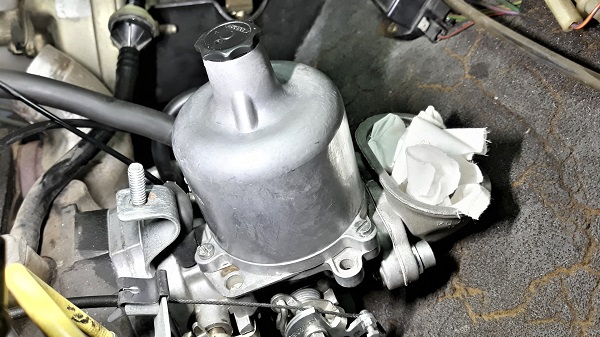
Remove the air filter box (➔ see the tutorial ''HS4 air filter change'' Op 01 to 02).
Op 02
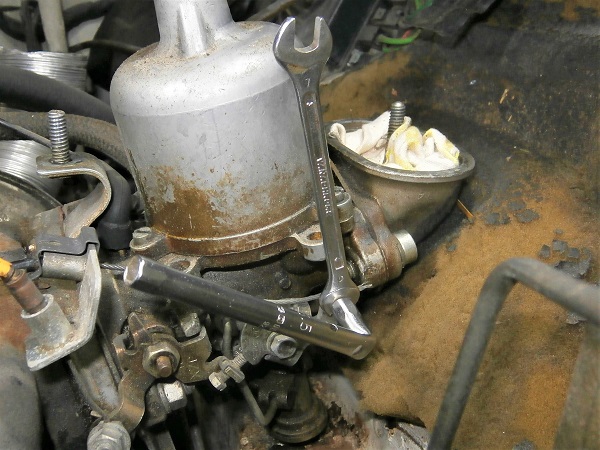
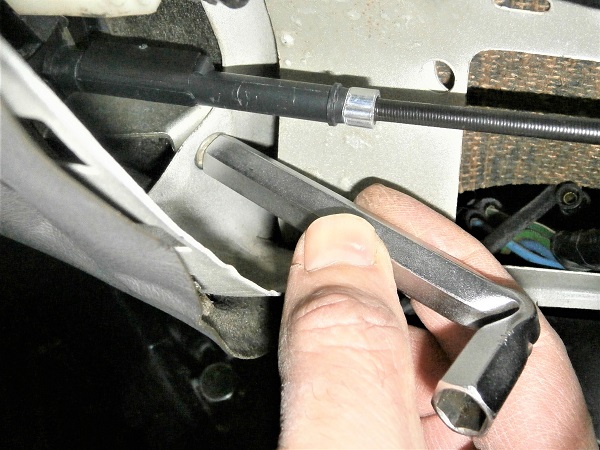
Unlock the choke cable :
•
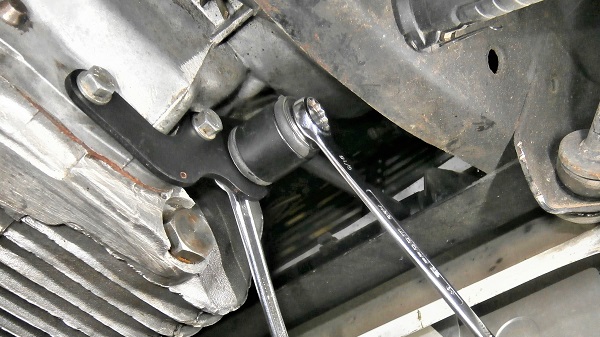
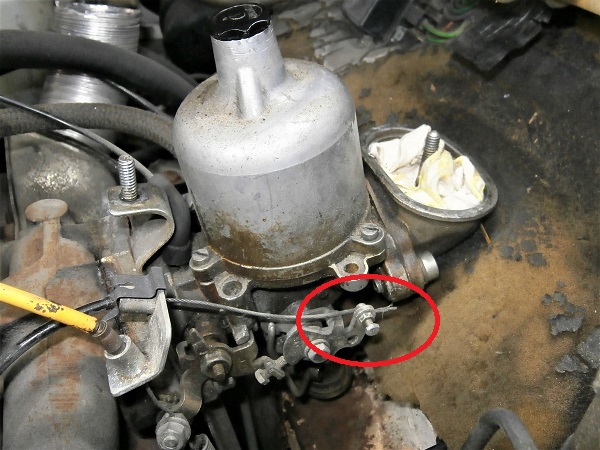
Unscrew the choke cable fixing bolt. Use the 5 mm socket spanner and the 6 mm spanner.
•
Release the cable.
•
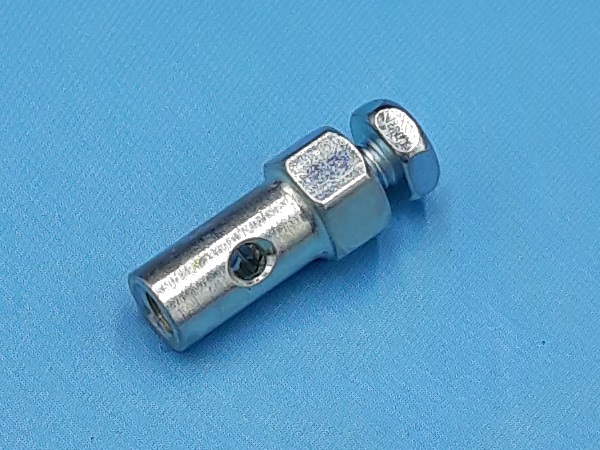
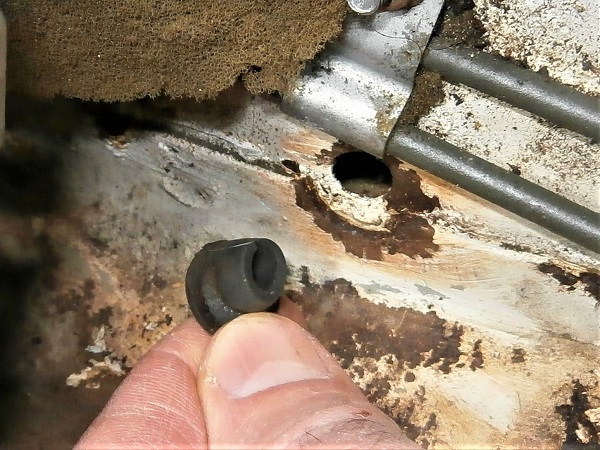
Retrieve the choke cable trunnion.
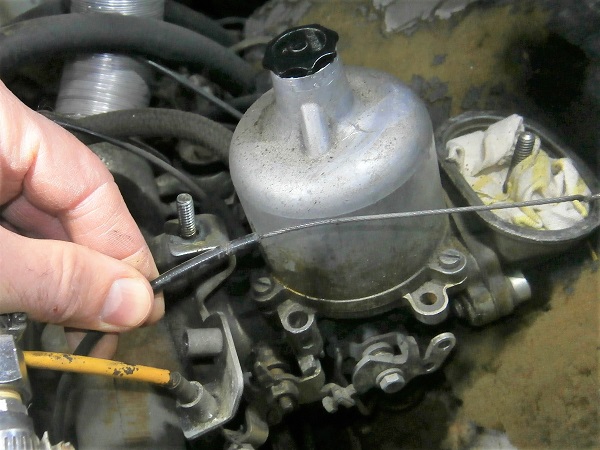
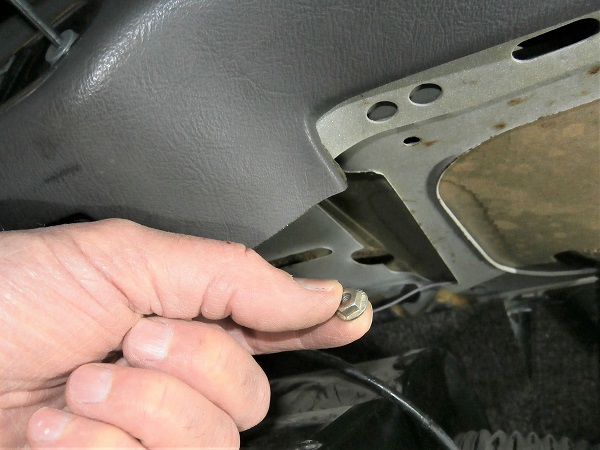
Op 03
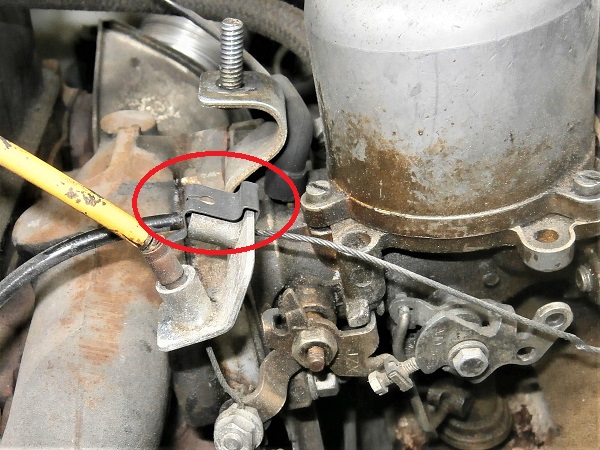
Release the choke cable from the carburetor :
•
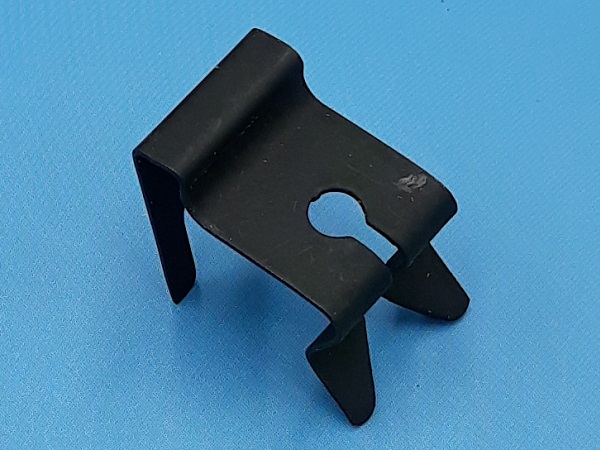
Remove the choke cable fixing clip. Pull firmly by hand or use a flathead screwdriver.
•
Remove the choke cable from its support bracket. Pull by hand.
Op 04
Locate the 2 fixing screws of the heater unit.
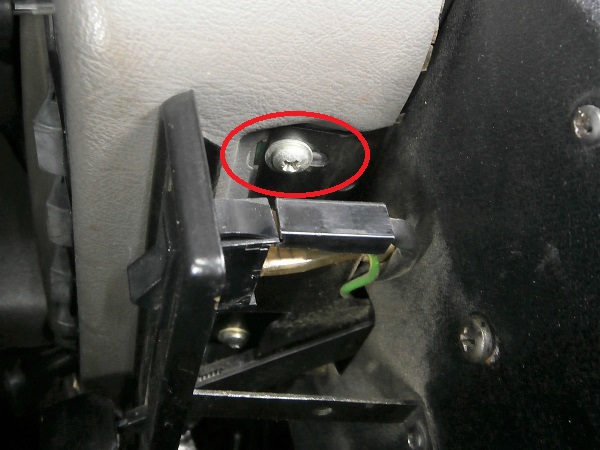
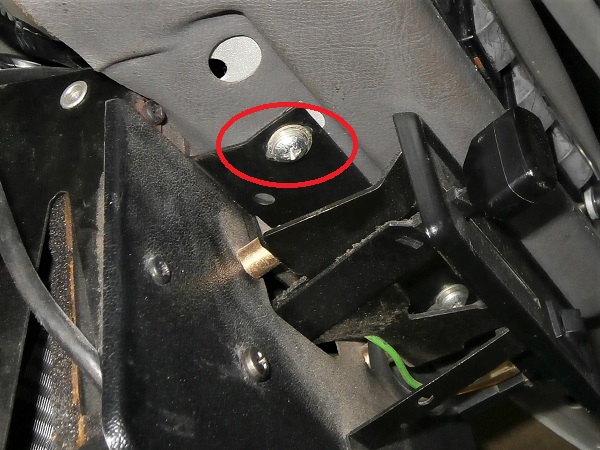
Op 05
Unscrew the 2 heater unit fixing screws. Use the Phillips screwdriver.
Op 06
Lower the heater unit. Push by hand.

Be careful not to stretch the electrical wires or the hoses.
Op 07
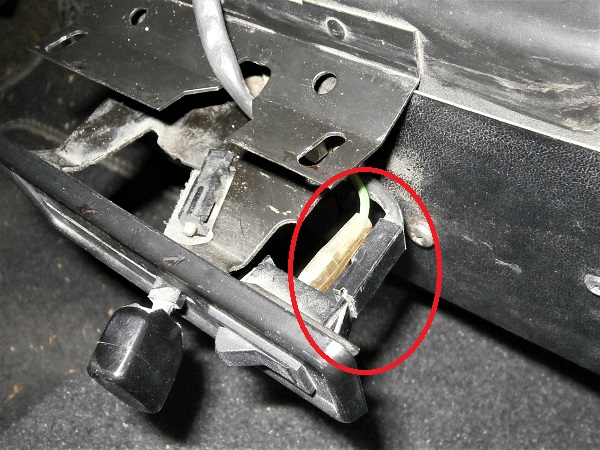
Disconnect the electrical wire from the heater fan switch. Pull by hand.
Disconnect only the black wire which is stretched. No need to disconnect the green wire.

Op 08
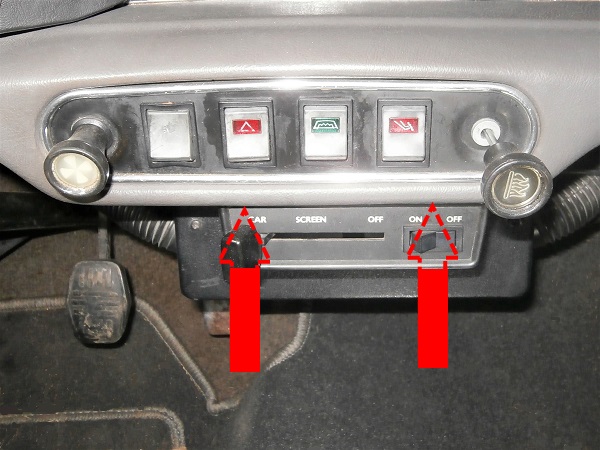
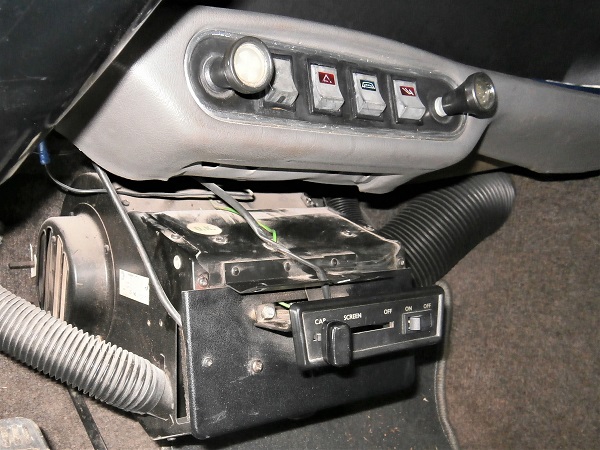
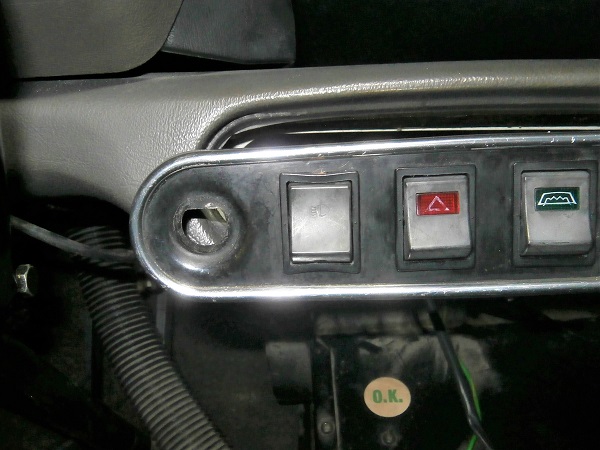
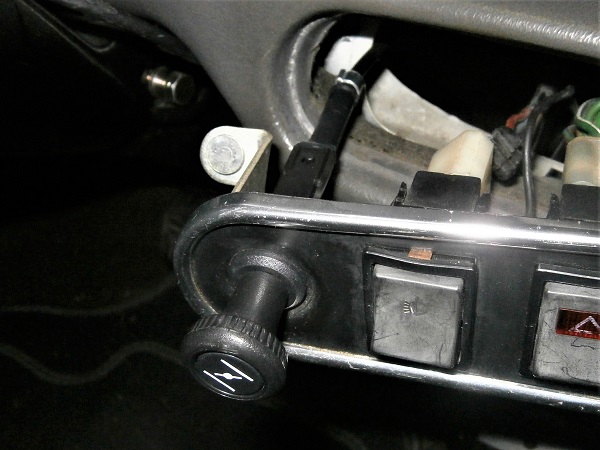
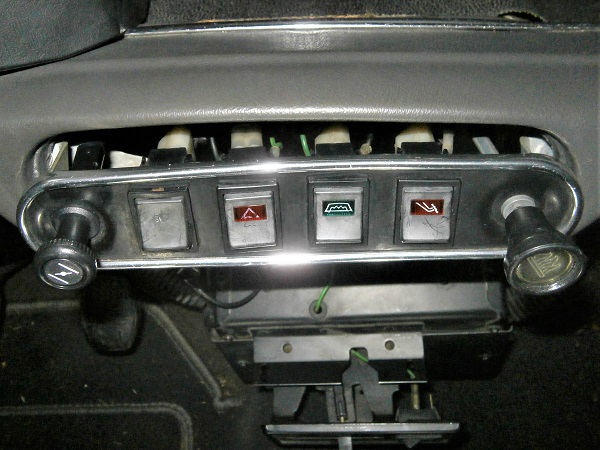
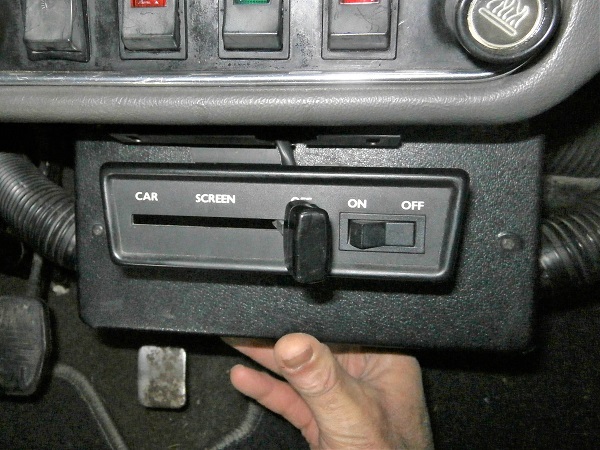
Locate the 2 fixing nuts of the switch panel.
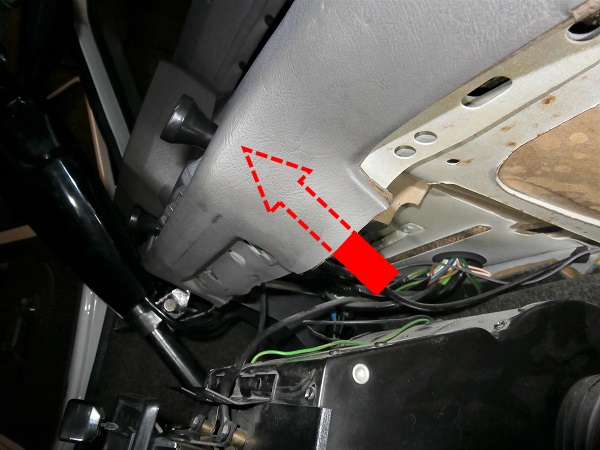


Op 09
Unscrew the 2 switch panel fixing nuts. Use the 8 mm socket spanner.
Op 10
Disengage the switch panel. Pull by hand.
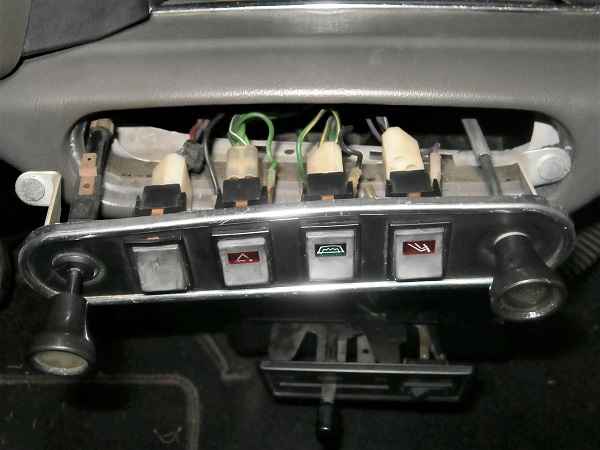
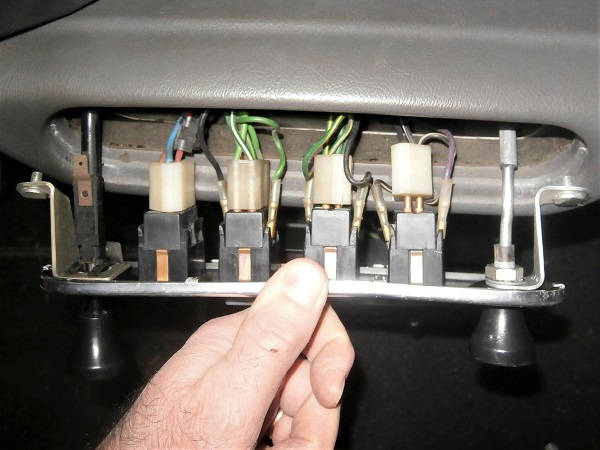
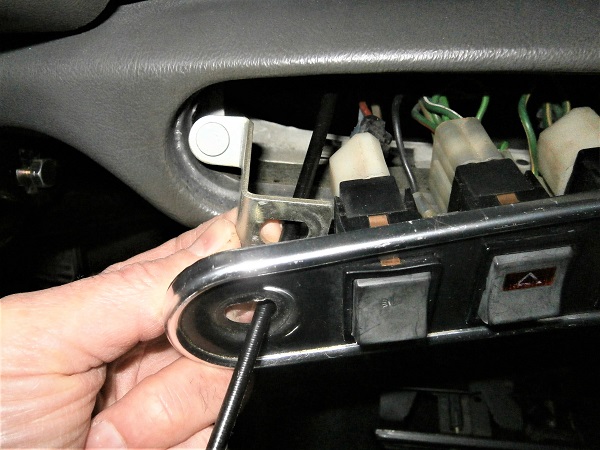
Op 11
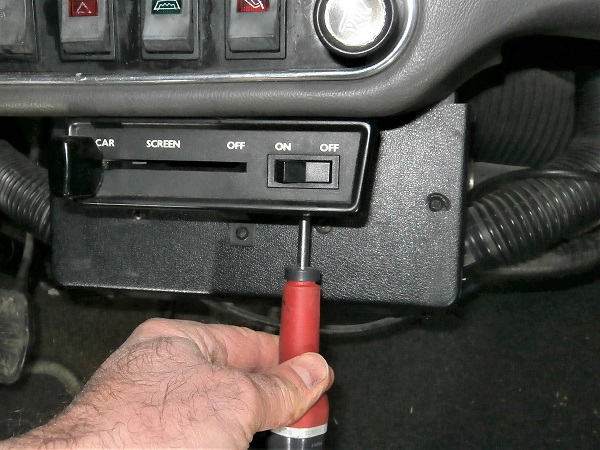
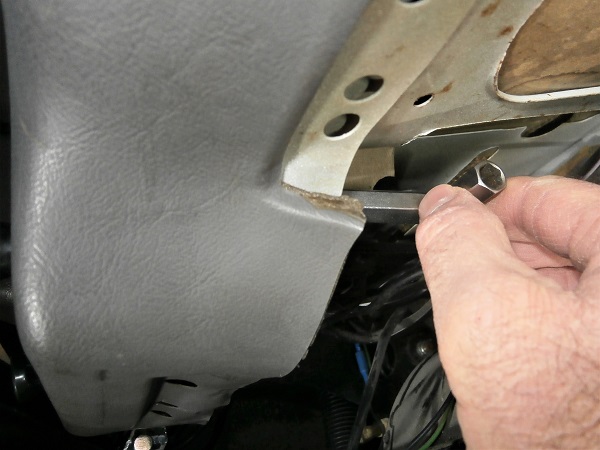
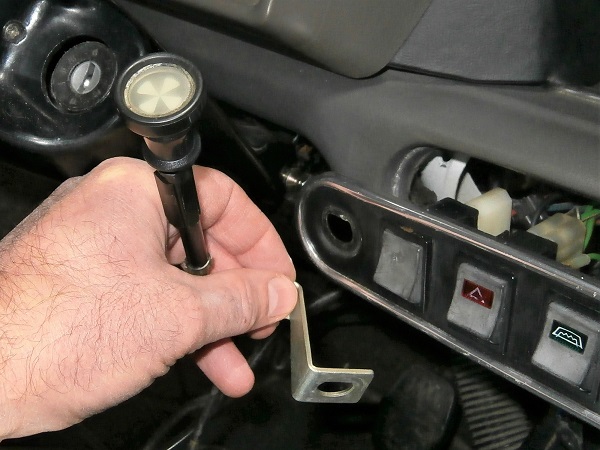
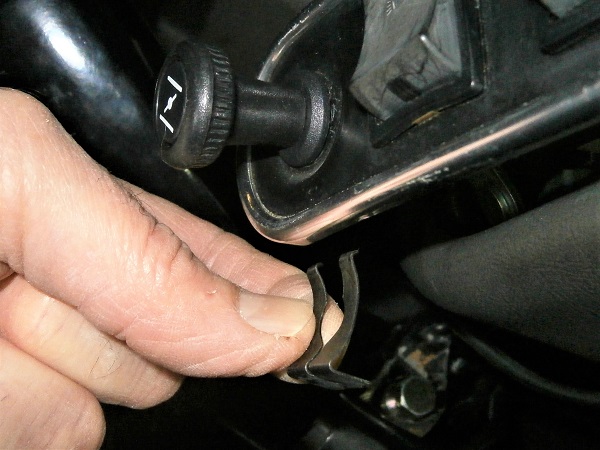
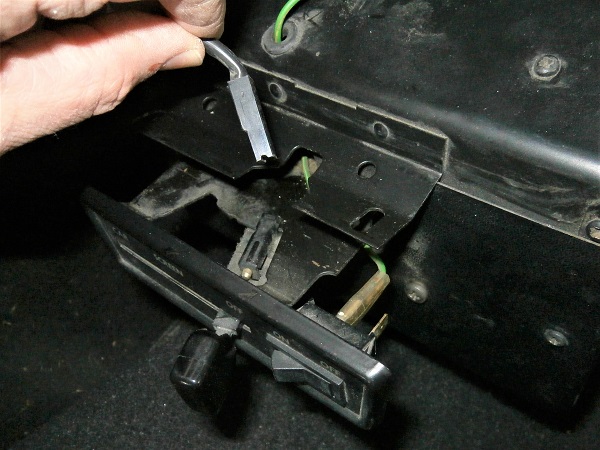
Remove the choke cable fixing clip. Use the small flathead screwdriver.
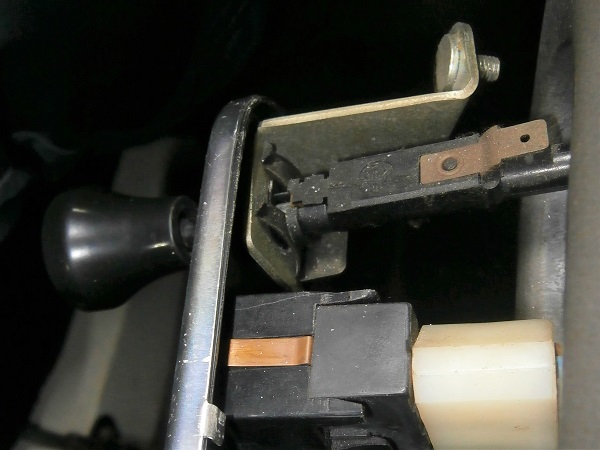
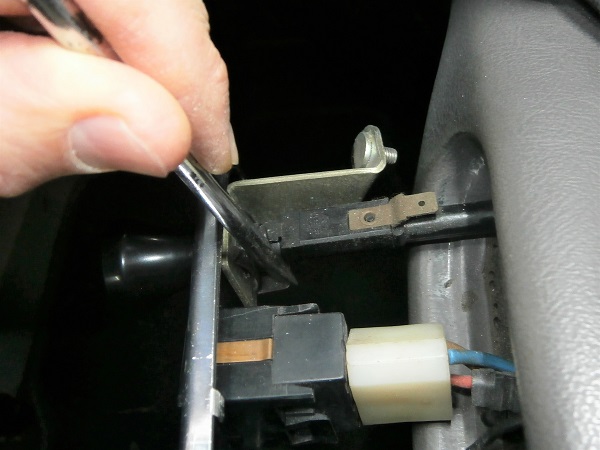
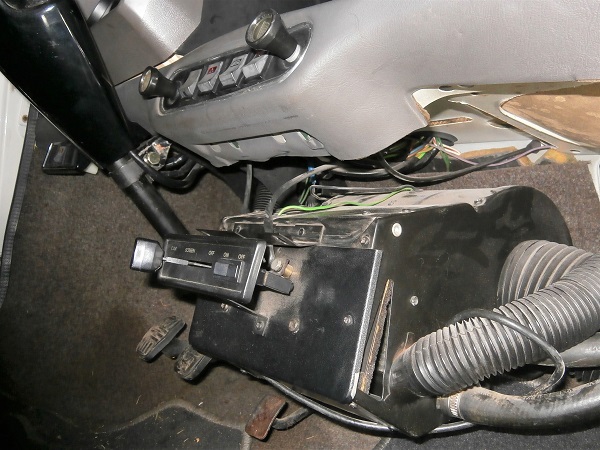
Op 12
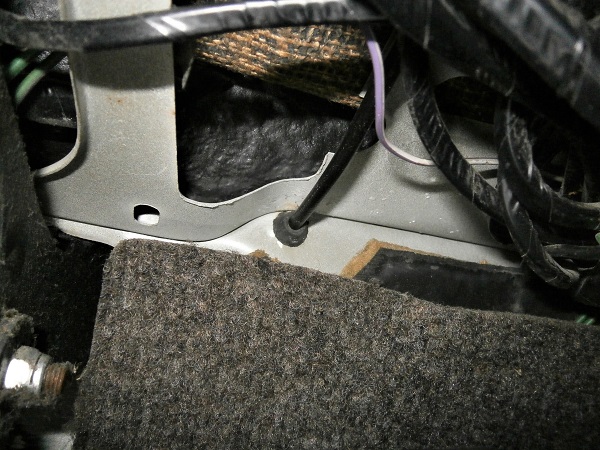
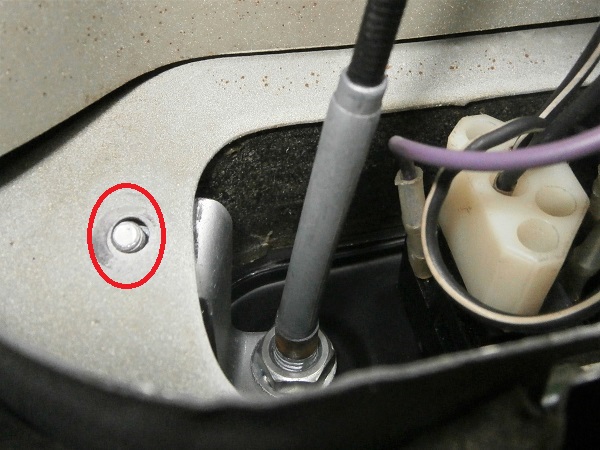
Look under the dashboard and locate where the choke cable passes through the bulkhead.
This may be useful when you will have to pass the new cable through.
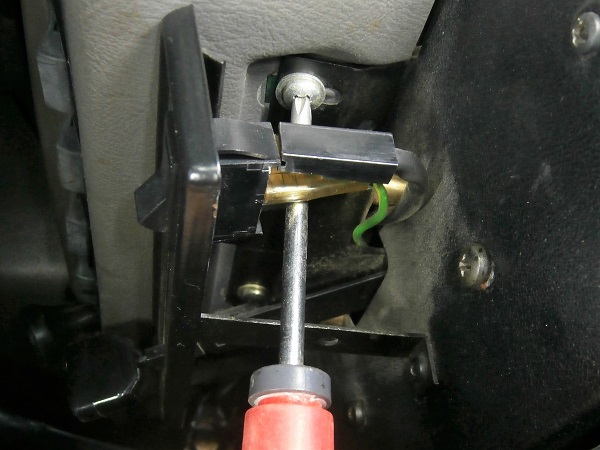
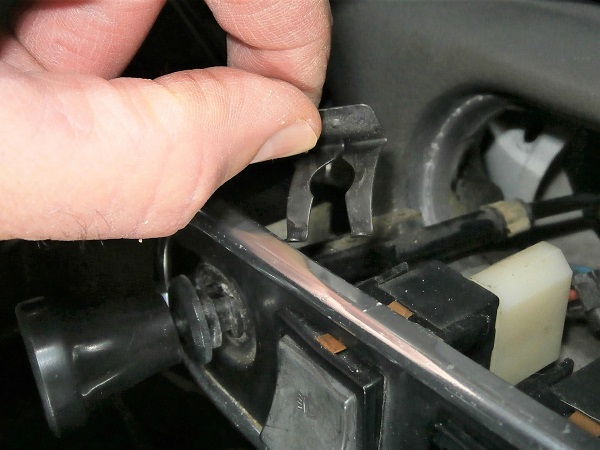
Op 13
Remove the choke cable. Pull by hand.
Recover the LH fixing bracket.
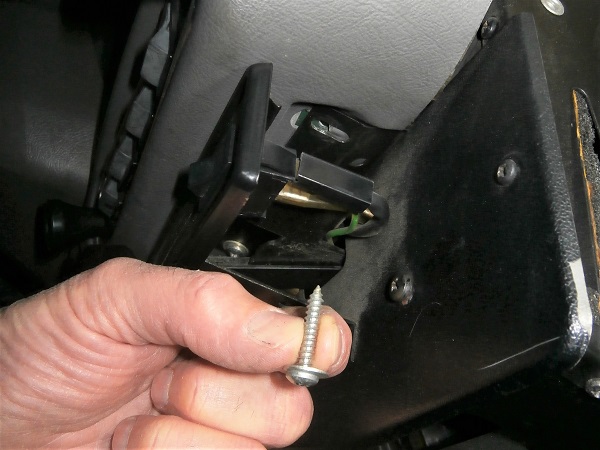
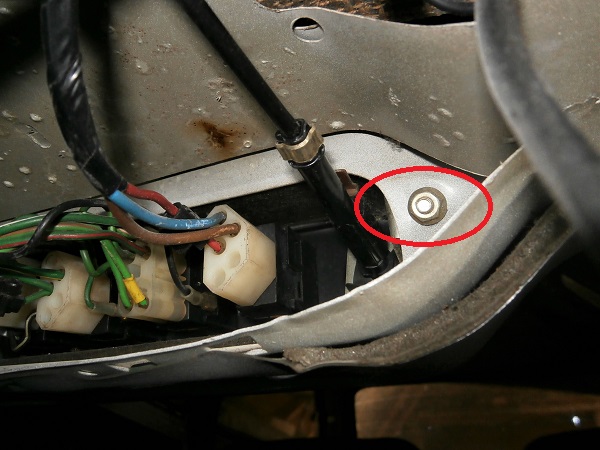
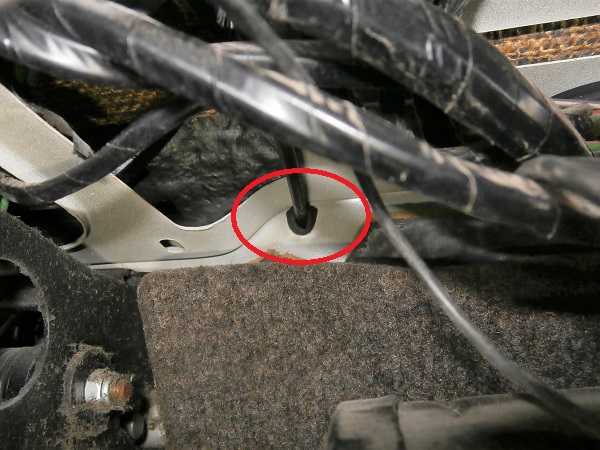
Op 14
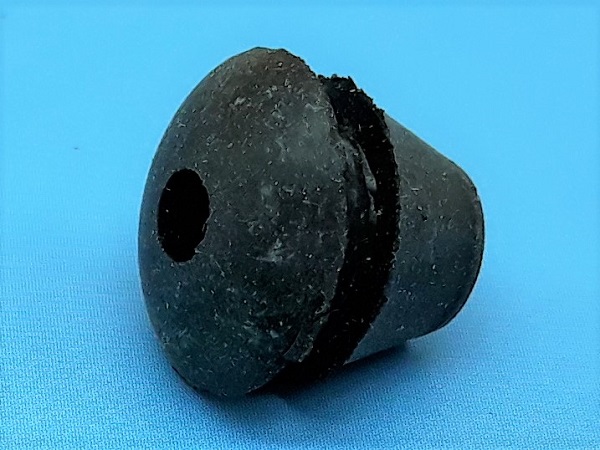
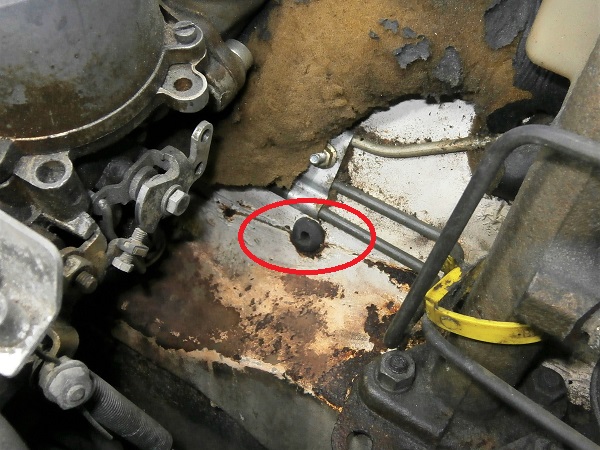
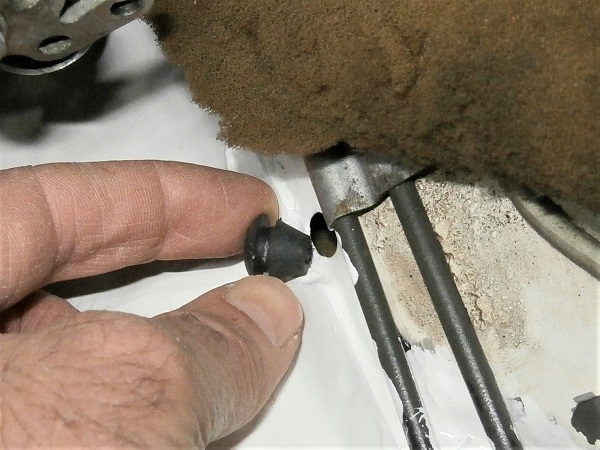
Remove the cable grommet. Pull by hand or use a flathead screwdriver.
The cable grommet is removed towards the front of the bulkhead (engine compartment).
Advertisement
Fit the choke cable
Op 15
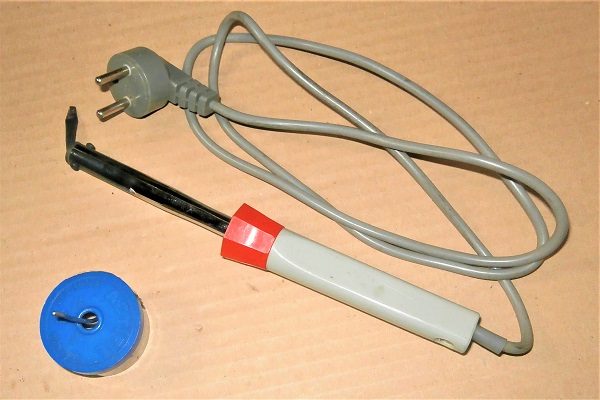
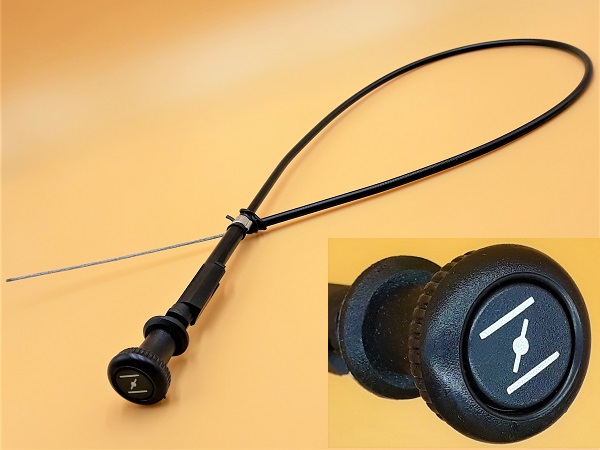
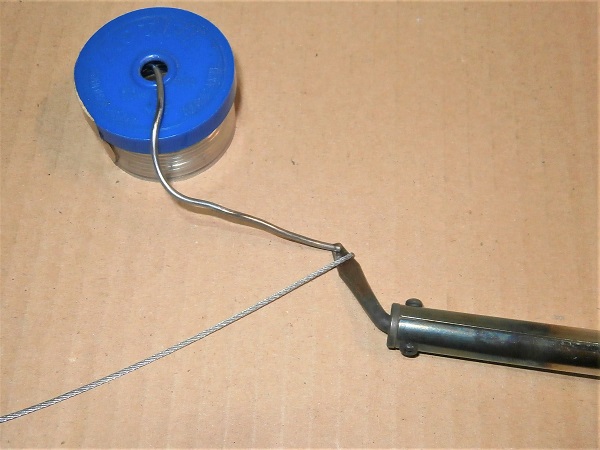
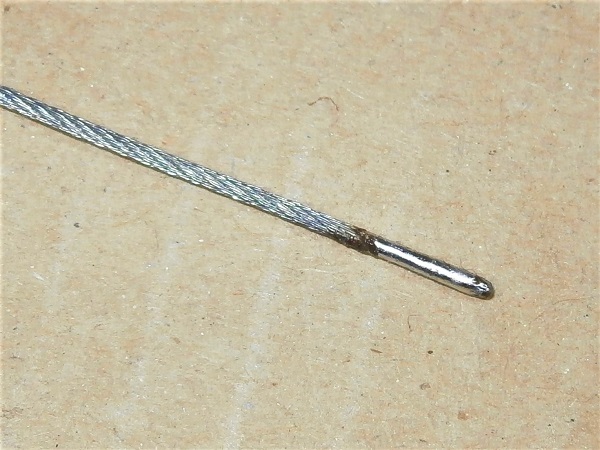
Tin the end of the new choke cable (SBF10027). Use the soldering iron.
This operation is not essential. The cable does not need to be tinned to operate the choke.
I still tinned the end of the cable because I'm tired of seeing frayed cables (choke and accelerator). This is a test. I'll see if it works (or not) in a while.
Do not load too much material during tinning because afterwards, the cable will have to be passed through the cable trunnion.
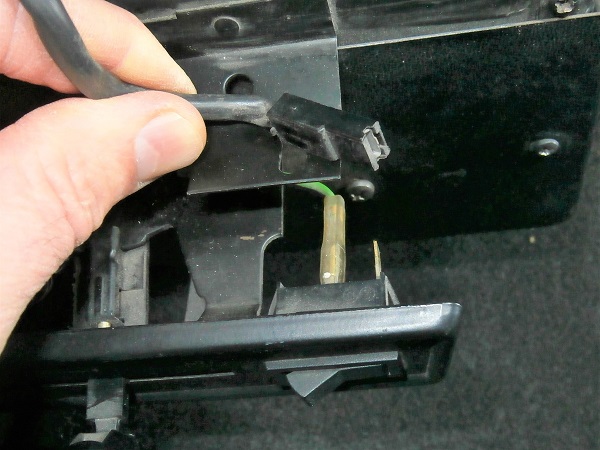
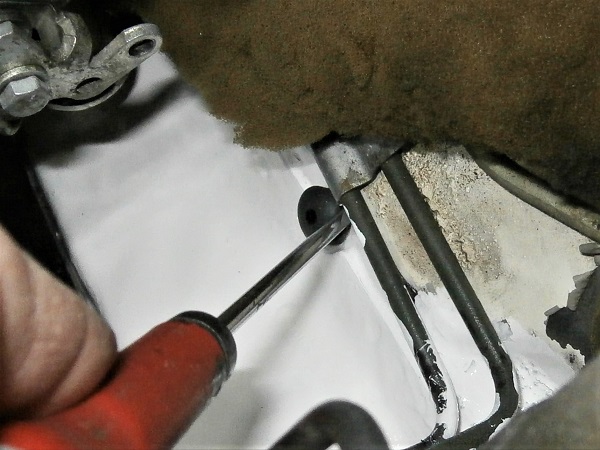
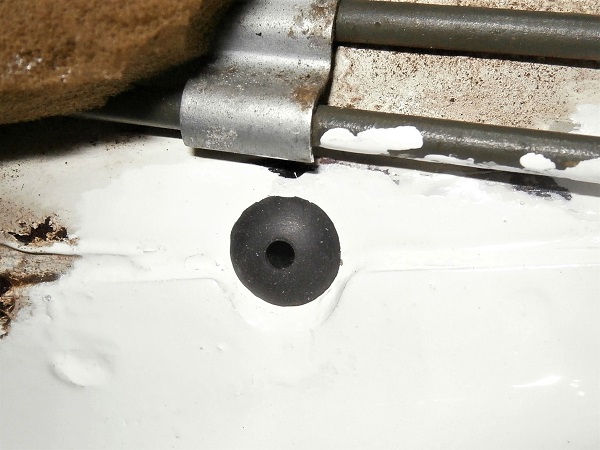
Op 16
Fit the new cable grommet (CAM5969). Use a small flathead screwdriver.
Op 17
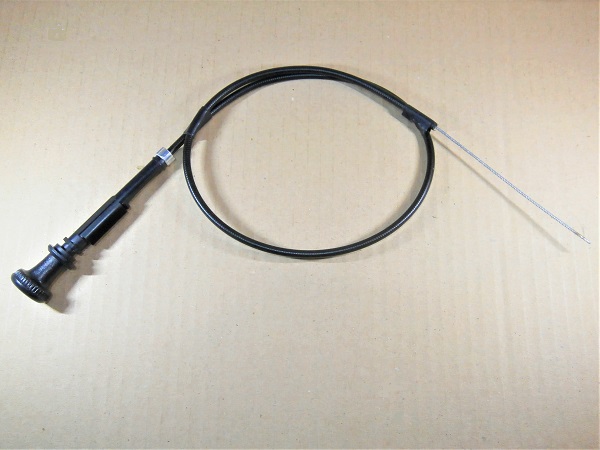
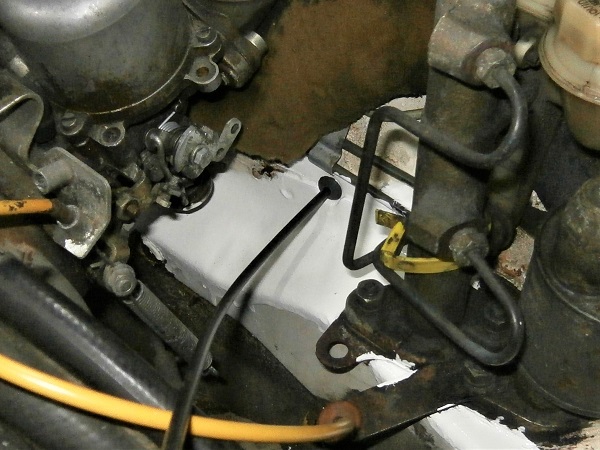
Engage the new choke cable (SBF10027) through the switch panel, the LH fixing bracket and the bulkhead.
Passing the cable through the bulkhead is not an easy operation because it happens under the dashboard so difficult to access and you have to force the cable housing so that it fits into the cable grommet.
Op 18
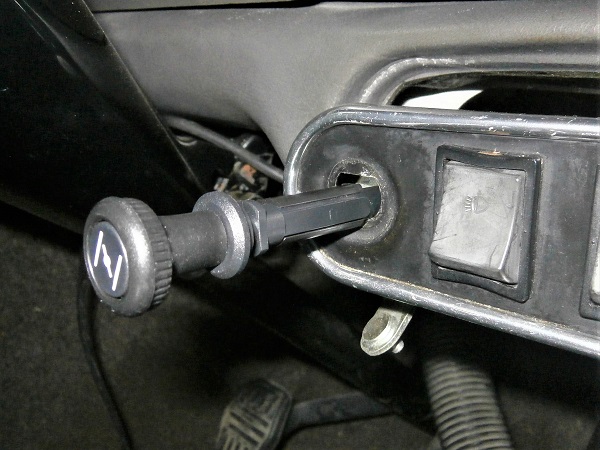
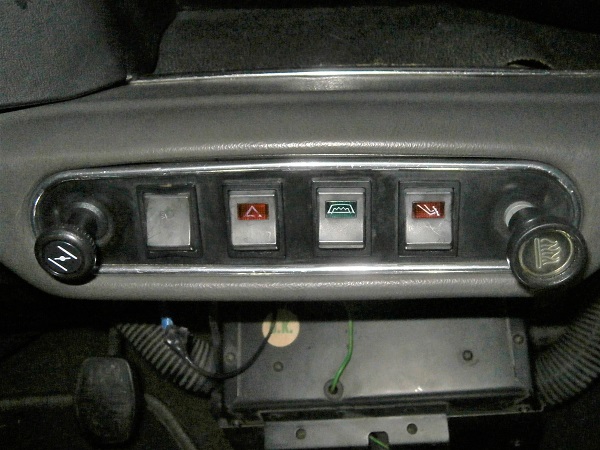
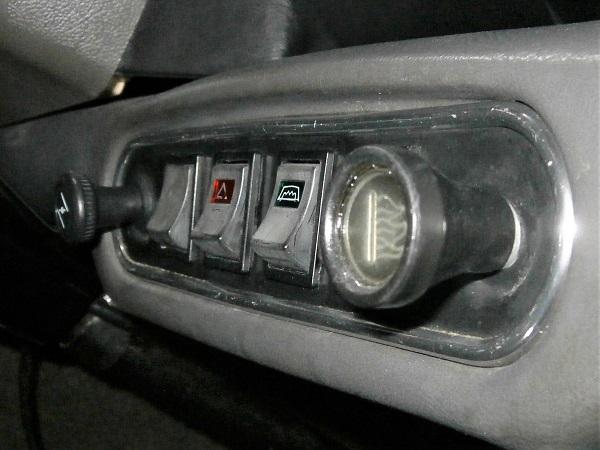
Fit the choke control on the switch panel as well as the LH fixing bracket.
Op 19
Fit the fixing clip (ADU5065) on the choke cable. Push by hand.
Op 20
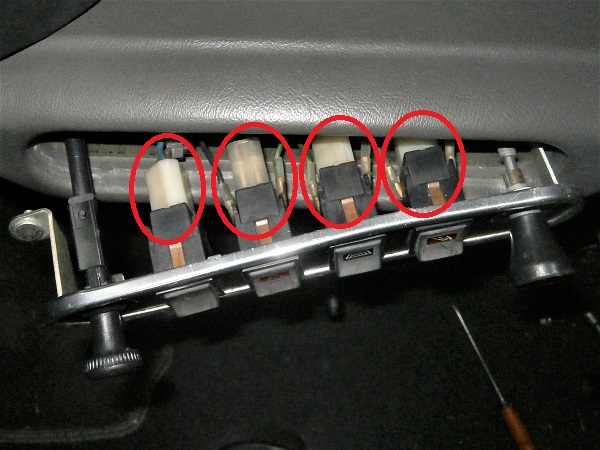
Make sure that all the connectors are properly connected to the switches before positioning the switch panel.
It often happens that the connectors come loose during handling.
Op 21
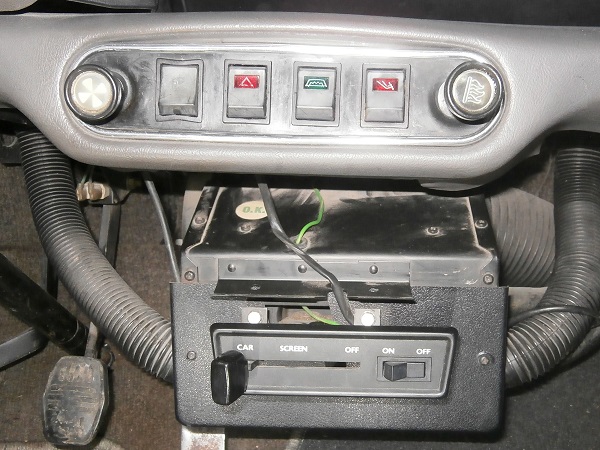
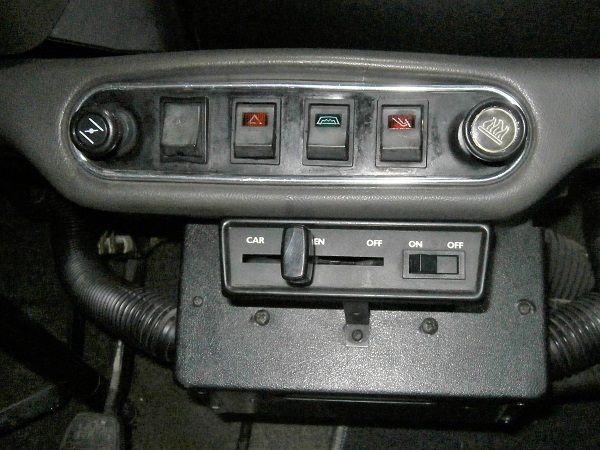
Engage the switch panel. Push by hand.
Op 22
Place the screws of the 2 fixing brackets in their housings.
Screw the switch panel fixing nuts. Use the 8 mm socket spanner.
Op 23
Connect the electrical wire to the heater fan switch.
Op 24
Lift the heater unit in its normal position.
Screw its 2 fixing screws of the heater unit (with their washers). Use the Phillips screwdriver.
Op 25
Make sure that the heater ducts are still properly fitted on the heater unit.
Op 26
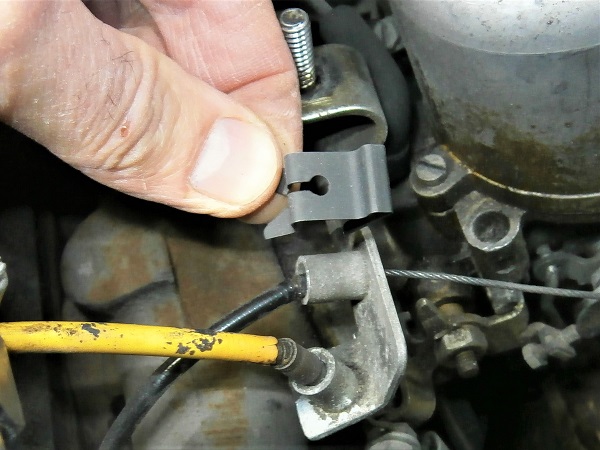
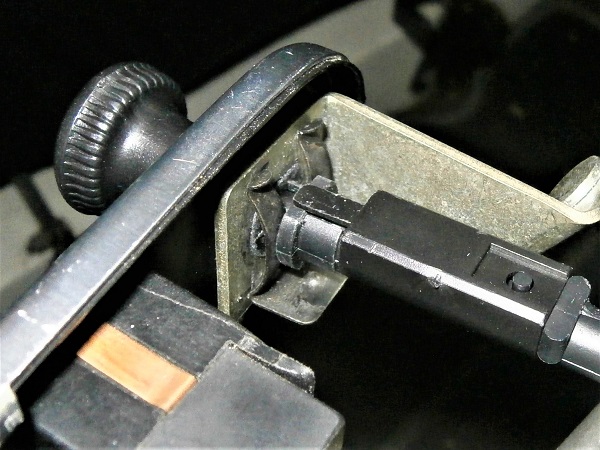
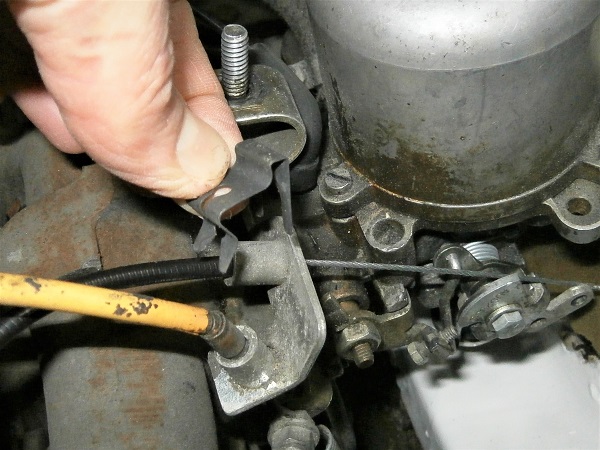
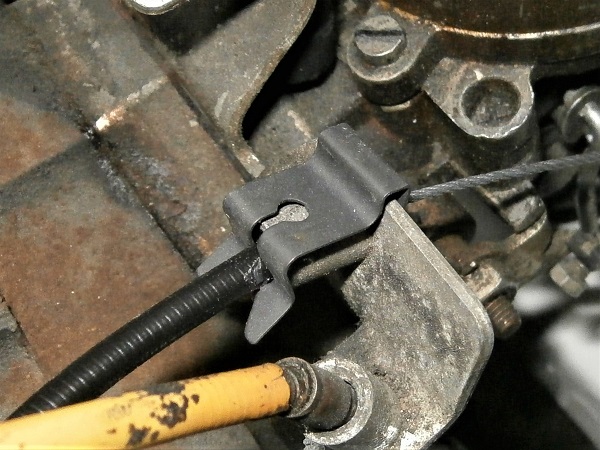
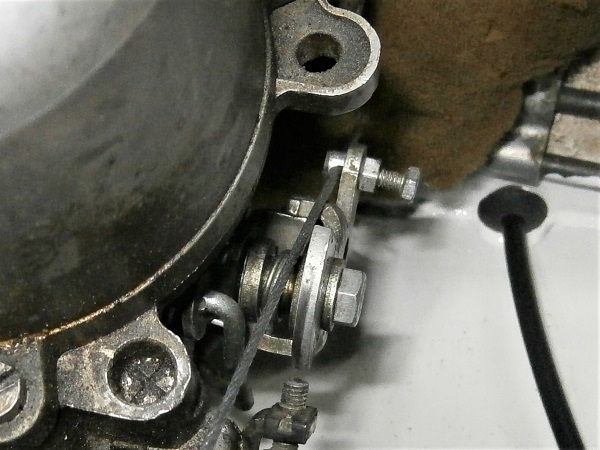
Fit the choke cable on the carburetor :
•
Engage the choke cable on its support bracket.
•
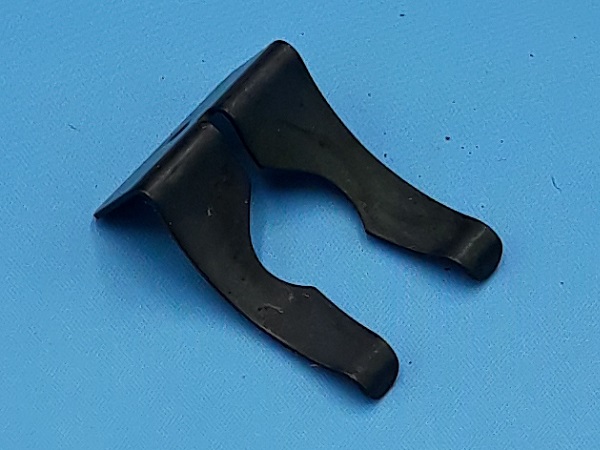
Fit the clip (13H3472). Push with your fingers.
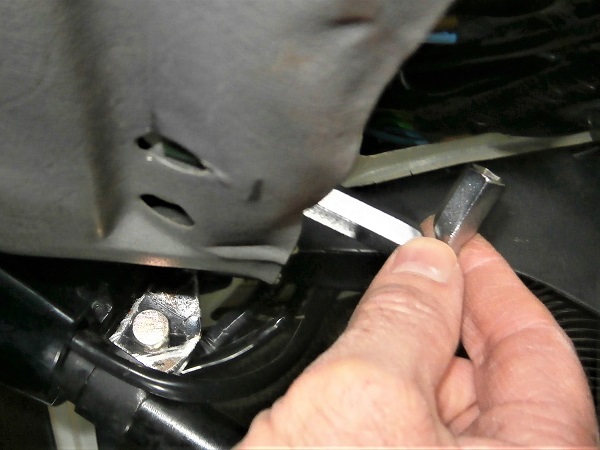
Op 27
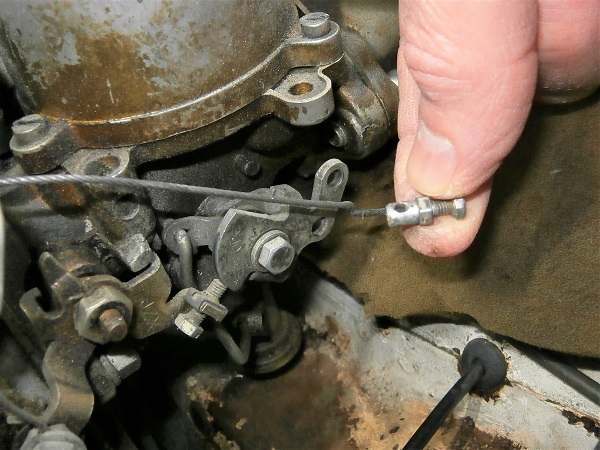
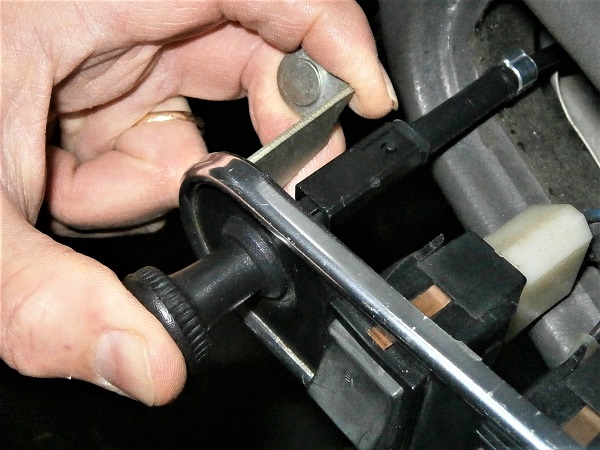
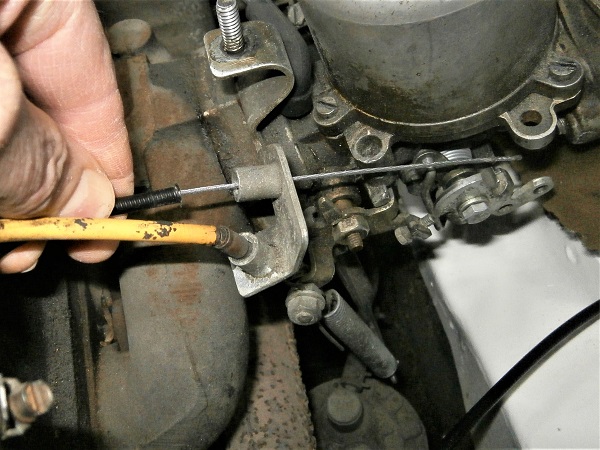
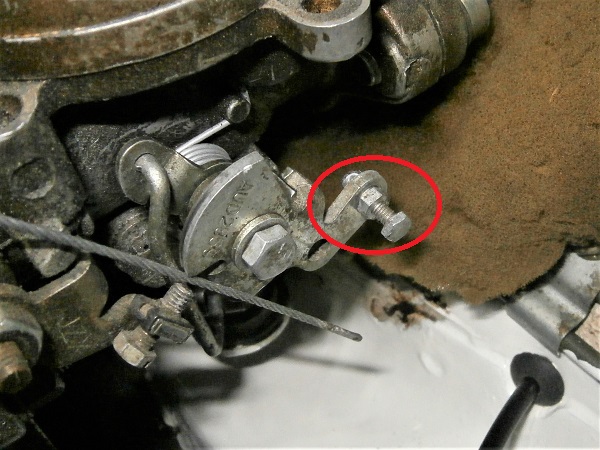
Fit the choke cable :
•
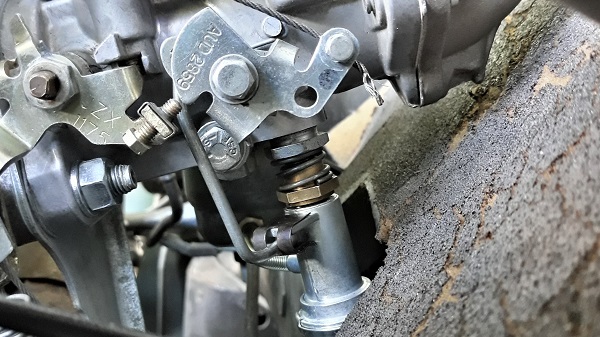
Fit the choke cable trunnion (AUE34) on the choke lever.
•
Engage the choke cable in the trunnion.
•
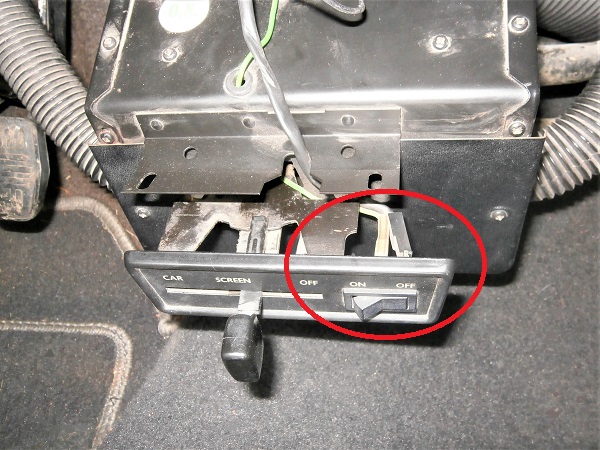
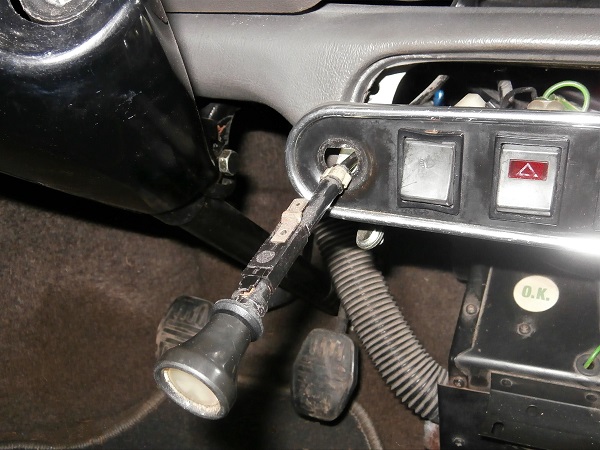
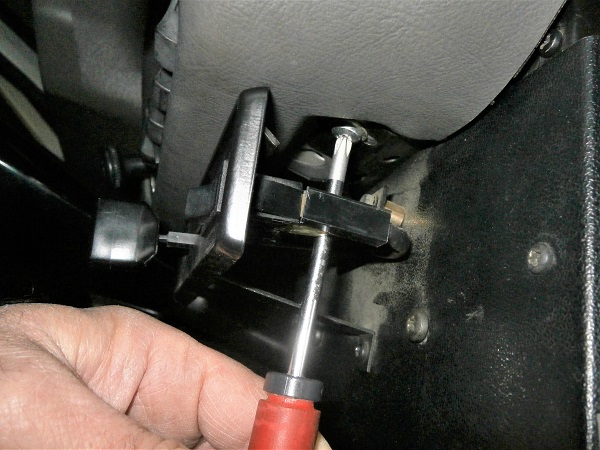
Tighten the fixing bolt. Use the 5 mm socket spanner and the 6 mm spanner.
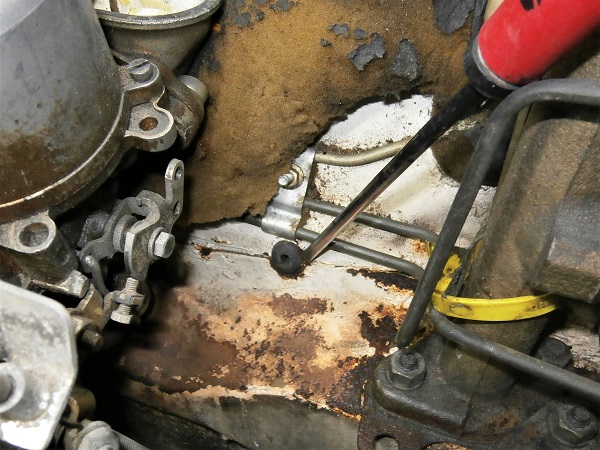
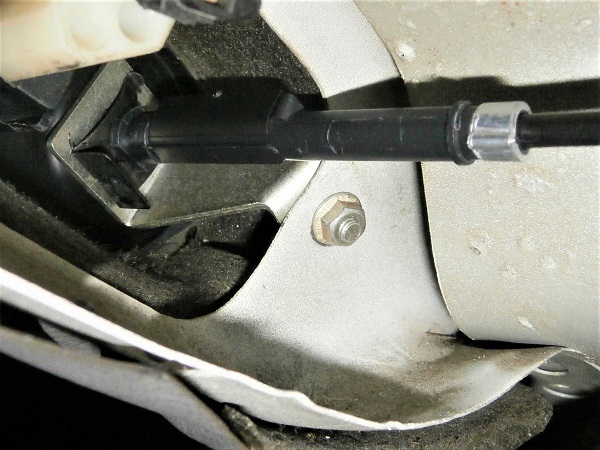
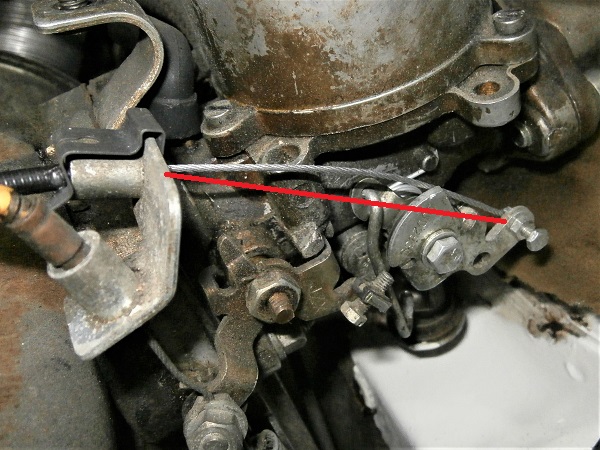
The choke cable must have a free travel of 2 mm before starting to actuate the choke lever. See on the 3rd photo : the cable is not tensioned.
Do not overtighten the bolt. Just enough to keep the cable securely in place. Too tight, the bolt may damage the strands of the cable.
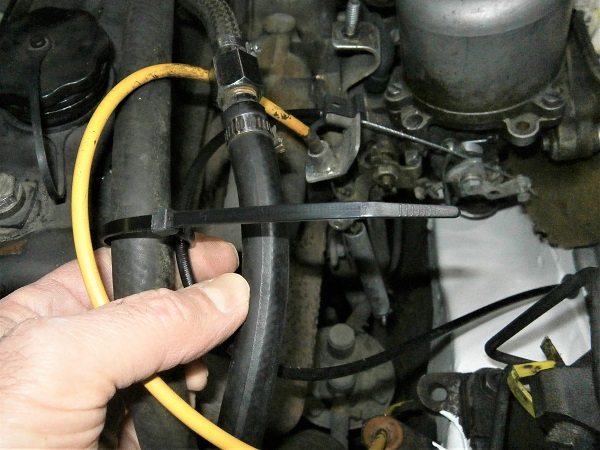
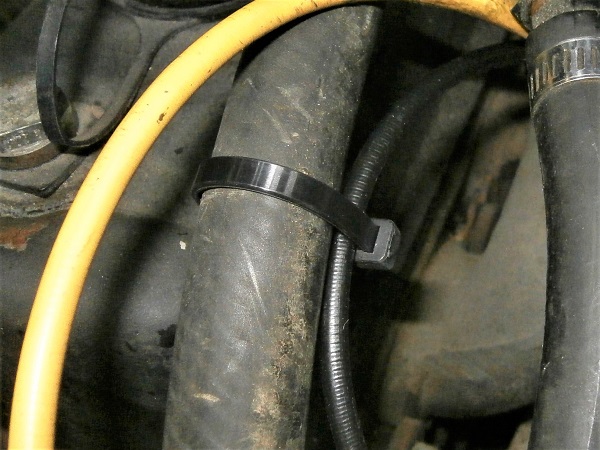
Op 28
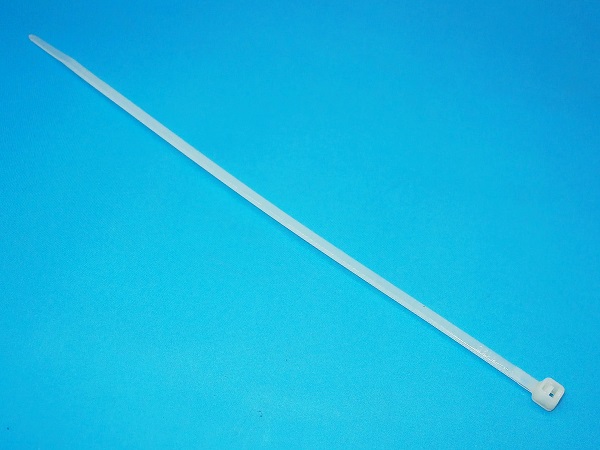
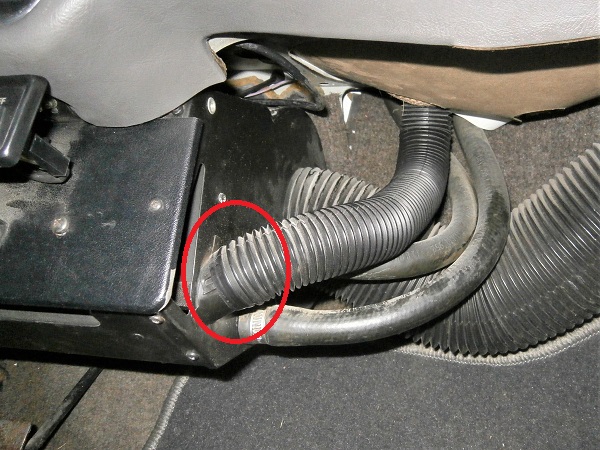
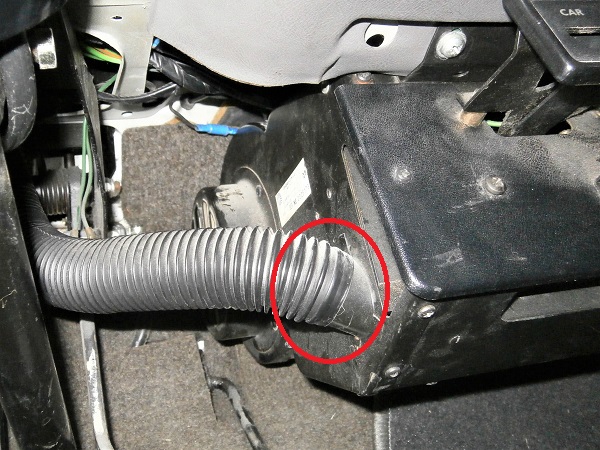
Place a cable tie to secure the choke cable to the heater hose.
Thus the cable will not be in contact with the rocker cover or the exhaust manifold. This will prevent burning the cable housing.
Tighten the cable tie moderately by hand. Do not deform the hose.
Op 29
Fit the air filter box (➔ see the tutorial ''HS4 air filter change'' Op 10 to 13).
The End